Live migration of virtual machines (VMs) with OpenShift Virtualization on Red Hat OpenShift Service on AWS and Amazon FSx for NetApp ONTAP
Red Hat® OpenShift® Virtualization allows organizations to run traditional virtual machines (VMs) alongside containerized applications in a unified platform. This is particularly valuable for enterprises with legacy applications that need modernization without a complete overhaul. For organizations already invested in Red Hat OpenShift, this integration simplifies operations, as teams can leverage existing tools and workflows.
Below we will set up Amazon FSx for NetApp ONTAP (FSxN) as the default Storage Class for the Red Hat OpenShift Service on AWS (ROSA) cluster, and then create a VM that will leverage FSxN storage for its volumes. We will also connect to the VM using the guest credentials and follow that by performing a live migration of the VM from the current node to a new node.
What will you learn?
- How to set FSxN as the default storage for a ROSA cluster
- Creating a VM that uses FSxN storage
- Migrating a VM to a new node
What do you need before starting?
- AWS account
- Red Hat account
- IAM user with appropriate permissions to create and access ROSA cluster
- AWS CLI
- ROSA CLI
- OpenShift command-line interface (oc)
- Helm 3 documentation
- A HCP ROSA cluster (with at least 2 bare-metal worker nodes)
- OpenShift Virtualization installed on ROSA Cluster
- Access to Red Hat OpenShift web console
Setting up the storage class
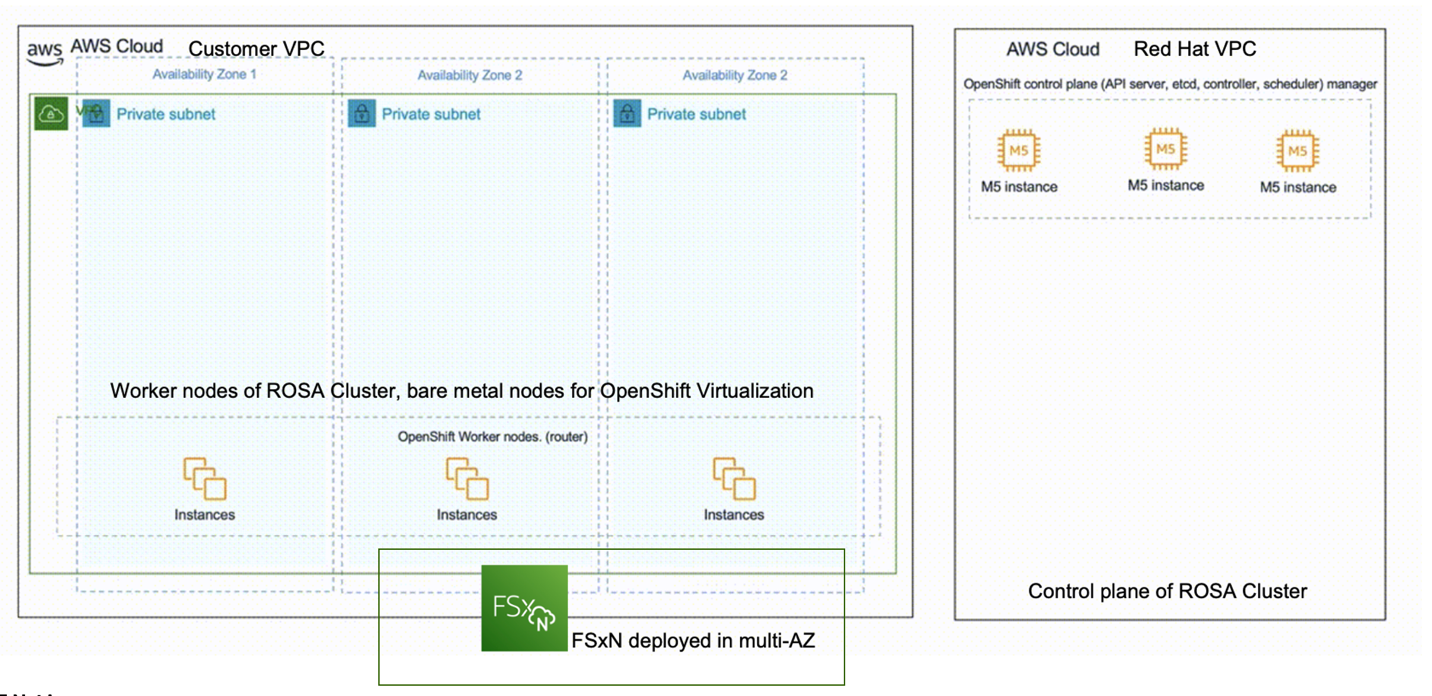
This diagram shows the ROSA Hosted Control Plane (HCP) cluster deployed in multiple availability zones (AZs). ROSA clusters’ control plane nodes are in a service team virtual private cloud (VPC), while the compute/Worker nodes are in a VPC in the customer's account. Some of the worker nodes are metal instance type to support OpenShift Virtualization. The FSxN file system is deployed within the same VPC. NetApp Trident provisioner is installed in the ROSA cluster, allowing all the subnets of this VPC to connect to the file system. OpenShift Virtualization is installed using the operator from the OperatorHub.
Ensure the default Storage Class is set to trident-csi. The following yaml was used to create the storage class.
apiVersion: storage.k8s.io/v1
                                                kind: StorageClass
                                                metadata:
                                                  name: trident-csi
                                                provisioner: csi.trident.netapp.io
                                                parameters:
                                                  backendType: "ontap-nas"
                                                  fsType: "ext4"
                                                allowVolumeExpansion: True
                                                reclaimPolicy: Retain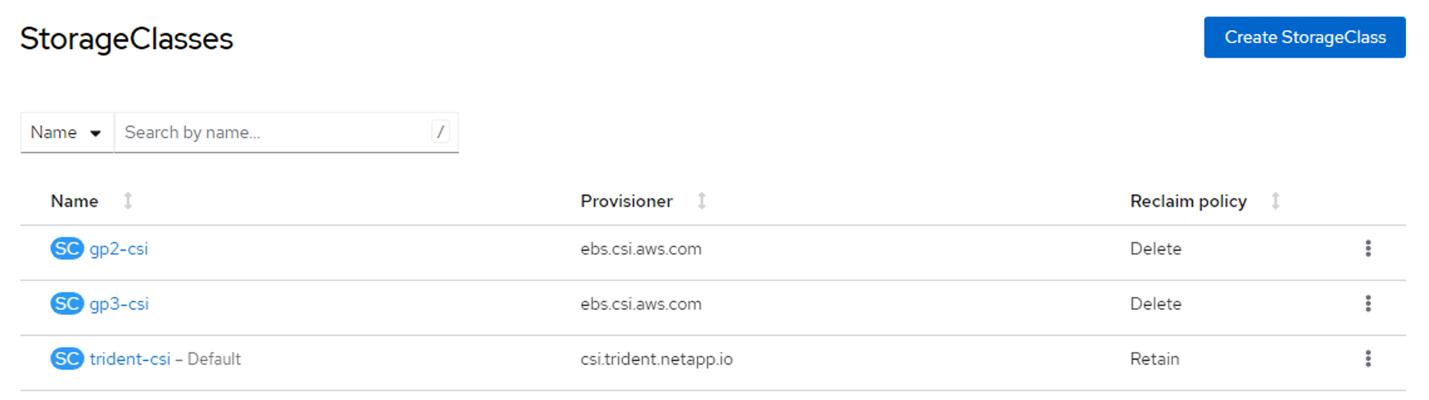
StorageClasses screen in console displaying trident-csi as default. Note: Prior to creating the Storage class, the following yaml files were used to create a secret and the backend object using ontap-nas driver.
apiVersion: v1
                                                kind: Secret
                                                metadata:
                                                  name: backend-fsx-ontap-nas-secret
                                                  namespace: trident
                                                type: Opaque
                                                stringData:
                                                  username: vsadmin
                                                  password: <SVM password configured while creating FSxN>
                                                apiVersion: trident.netapp.io/v1
                                                kind: TridentBackendConfig
                                                metadata:
                                                  name: backend-fsx-ontap-nas
                                                  namespace: trident
                                                spec:
                                                  version: 1
                                                  backendName: fsx-ontap
                                                  storageDriverName: ontap-nas
                                                  managementLIF: <Management DNS name>
                                                  dataLIF: <NFS DNS name>
                                                  svm: <SVM NAME>
                                                  credentials:
                                                    name: backend-fsx-ontap-nas-secret
Ensure the default VolumeSnapShotClasses is set as shown. The following yaml was used to create the VolumeSnapshotClass:
kind: VolumeSnapshotClass
                                                        metadata:
                                                          name: fsx-snapclass
                                                        driver: csi.trident.netapp.io
                                                        deletionPolicy: Delete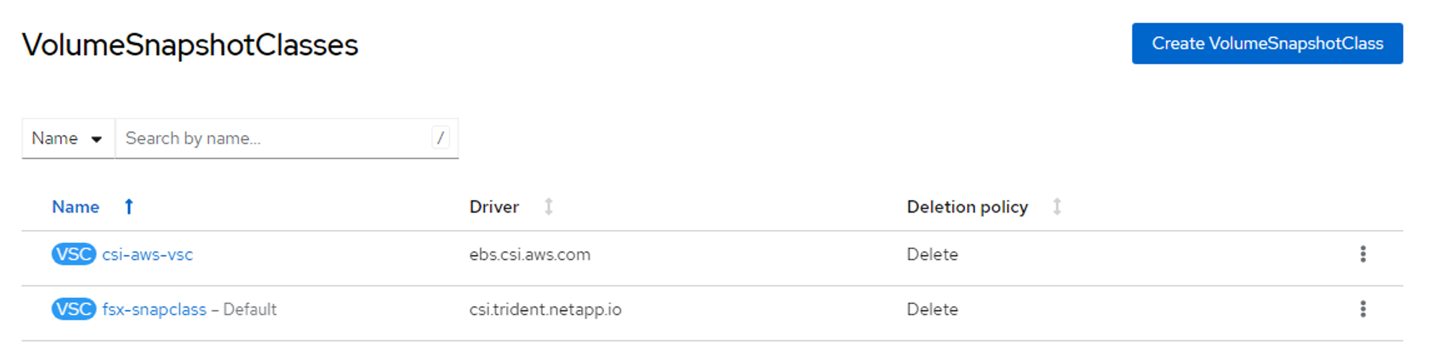
VolumeSnapshotClasses screen in console reflecting that fsx-snapclass is the default. If the defaults are not set, you can set it up either from the console or from command line:
$ oc patch storageclass trident-csi -p '{"metadata": {"annotations": {"storageclass.kubernetes.io/is-default-class": "true"}}}'
                                                        $ oc patch VolumeSnapshotClasses fsx-snapclass -p '{"metadata": {"annotations": {"snapshot.storage.kubernetes.io/is-default-class": "true"}}}'
Creating the VM from a template
From the ROSA console, create a VM. There are several templates available, but for the purposes of this scenario, we will use the Fedora VM.
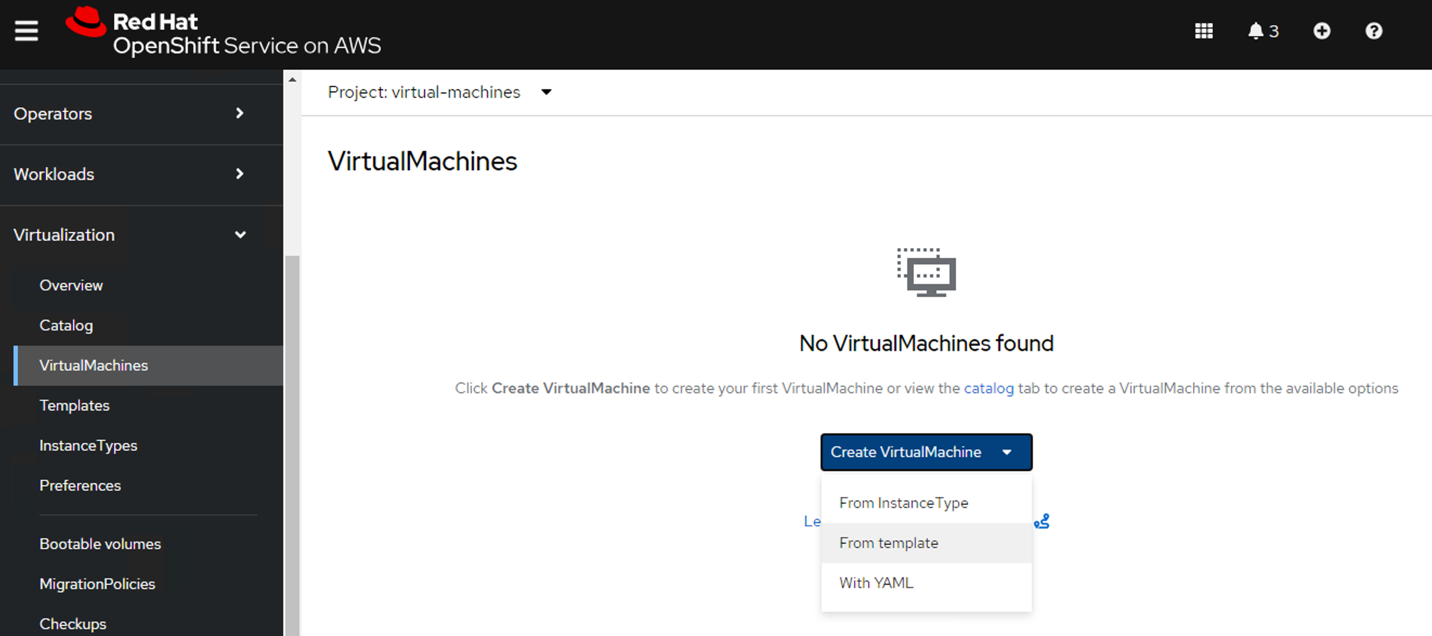
Red Hat console screen with VirtualMachines tab open. Create VirtualMachine menu open and "From template" selected. 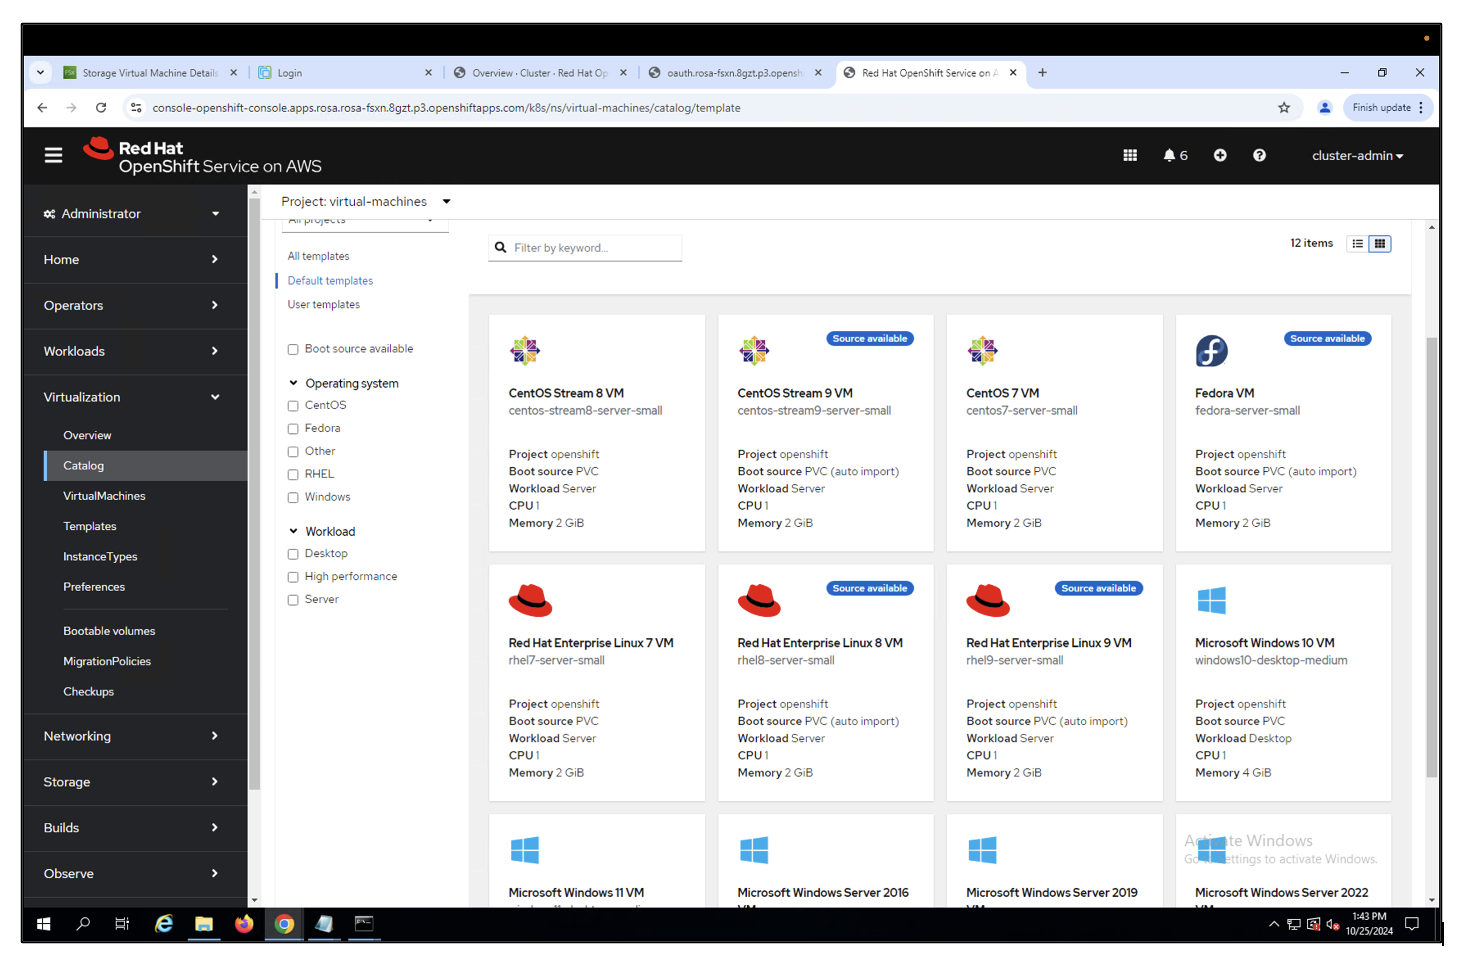
Red Hat console screen displaying different types of available VirtualMachine templates, including multiple OS and workload types. Give the VM a name, and then click Customize Virtual Machine.
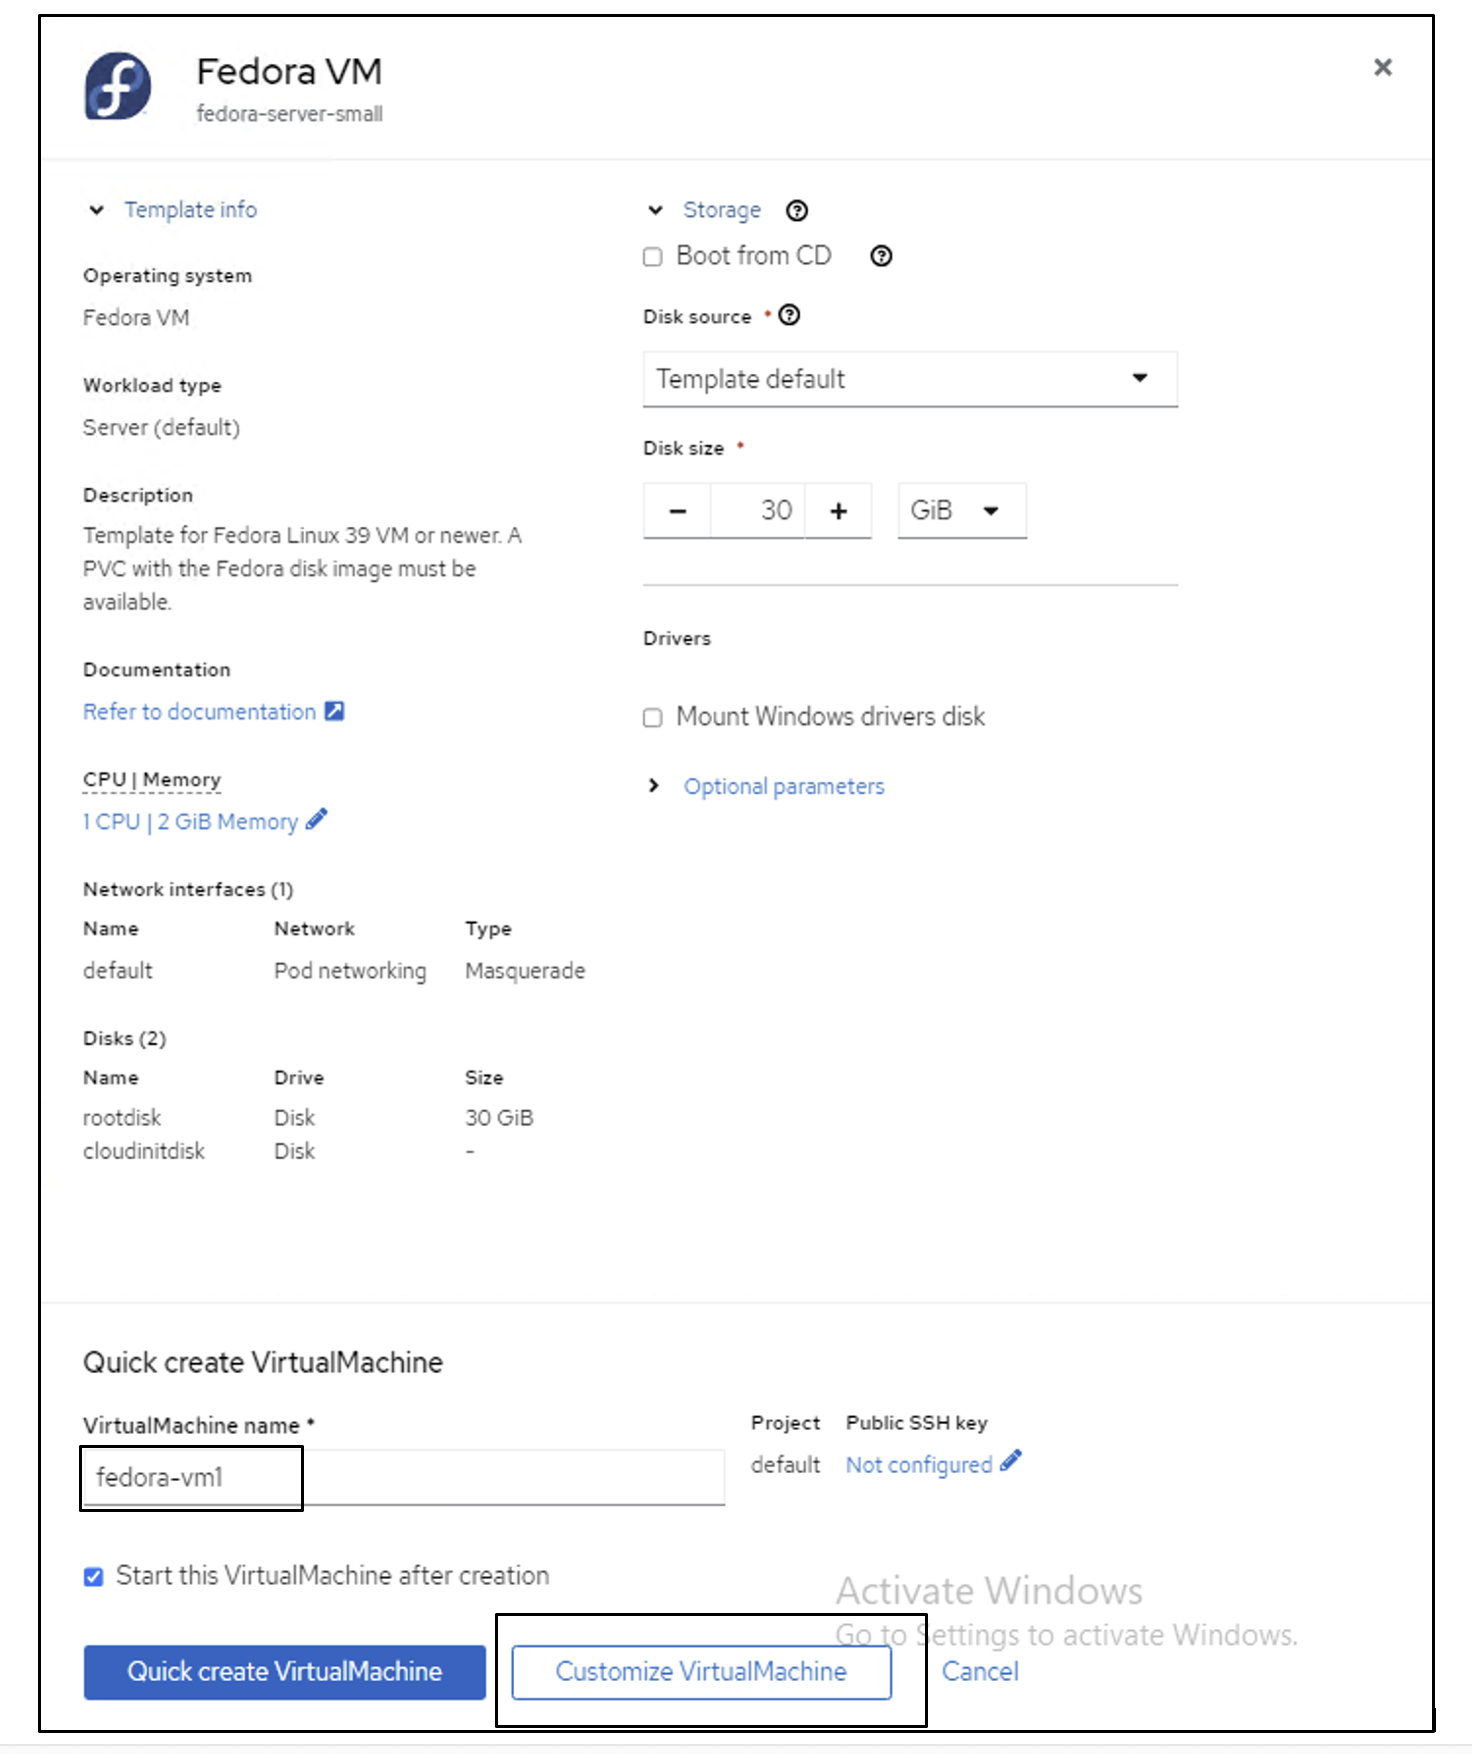
Red Hat console VM creation screen showing VirtualMachine name field filled out and Customize VirtualMachine button highlighted to click. Select the Disks tab and click Add disks.
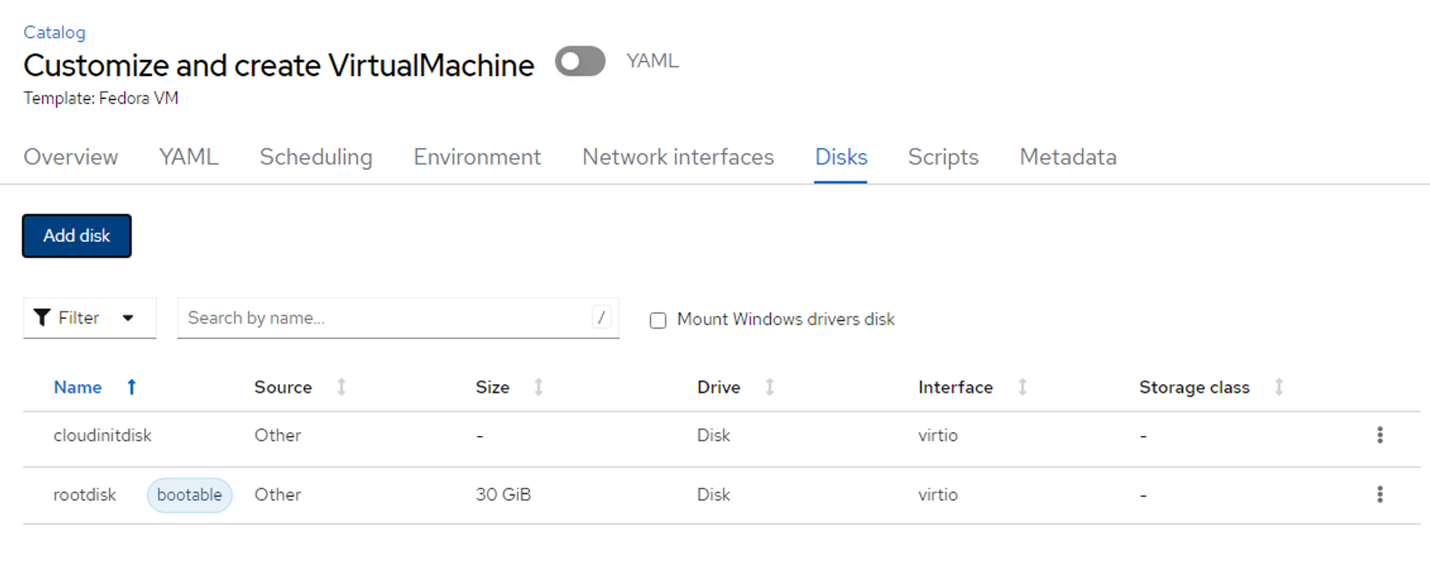
Red Hat Console virtual machine screen with Disks tab selected. Add disk button is in upper left of page. Change the name of the disk to whatever preferred title, and ensure that trident-csi is selected for storage class. Then click Save.
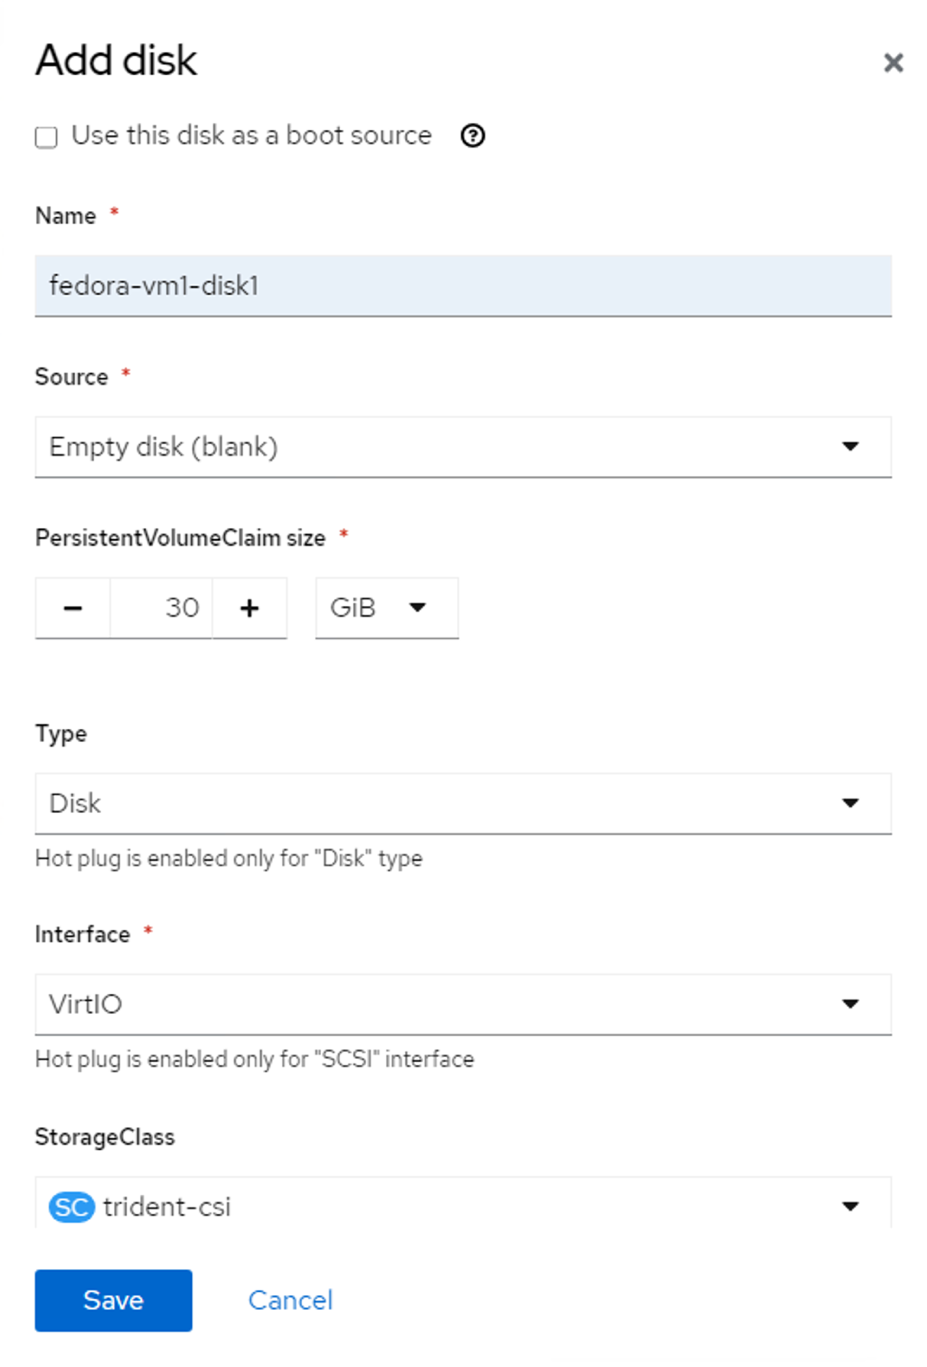
Add disk screen with trident-csi set as the StorageClass. After the options are saved, click Create VirtualMachine.
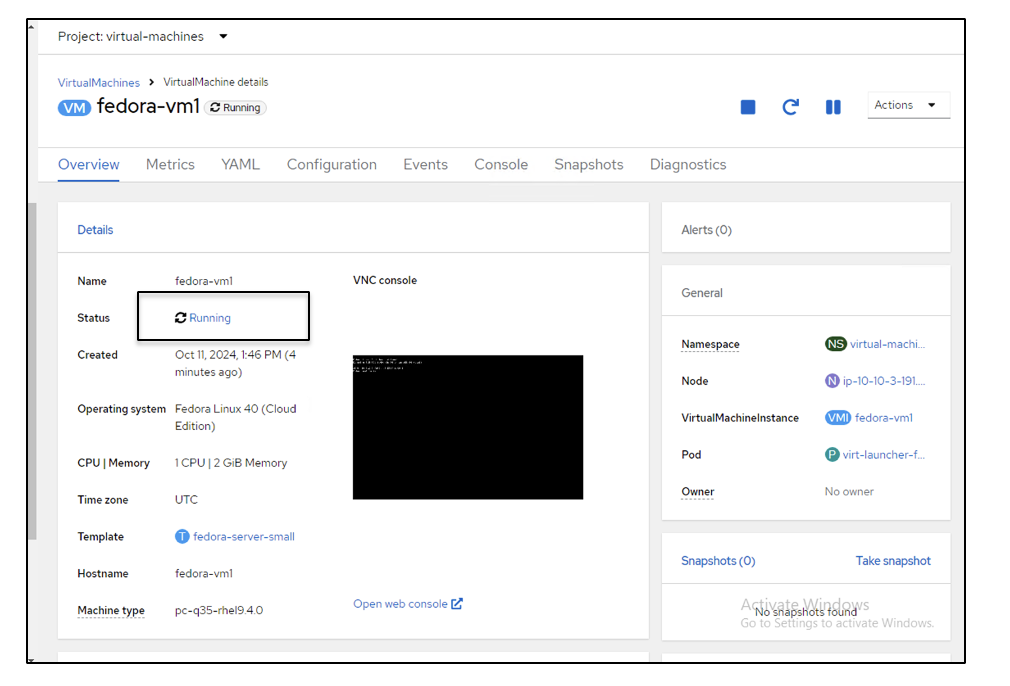
Virtual machine screen showing newly created VM with a Running status.
Reviewing all the objects created for the VM
Once the VM is created, you will want to review that all the objects necessary for it to run are present and accounted for.
Storage disks
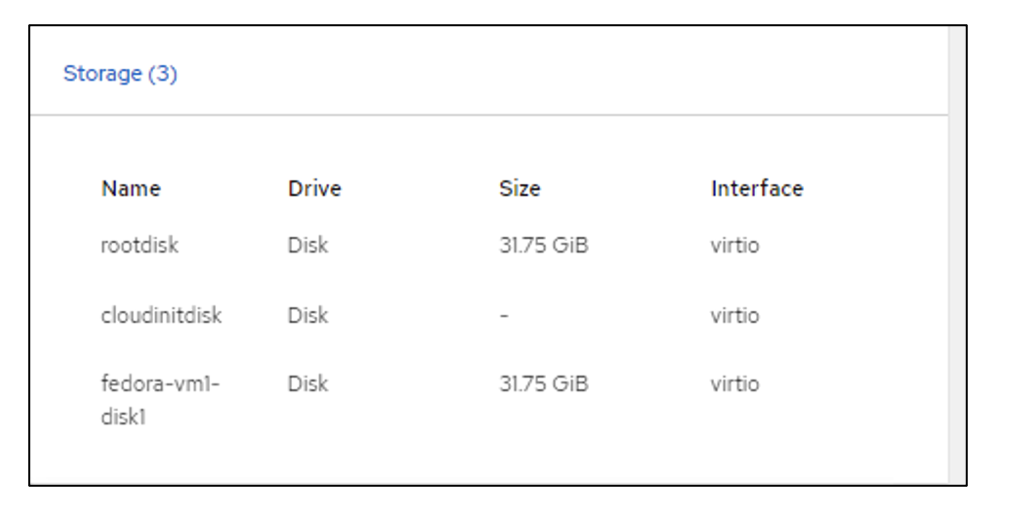
Storage screen displaying disk drives and interfaces. The file systems of the VM will show the partitions, file system type and mount points.
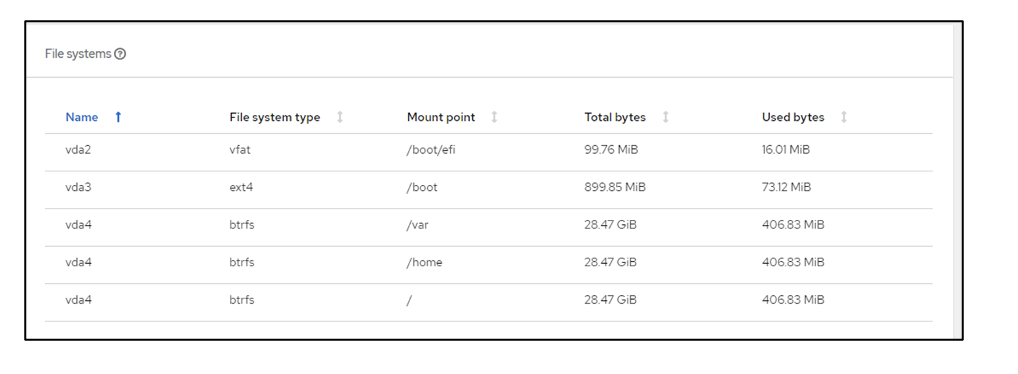
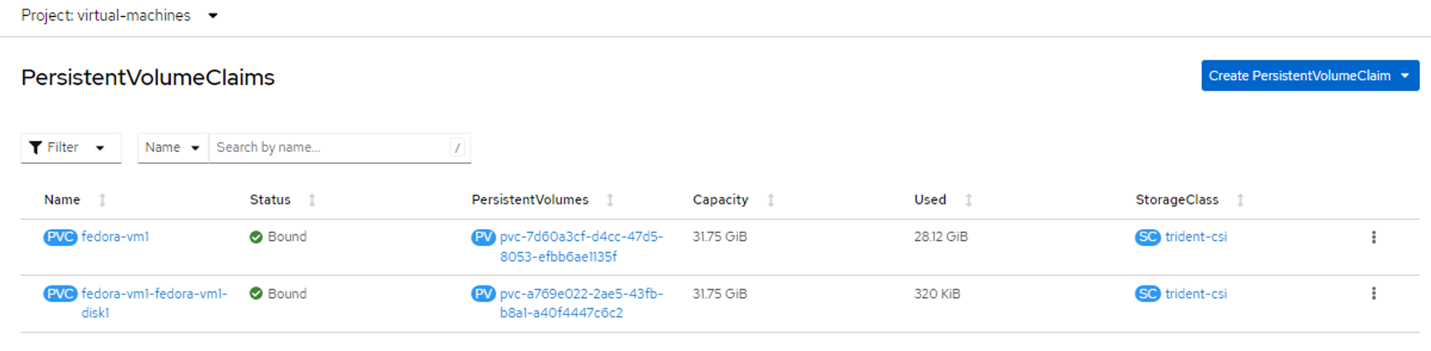
Files systems screen showing types and names. 2 Persistent Volume Claims (PVCs) are created for the VM, one from the boot disk and one for the hot plug disk.

Console screen for PersistentVolumeClaims displaying system type and mounts. The PVC for the boot disk shows that the Access mode is set to ReadWriteMany and the Storage Class is trident-csi.

PVC details screen displaying ReadWriteMany under Access Modes field. - Similarly, the PVC for the hot-plug disk shows that the Access mode is ReadWriteMany, and the Storage Class is trident-csi.
In the screenshot below we can see that the pod for the VM has a Status of Running.
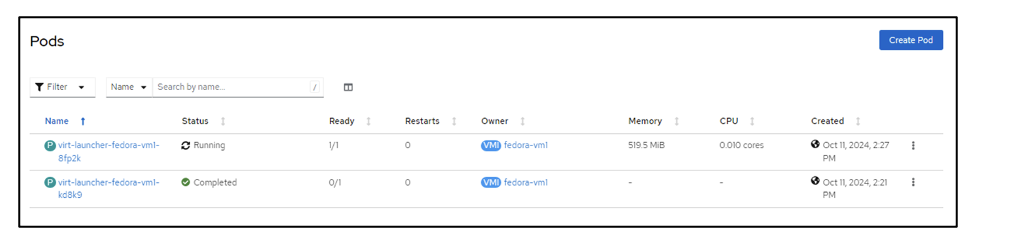
Pods screen displaying Running status for one particular pod.
Connect to the VM by clicking Open web console, and login using Guest Credentials.
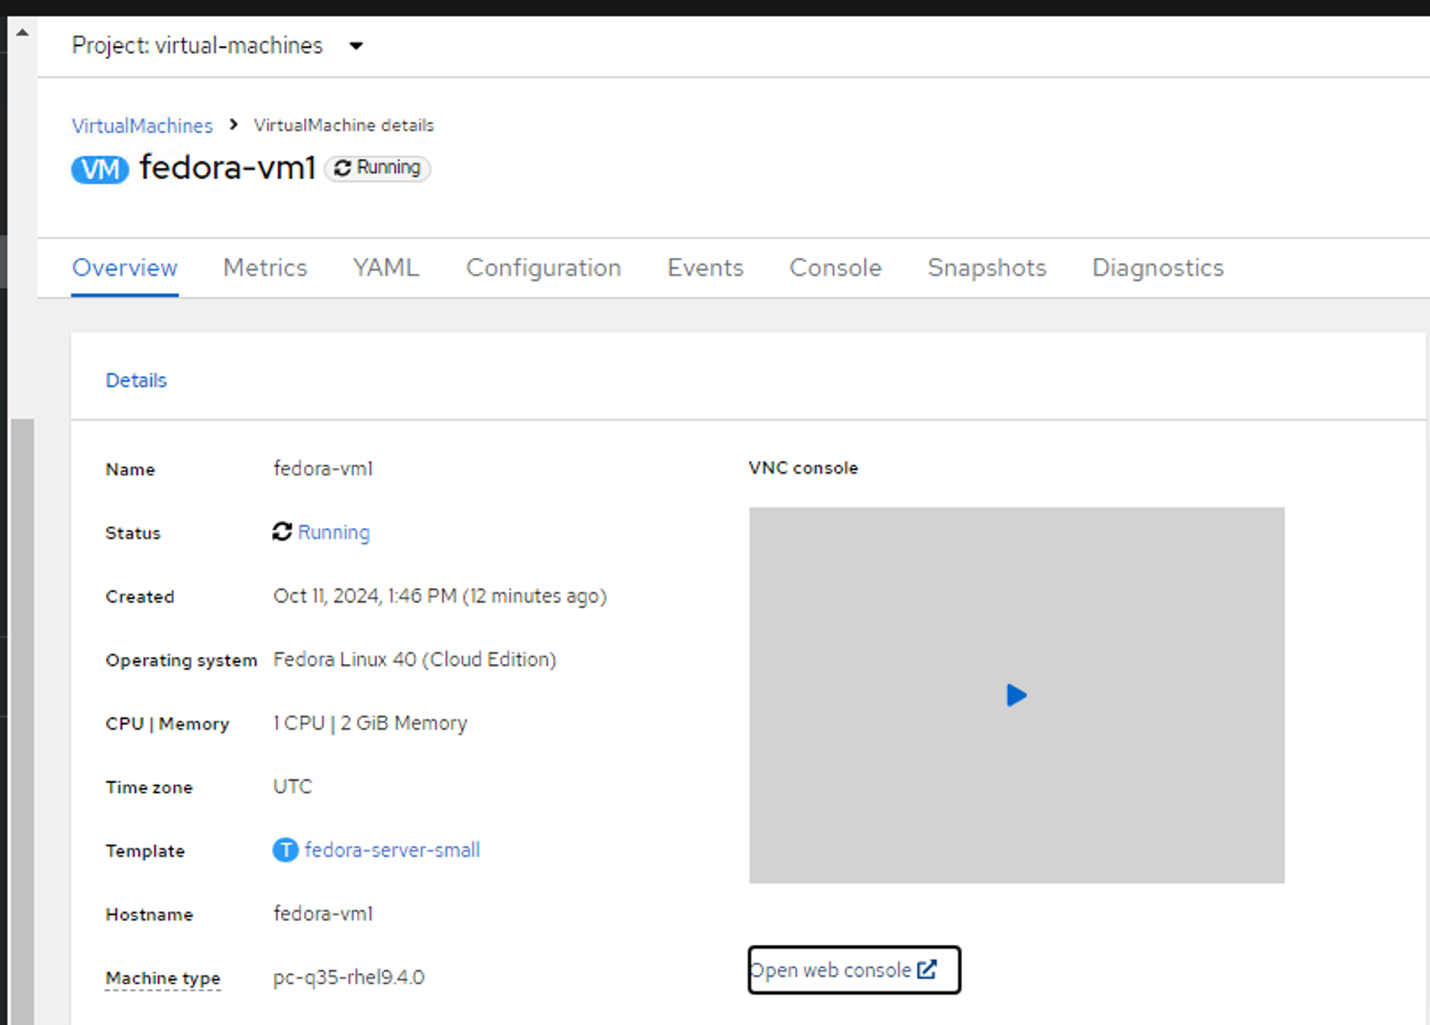
VirtualMachines overview page with the Open web console hyperlink. 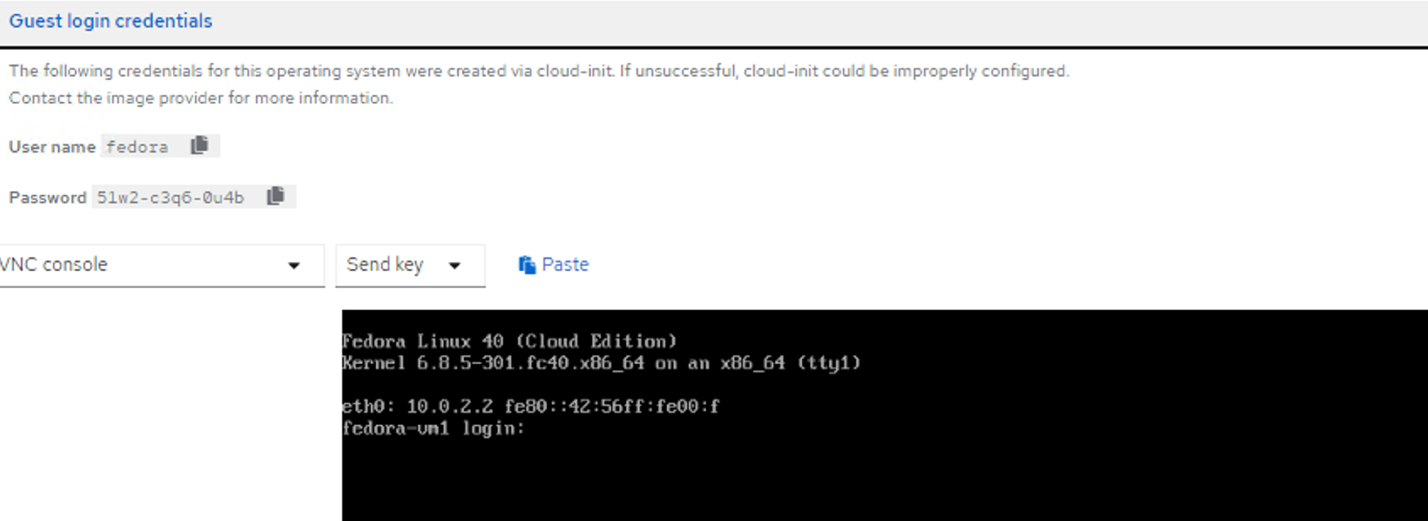
The web console screen displaying guest credentials to use in the console pop out. - Issue the following commands:
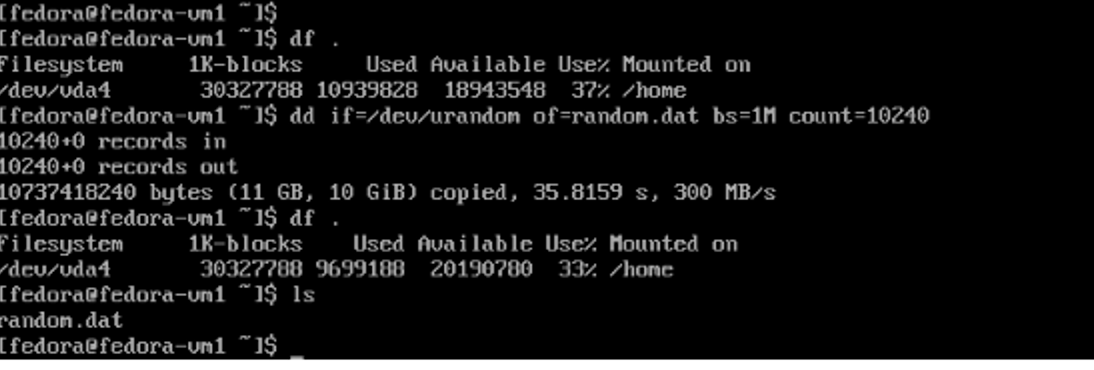
$ df (to display information about the disk space usage on a file system).$ dd if=/dev/urandom of=random.dat bs=1M count=10240 (to create a file called random.dat in the home dir and fill it with random data).
The disk is filled with 11 GB of data.
Command line results return of 11GB of data being added to the machine. Use vi to create a sample text file that we will use to test.

Command line results showing the creation of a text file.
Restart the virtual machine
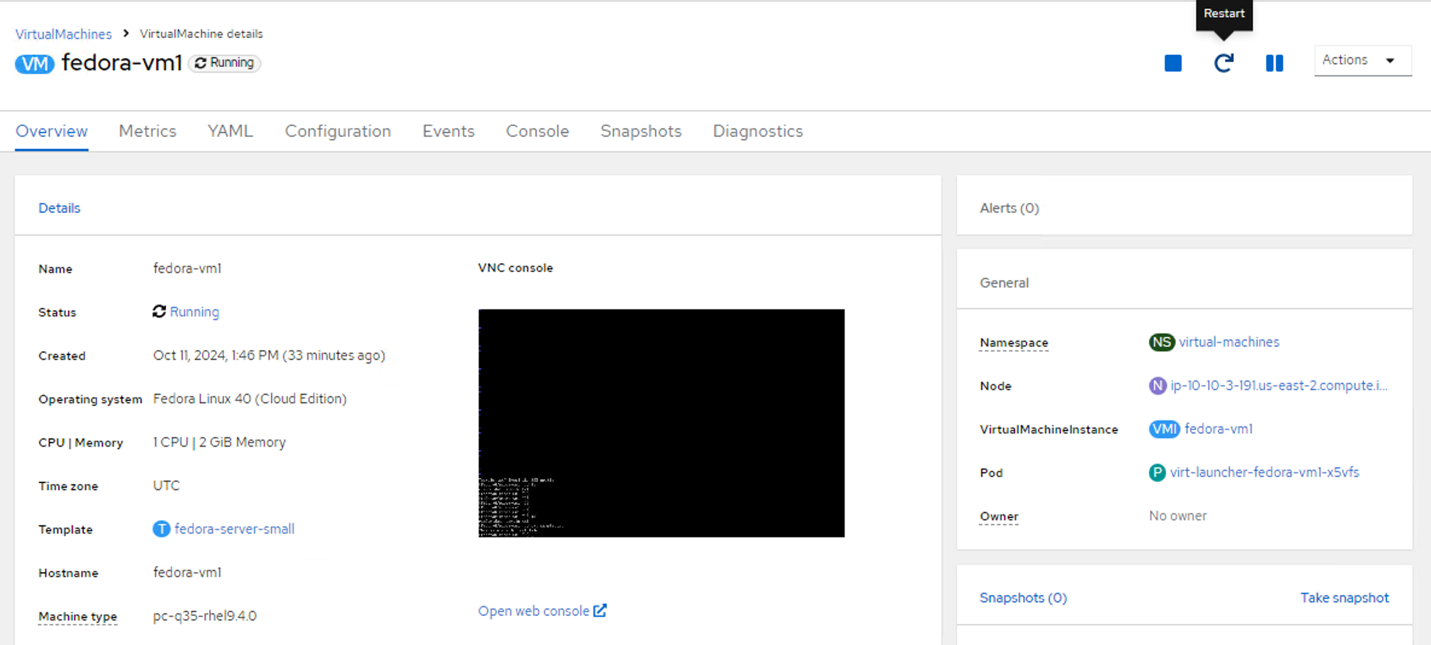
The VM comes back to the running state with the exact same filesystems, PVCs and files in the filesystems.

File systems screen displaying all the same PVC information. 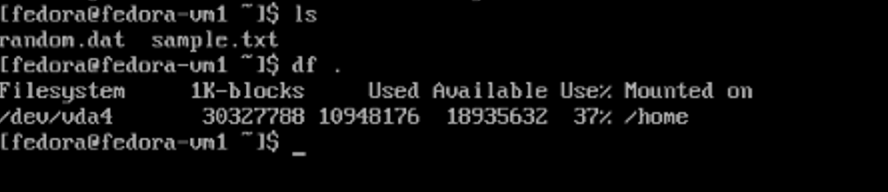
Command line interface showing expected data mounted for virtual machine. 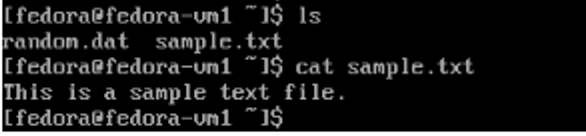
Sample text file created in command line.
Live migration
Live migration refers to the process of moving a running VM from one physical host to another host without disrupting normal operations, causing any downtime, or causing other adverse effects for the end user.
Live migration is considered a major step in virtualization. It allows an entire VM to be moved with a running operating system (OS), memory, storage, and network connectivity from their current node to the destination.
Below we will see how to perform a live migration of the VM from the current node to a new node.
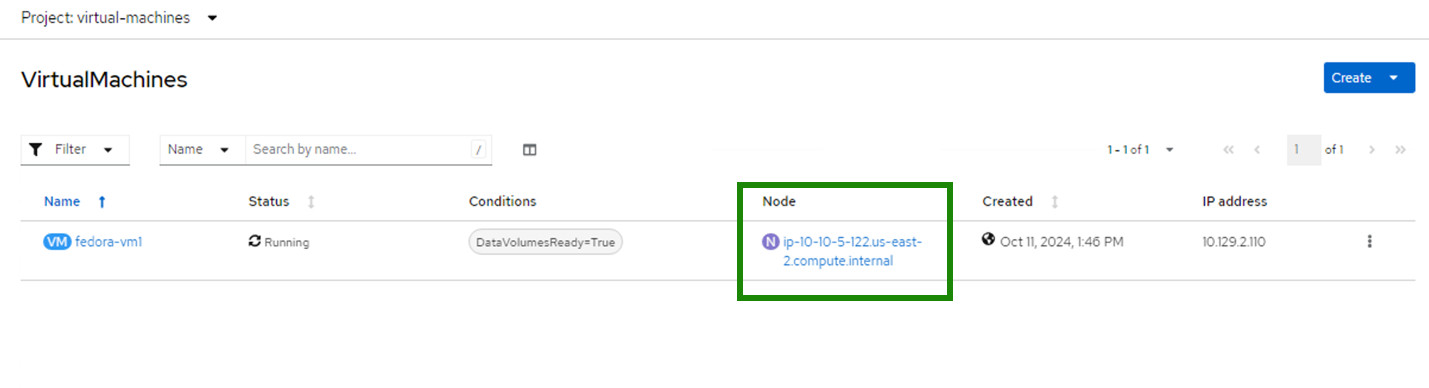
Note the node on which the VM is running.
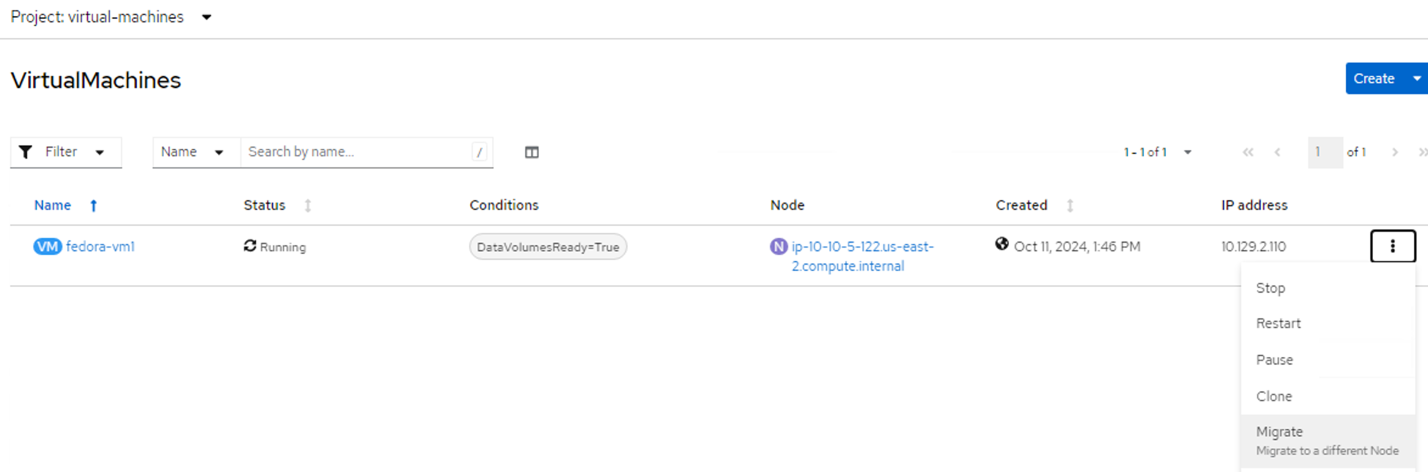
VirtualMachines screen in console with running node highlighted for emphasis. Click on the 3 dots in the far right of the VM entry and select Migrate.
Three-dot menu in VM entry clicked to reveal dropdown selector with Migrate option highlighted. On the Overview page, you can see that the migration has succeeded, and the Status has changed to Succeeded.
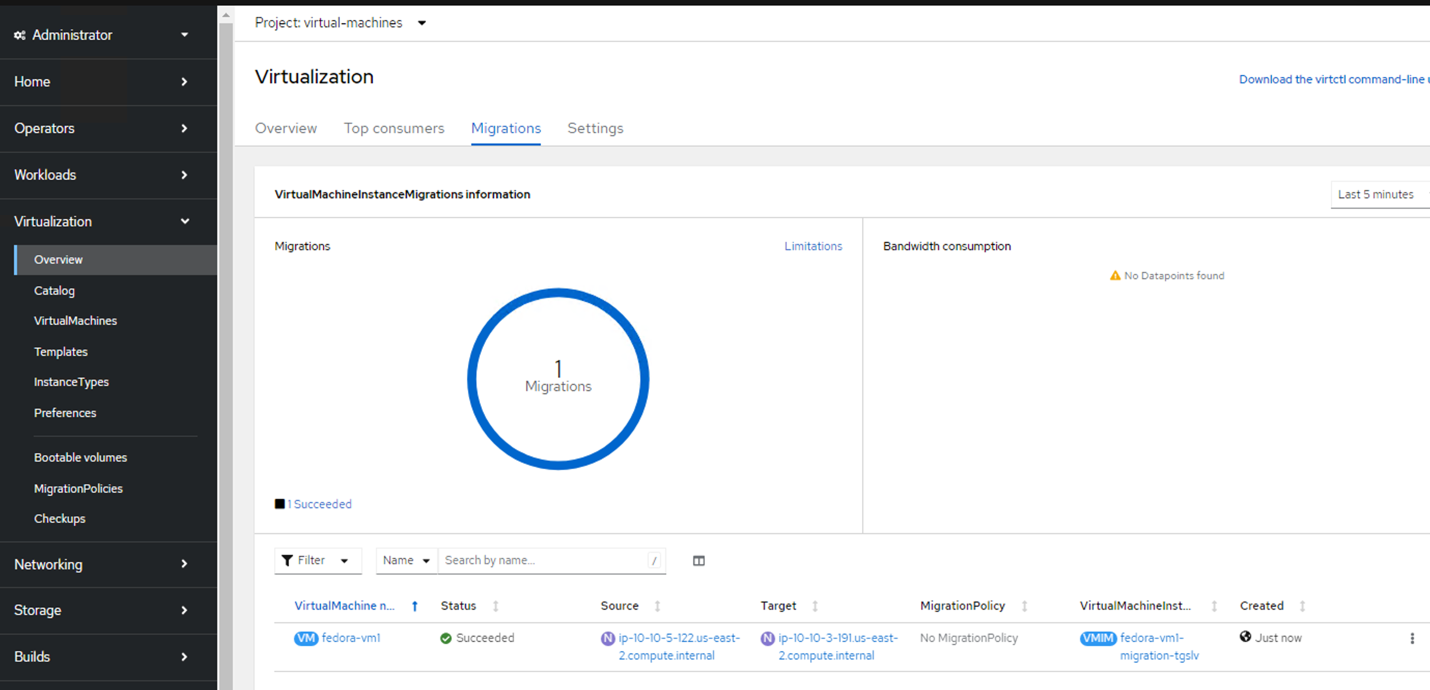
Migrations tab of Virtualization page in Red Hat Console displaying successful migrations at the bottom of the page. After the completion of the Live Migration, the VM is now on a different node.
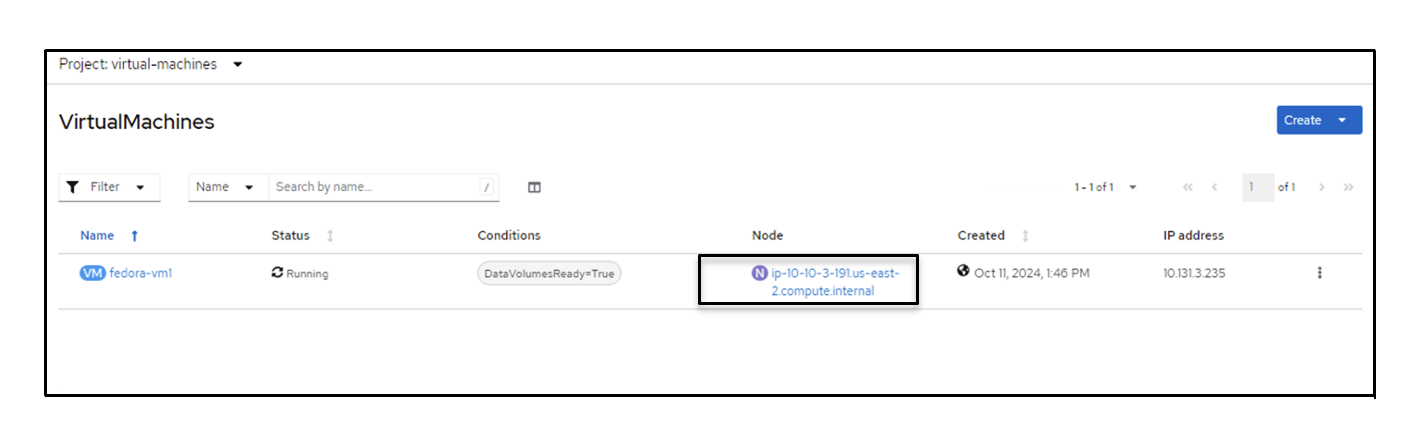
VirtualMachines tab with node highlighted to show a different name reflecting the migrated status. Open the web console and view the contents of the disks. It still has the same 2 files that we previously created before live migration.
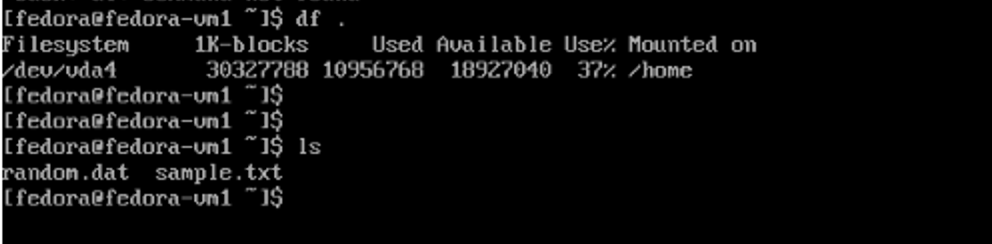
Console reflecting previous files. 
Previously created sample files in command line. The storage for the VM on the new node still shows the same disks.
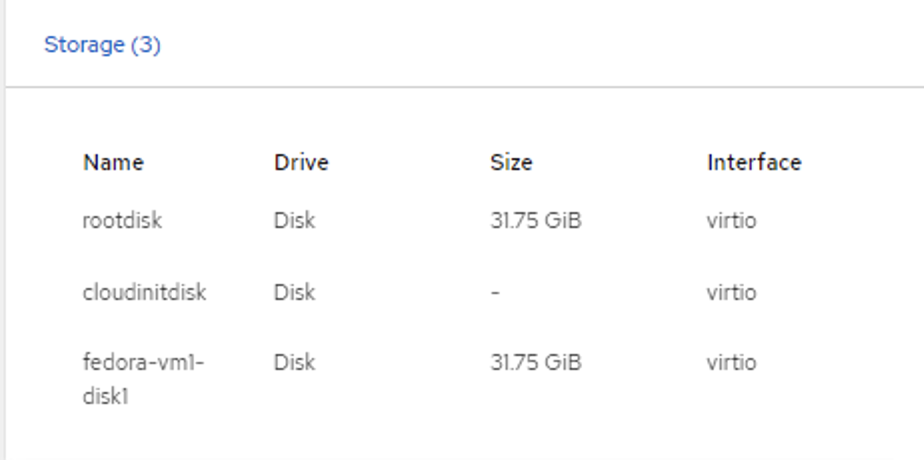
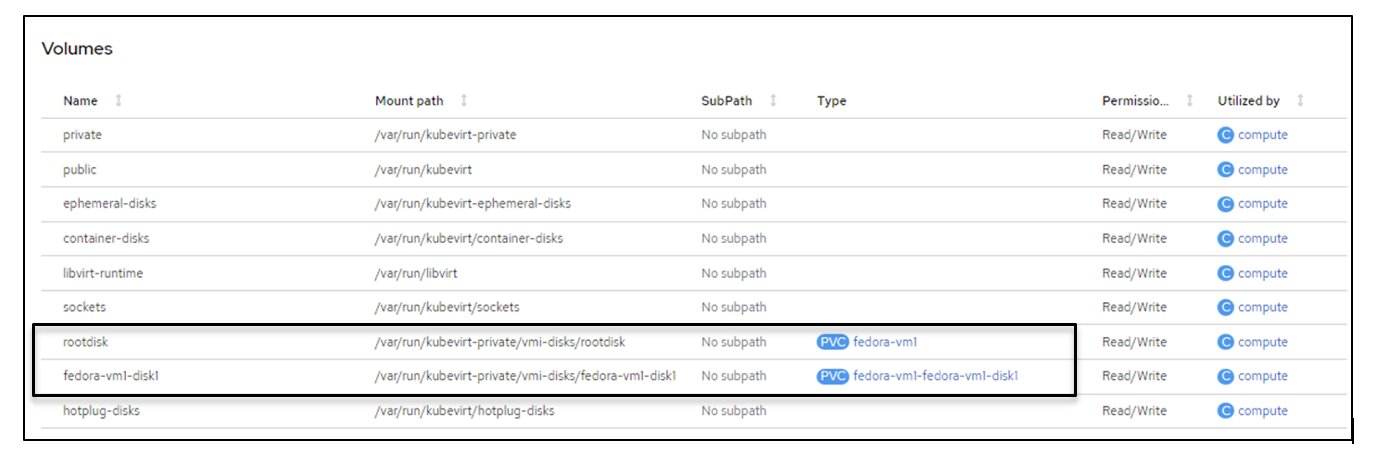
The same disks previously seen under the storage page. Also, the PVCs are the same.
PersistentVolumeClaims screen previously seen reflecting the same names. - Volumes associated with the VM pod are also the same (2 PVCs) as before.
You have now successfully conducted a live migration of virtual machines using Amazon FSxN!
