Creating images using OpenSCAP via Red Hat Lightspeed image builder
Red Hat® Lightspeed (formerly Insights) image builder makes the process of hardening images much simpler since it is able to leverage OpenSCAP remediations at build time before the image has even been launched. This is desirable since some options, such as filesystem customizations, are hard to remediate once an image has been built and booted. Let’s get started by walking through how to create images using OpenSCAP via Red Hat Lightspeed image builder.
What will you learn?
- Building images with Lightspeed image builder using OpenSCAP via the UI
- Building images with Lightspeed image builder using the API
What do you need before starting?
- Cloud service provider account credentials
- Red Hat account
Building images with Lightspeed image builder
There are two ways we can build images using image builder in the console. The first way is making an API request to the backend image builder application and then deploying the resulting image to AWS. Alternatively, we can use the front end to build pre-hardened images. This guide will take you through both methods.
Building images using OpenSCAP via the UI
Since April 2024, it is possible to build pre-hardened images using OpenSCAP in the console environment. To get started building an image, navigate to Image Builder. and click on the Create Image button. We will skip ahead a few steps through the wizard with the following assumptions:
- A RHEL 9 image was selected
- An AWS Amazon Machine Image (AMI) was selected as the target environment
- The system was registered with an Access Key
From the OpenSCAP compliance step, choose an OpenSCAP profile from the dropdown menu, and select the “PCI-DSS” profile:
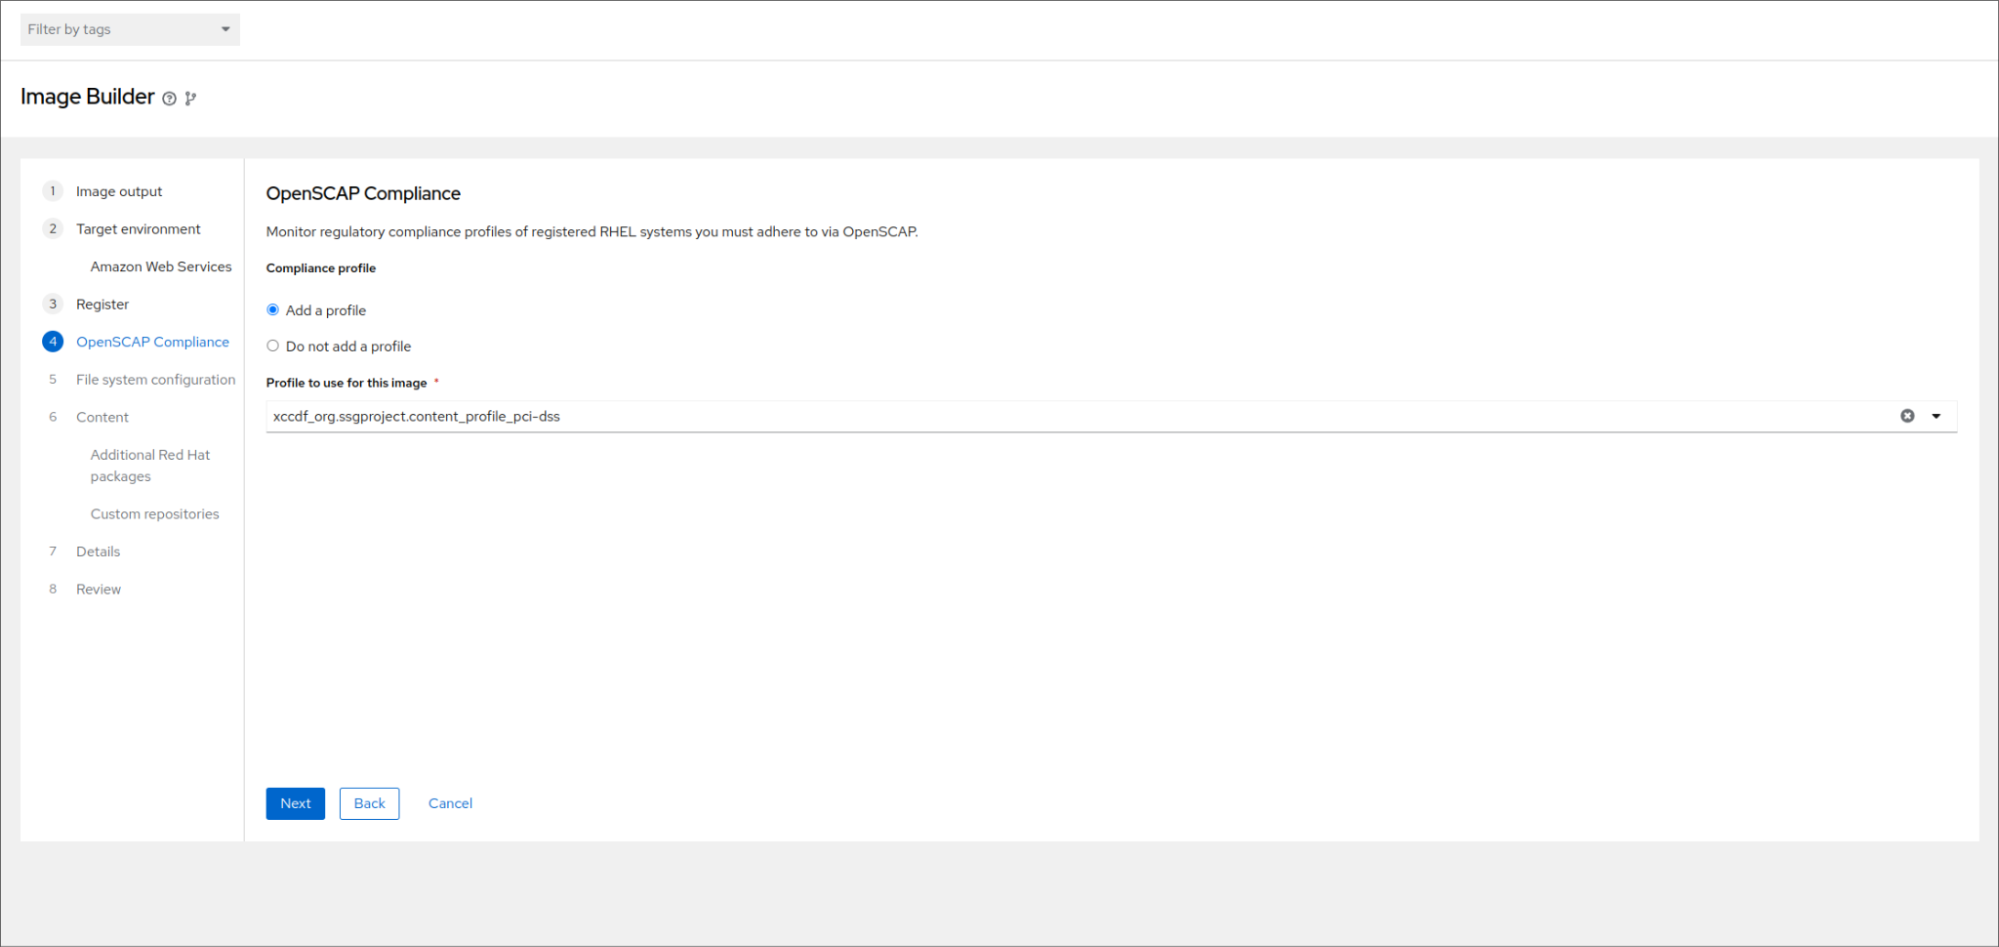
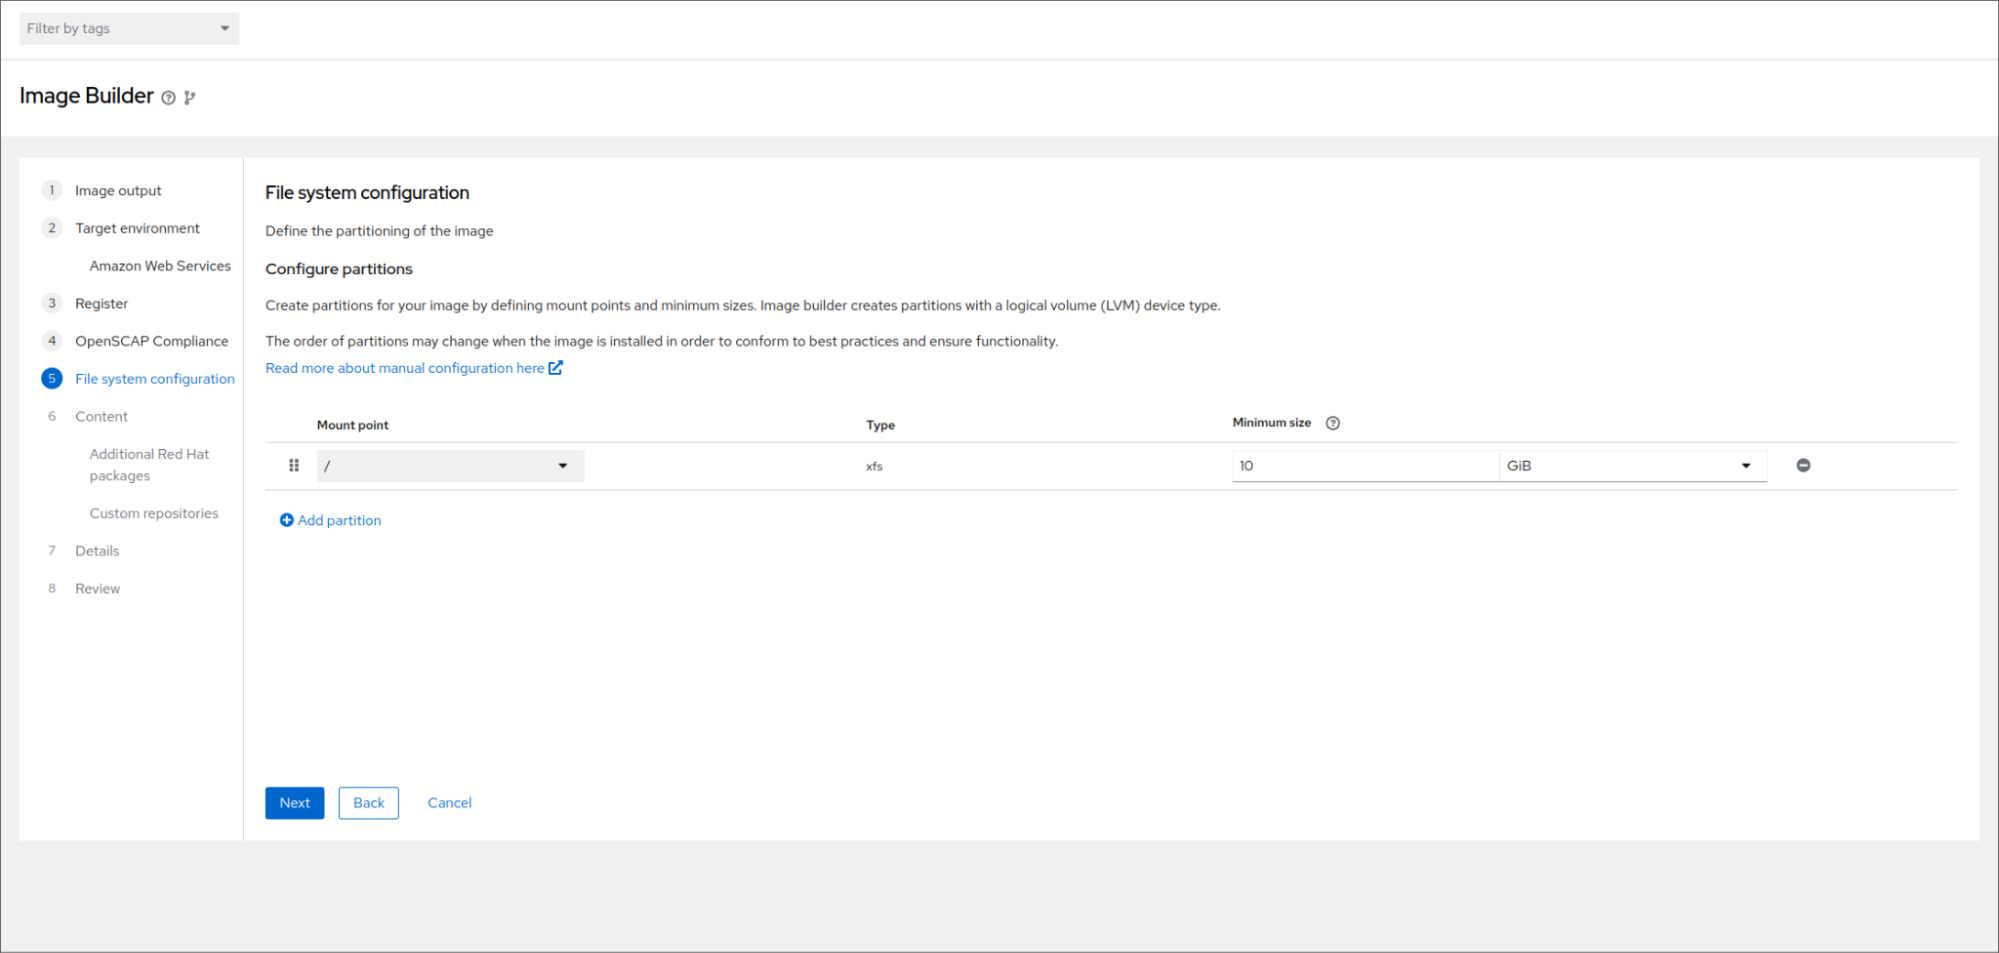
The “PCI-DSS” doesn’t have any partitioning requirements. For profiles that do have required partitions, the filesystem step in the wizard will be pre-populated with recommended partition sizes based on the requirements of the selected profile. These sizes can be amended. Additional mount points can also be added.
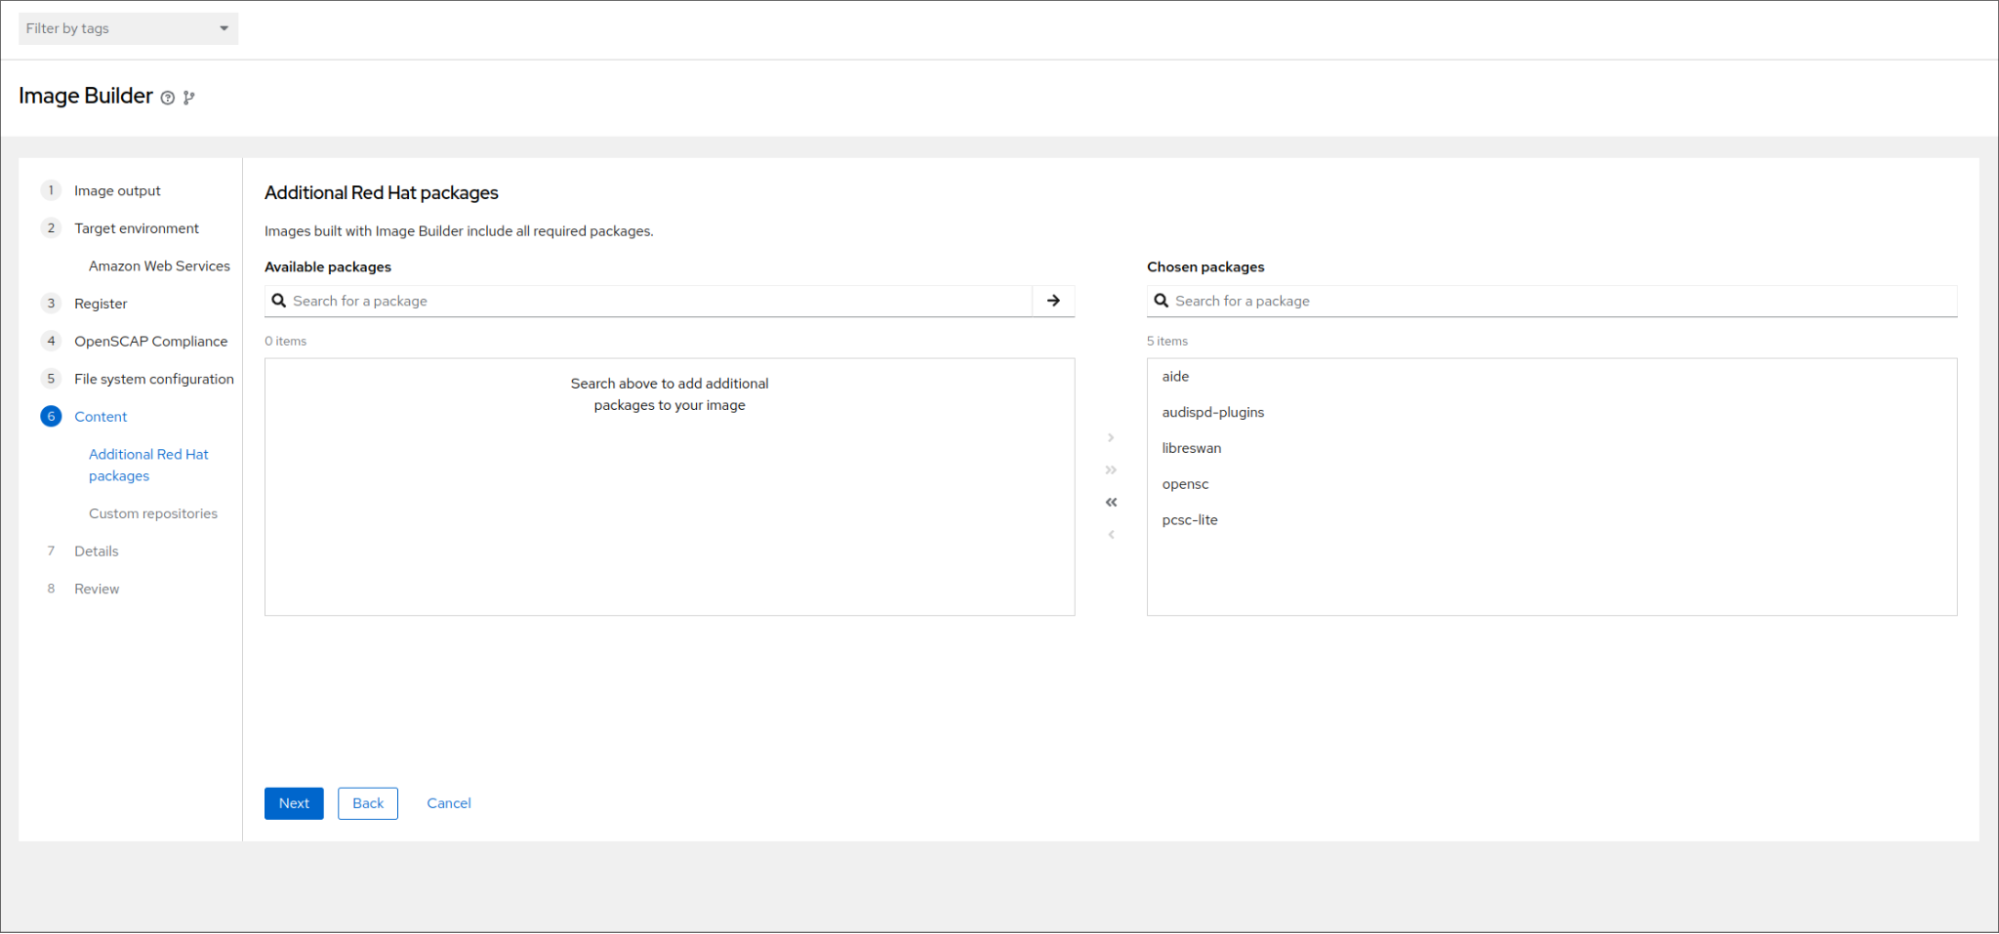
Similarly, the required packages for the selected profile are pre-populated; these packages may be removed, and additional packages can be added, as desired.
Note that amending the suggested file system layout or removing suggested packages may impact your image’s compliance score.
Click through the remaining steps, select the options as desired, then start the image build. Once the build is complete, we can launch the image and move on to the next step.
Building images via the API
To start off with, we will build an image for AWS using the Lightspeed image builder’s API. First, navigate to the operation to compose an image in the console.
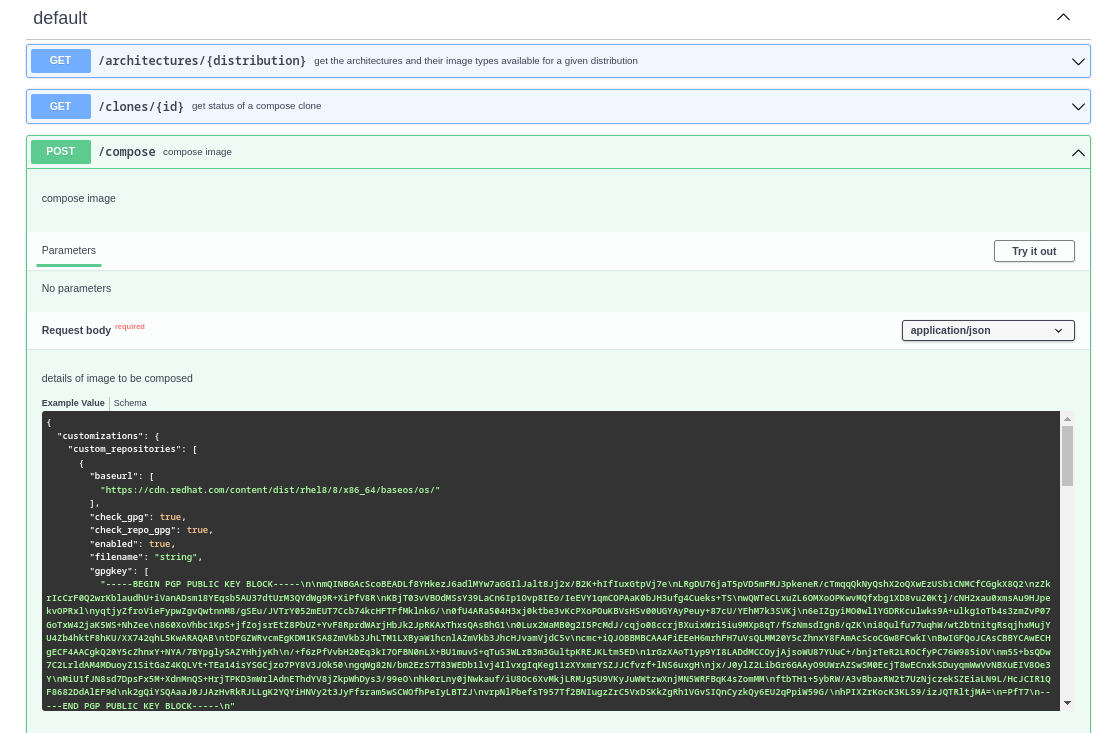
Scroll down to the compose image section, click on the Try it out button, and input the following JSON script. Amend the following values as you see fit:
- distribution
- image_name
- architecture
- image_type
- type, share_with_accounts
- profile_id
```bash
{
  "distribution": "rhel-92",
  "image_name": "obi",
  "image_requests": [
    {
      "architecture": "x86_64",
      "image_type": "ami",
      "upload_request": {
        "type": "aws",
        "options": {
          "share_with_accounts": [ "AWS_Account_ID" ]
        }
      }
    }
  ],
  "customizations": {
    "packages": [ "zsh" ],
    "openscap": {
      "profile_id": "xccdf_org.ssgproject.content_profile_pci-dss"
    }
  }
}
```
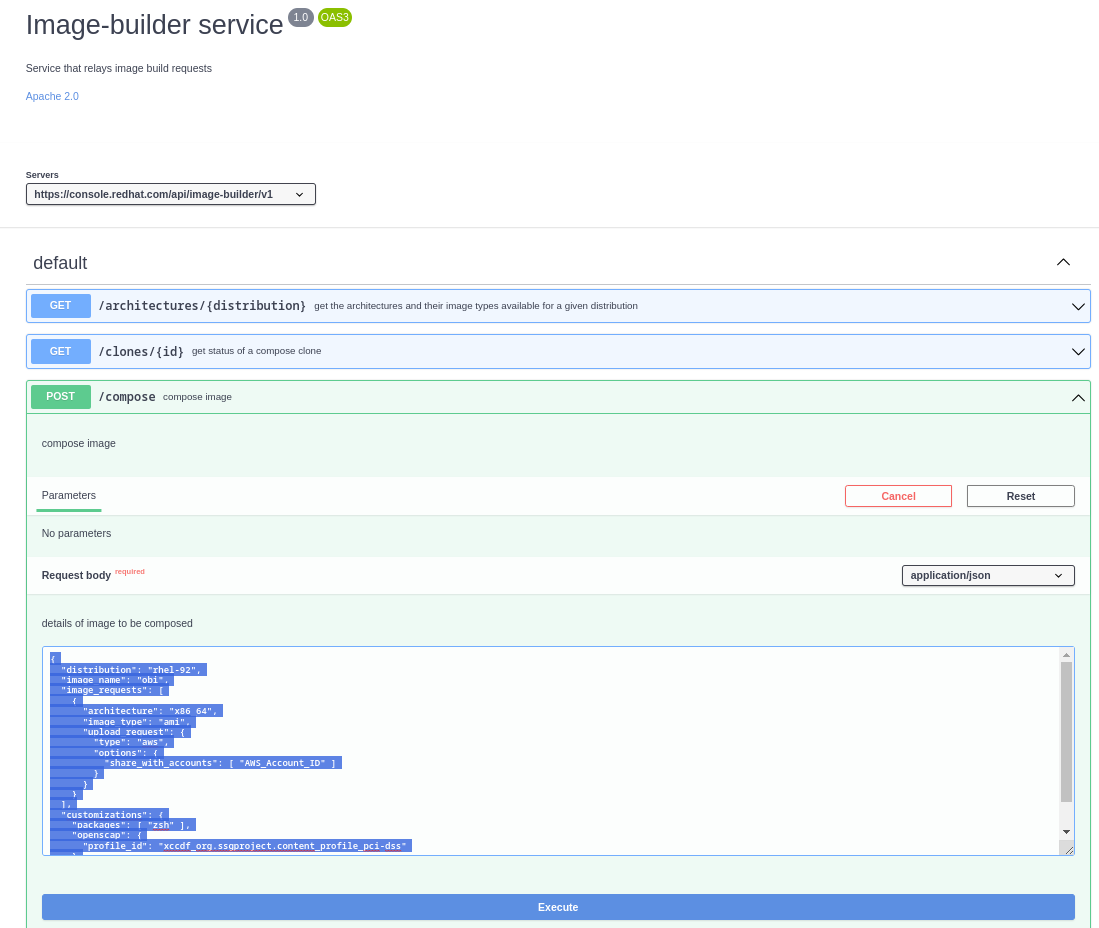
Then hit the Execute button to build the image. Head to https://console.redhat.com/insights/image-builder and monitor the build process for the AMI. The AMI will be ready to use once you see the green tick and ready message.
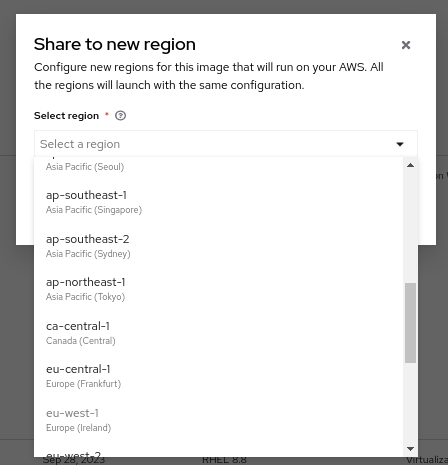
To share to AWS, click on the three dots in the right corner of the screen and click the option, Share to new region. Choose the region in which you want to raise your AMI.

With this done, you’re ready to learn about compliance monitoring and testing frameworks in the next resource.
