Migrating existing virtual machines
This portion of our lab uses the migration toolkit for virtualization (MTV) to import virtual machines (VMs) from VMware vSphere to Red Hat OpenShift. The migration toolkit supports two "modes" of import:
Cold migration turns off the source virtual machine before starting the migration. This is the default migration type.
Warm migration copies data while the source virtual machine continues to run. Once the bulk of data has been migrated, the VM is shutdown and the final data is copied to the destination. The new VM can then be started, resulting in a much shorter period of downtime for the VM-hosted application.
Note: The migration toolkit has already been deployed to your cluster using the Operator available in OperatorHub.
Documentation for how to install and configure the Operator can be found here.
If you would like to learn more about how to configure the Migration Toolkit for Virtualization for your own needs, please see the documentation at the following links for:
What will you learn?
- How to use the Migration Toolkit for Virtualization (MTV) to migrate a VM from an existing VMware vSphere environment to OpenShift Virtualization.
What do you need before starting?
The following prerequisites apply to all migrations:
ISO/CD-ROM disks must be unmounted.
Each NIC must contain one IPv4 and/or one IPv6 address.
The VM operating system must be certified and supported for use as a guest operating system for Red Hat OpenShift Virtualization.
VM names must contain only lowercase letters (a-z), numbers (0-9), or hyphens (-), up to a maximum of 253 characters. The first and last characters must be alphanumeric. The name must not contain uppercase letters, spaces, periods (.), or special characters.
VM names must not duplicate the name of an existing VM in the OpenShift Virtualization environment.
Note: The Migration Toolkit for Virtualization will automatically assign a new name to a VM that does not comply with the rules, doing so allows the migration to proceed smoothly.
Migrating virtual machines from VMware
A three-tier application has been deployed on VMware for you to migrate to OpenShift.
The application is accessible from the following link: WebApp. It will display a visitor counter, and the hostname of the webserver that returned your request.
The application consists of the following four virtual machines:
One HAproxy system that redirects traffic to the web servers
One Linux system running a MariaDB database
Two Microsoft Windows servers with IIS hosting a PHP application connecting to the database
For this lab, you will be tasked with migrating three of the four virtual machines using cold migration.
Note: You will not need to migrate the HAproxy (load balancer) VM because OpenShift handles network traffic and load balancing natively for VMs connected to the SDN using a Service.
Review the VMware environment
To help understand the process of mapping resources, such as datastores and port groups, from vSphere into OpenShift’s equivalents, storage classes and network attachment definitions, let’s begin by reviewing the source environment for the migrations.
Navigate to VMware vCenter: vCenter Console
Login with the following credentials:
User: {vcenter_user}
Password: {vcenter_password}
By default you’ll land in the Inventory view at the top of the navigation tree. Click the Workloads icon and expand the navigation tree until you see the folder that matches your username, and the 4 VMs under it. Click the VMs tab at the top of the screen to view the VM details (Figure 1).
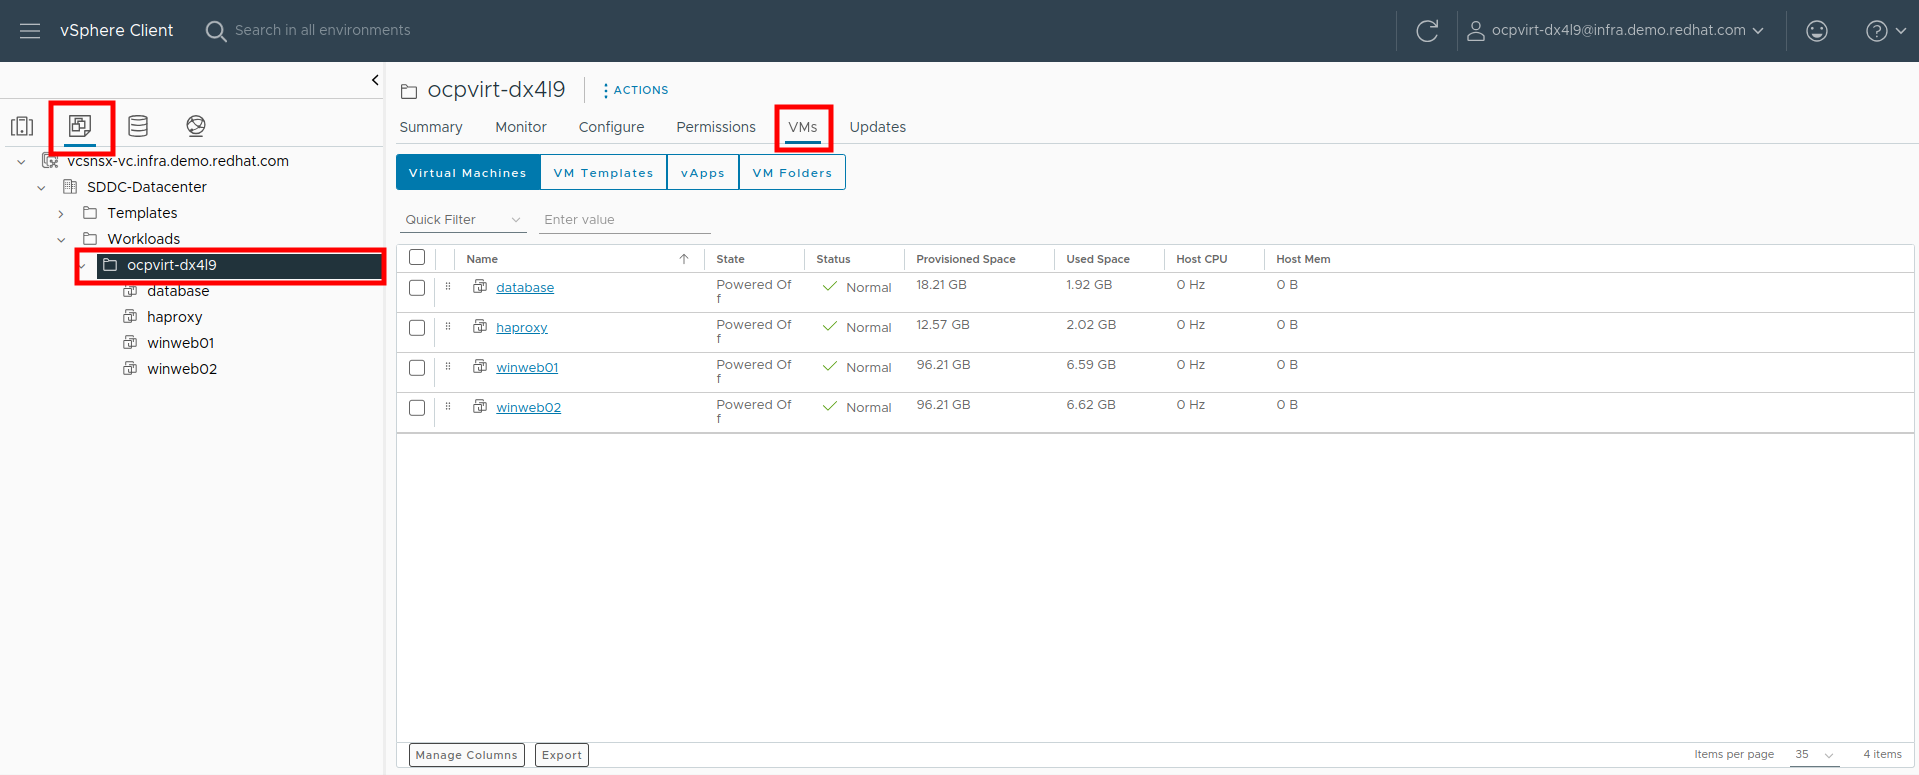
Figure 1 Change to the Networks view, then expand the tree to view the port group used by the virtual machines (Figure 2). Note that the name is segment-migrating-to-ocpvirt.
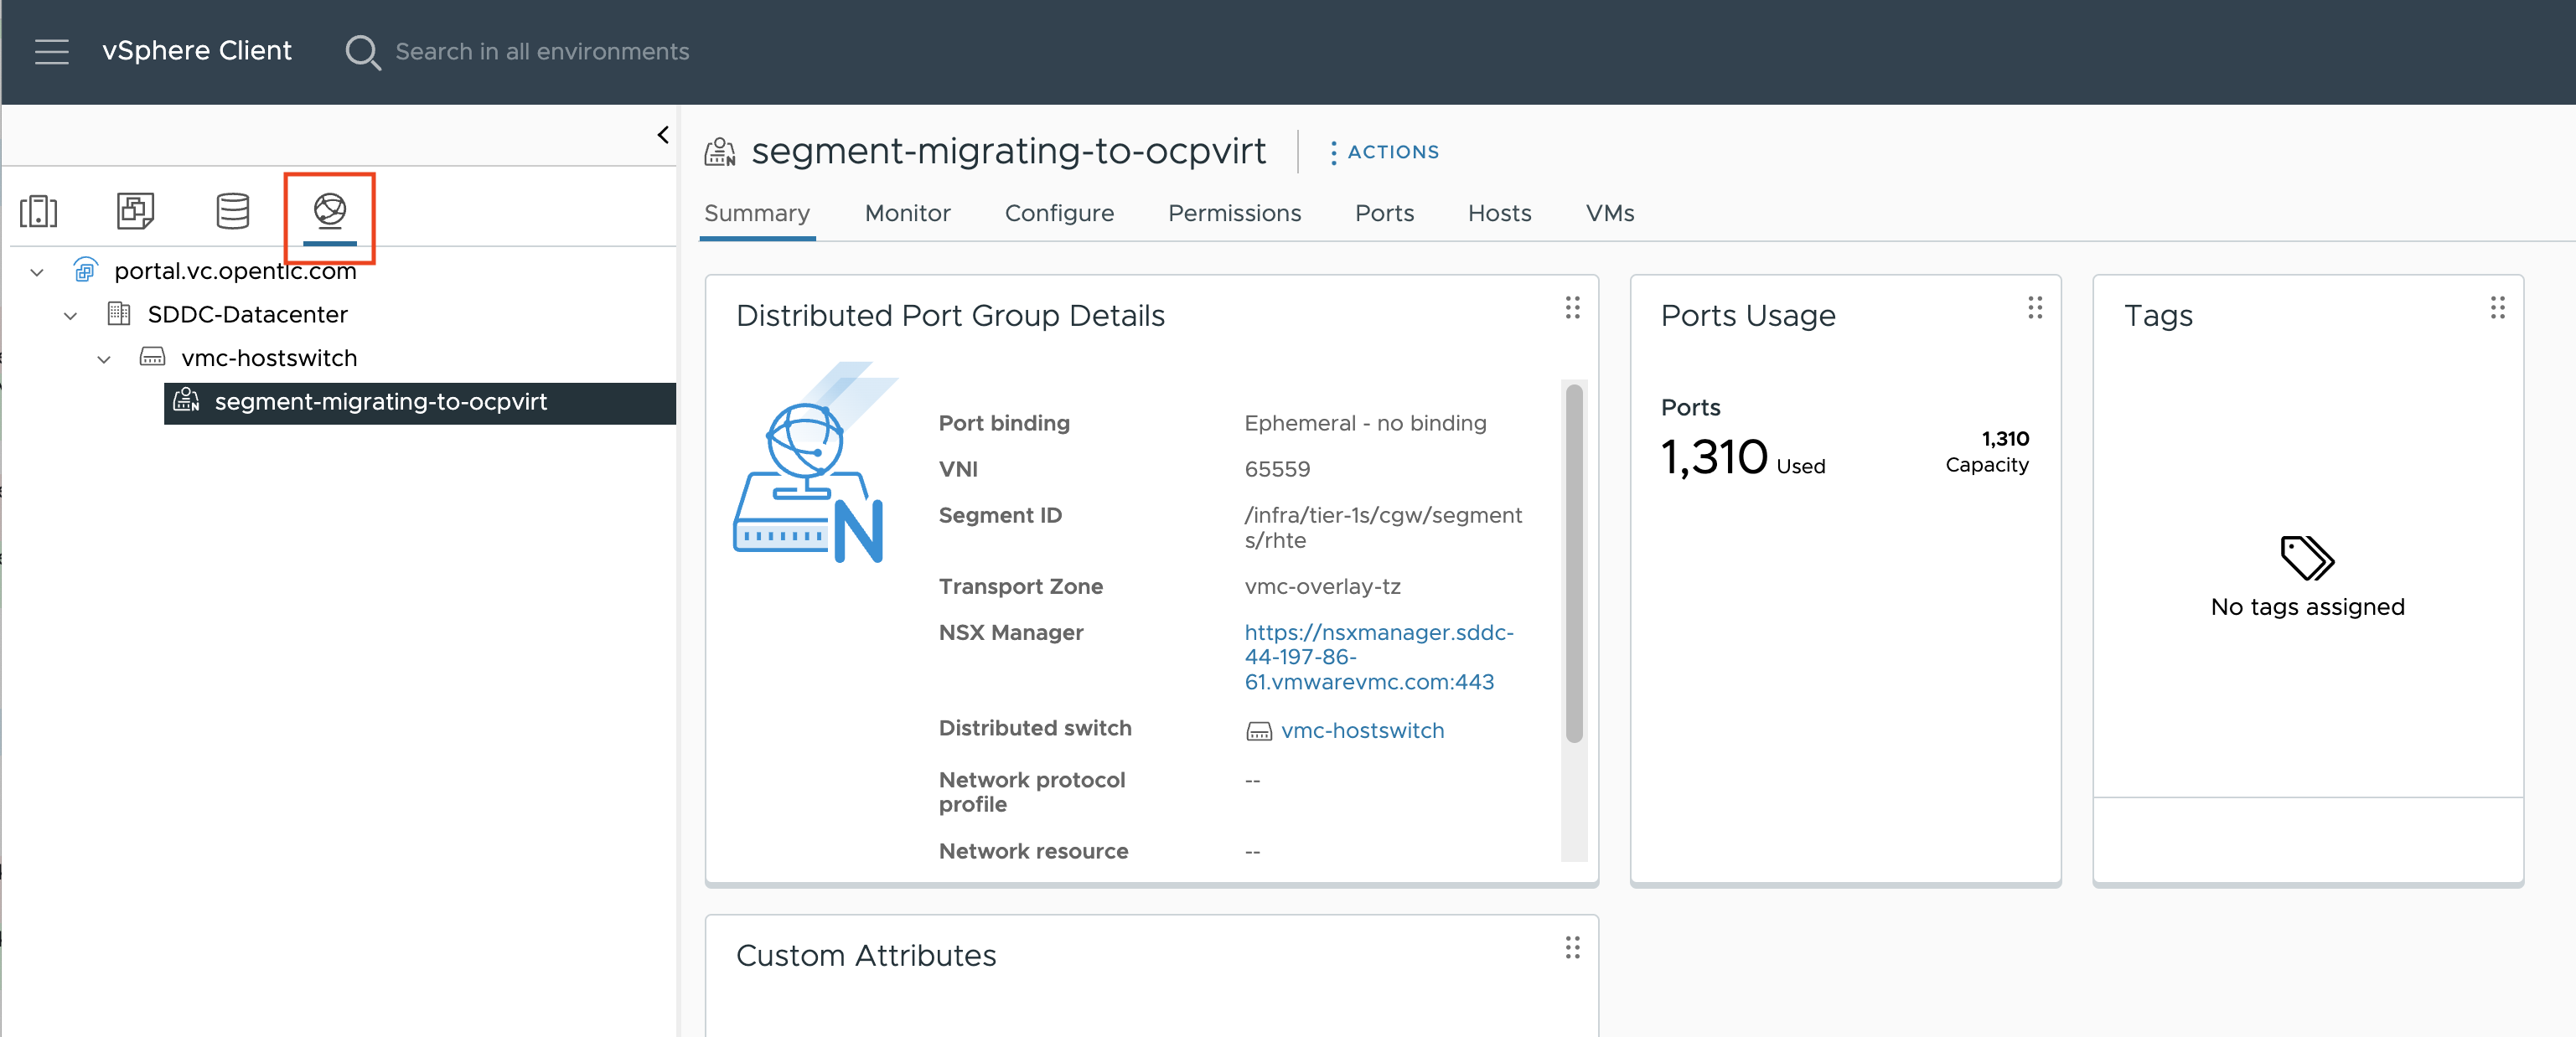
Figure 2 Finally, review the datastores in use by browsing to the Datastores view. Expand the tree to see the datastores that are attached to the SDDC-Datacenter, and optionally browse to the VMs sub-tab to view the capacity used by each virtual machine.
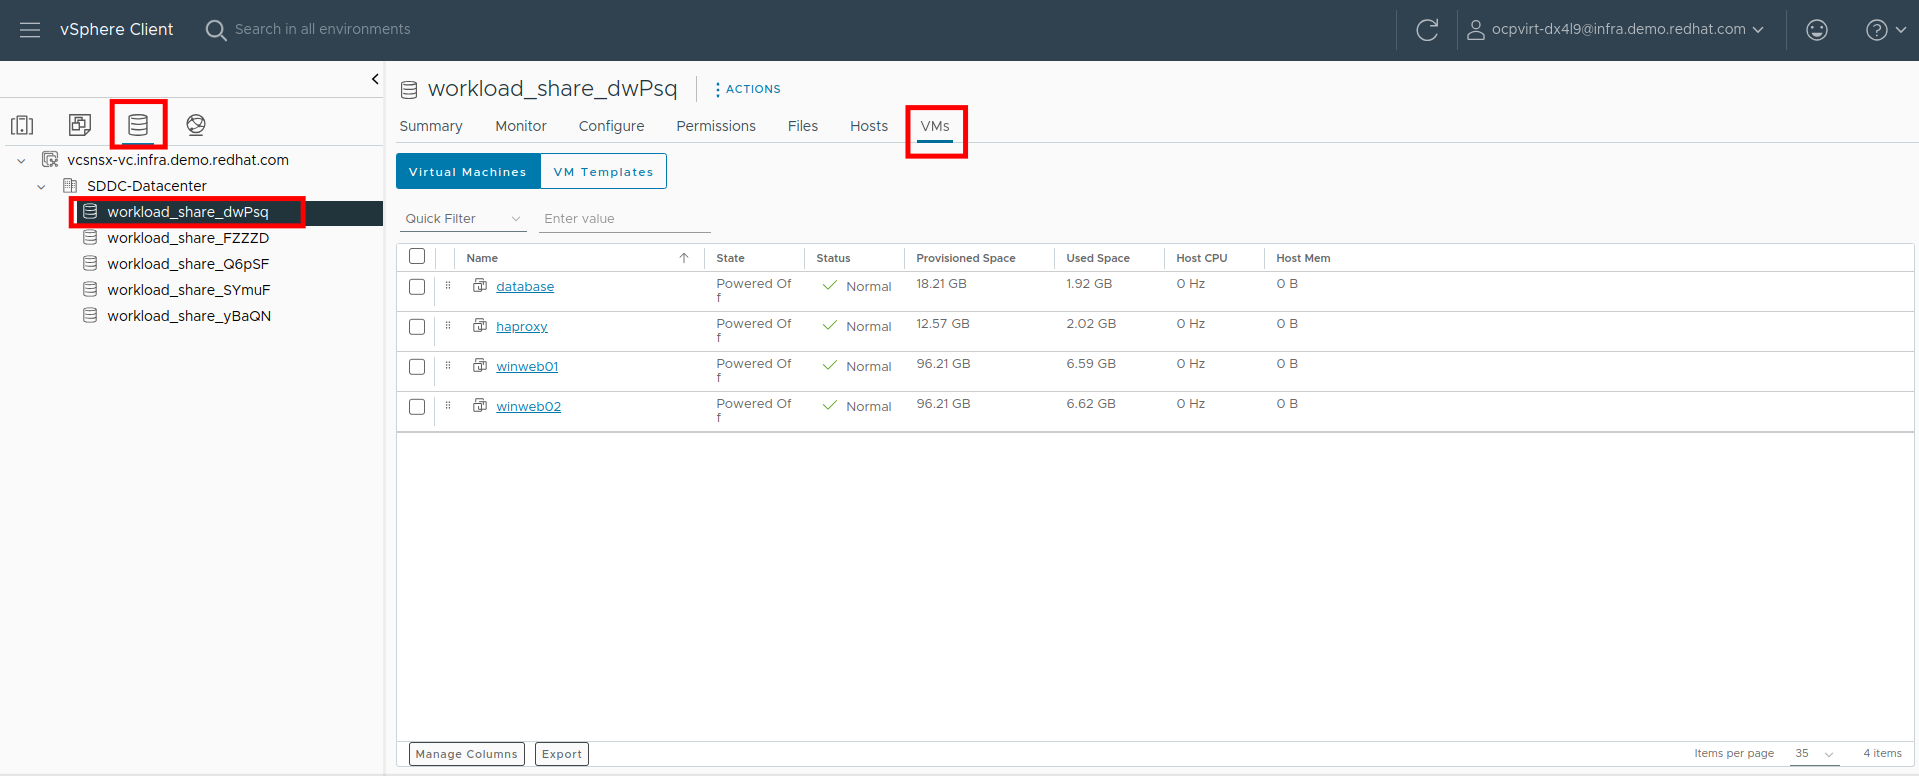
Figure 3
Review the VMware provider to the migration toolkit
The Migration Toolkit for Virtualization (MTV) uses the VMware Virtual Disk Development Kit (VDDK) SDK to transfer virtual disks from VMware vSphere. The VDDK has already been configured for you in this environment.
Navigate in the left menu to Migration → Providers for virtualization
Select project openshift-mtv (You may need to toggle the Show default projects slider (Figure 4).
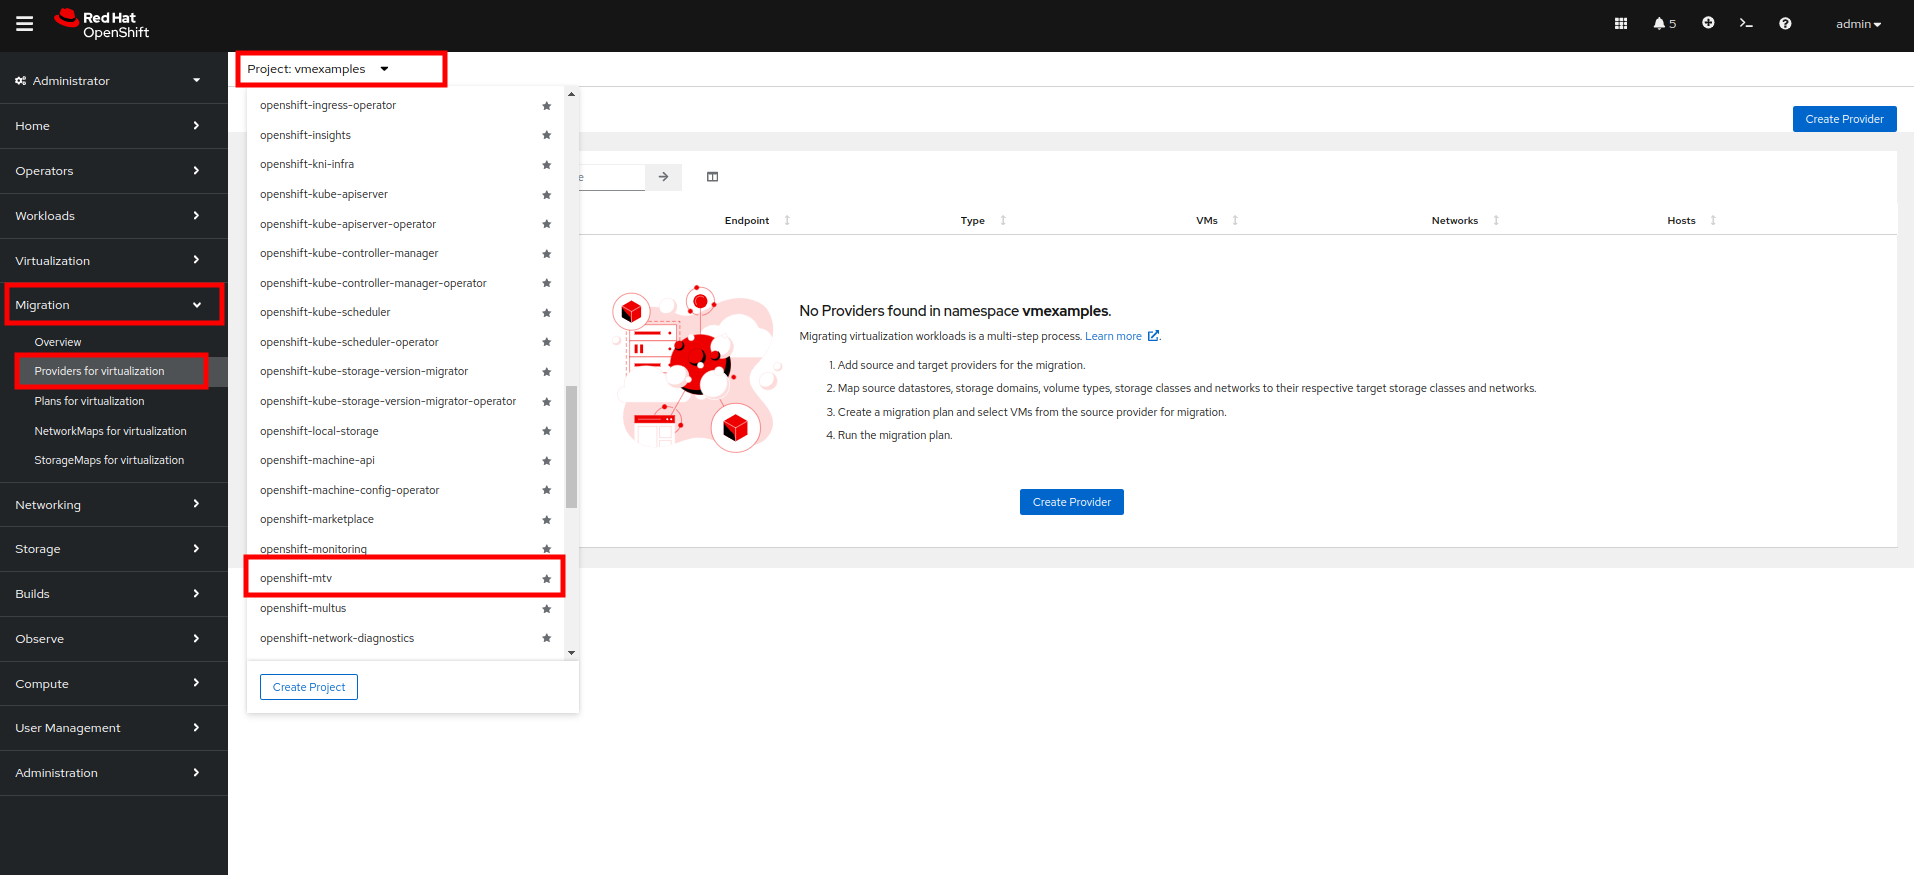
Figure 4 Tip: MTV 2.4 and later are project/namespace aware and do not require administrator privileges. You can delegate VM imports to application teams and VM users so that they can self-serve and migrate at their own pace!
By default, there is a provider called host which represents OpenShift Virtualization as a target platform (Figure 5).
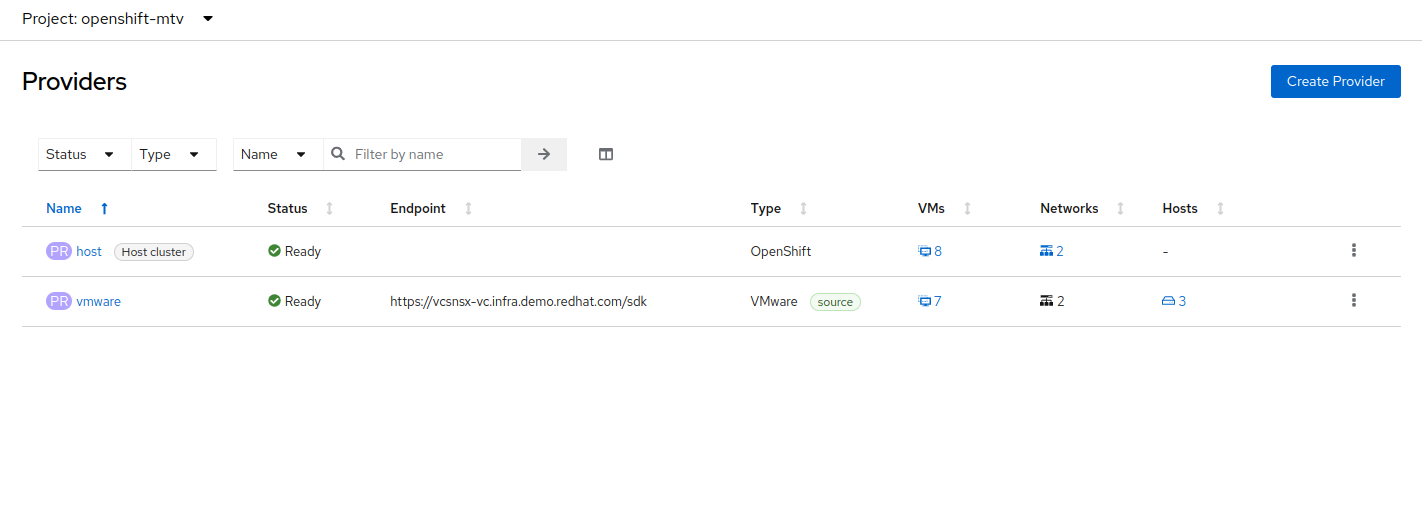
Figure 5 The lab is already configured with the VMWare provider named vmware and it is marked as a migration source.
Create a migration plan
Now that we have reviewed our environment, and have our providers created, it is time for us to create a Migration Plan. This plan selects which VMs to migrate from VMware vSphere to Red Hat OpenShift Virtualization and specifics about how to execute the migration.
Navigate in the left menu to Migration → Plans for virtualization and press Create plan (Figure 6).
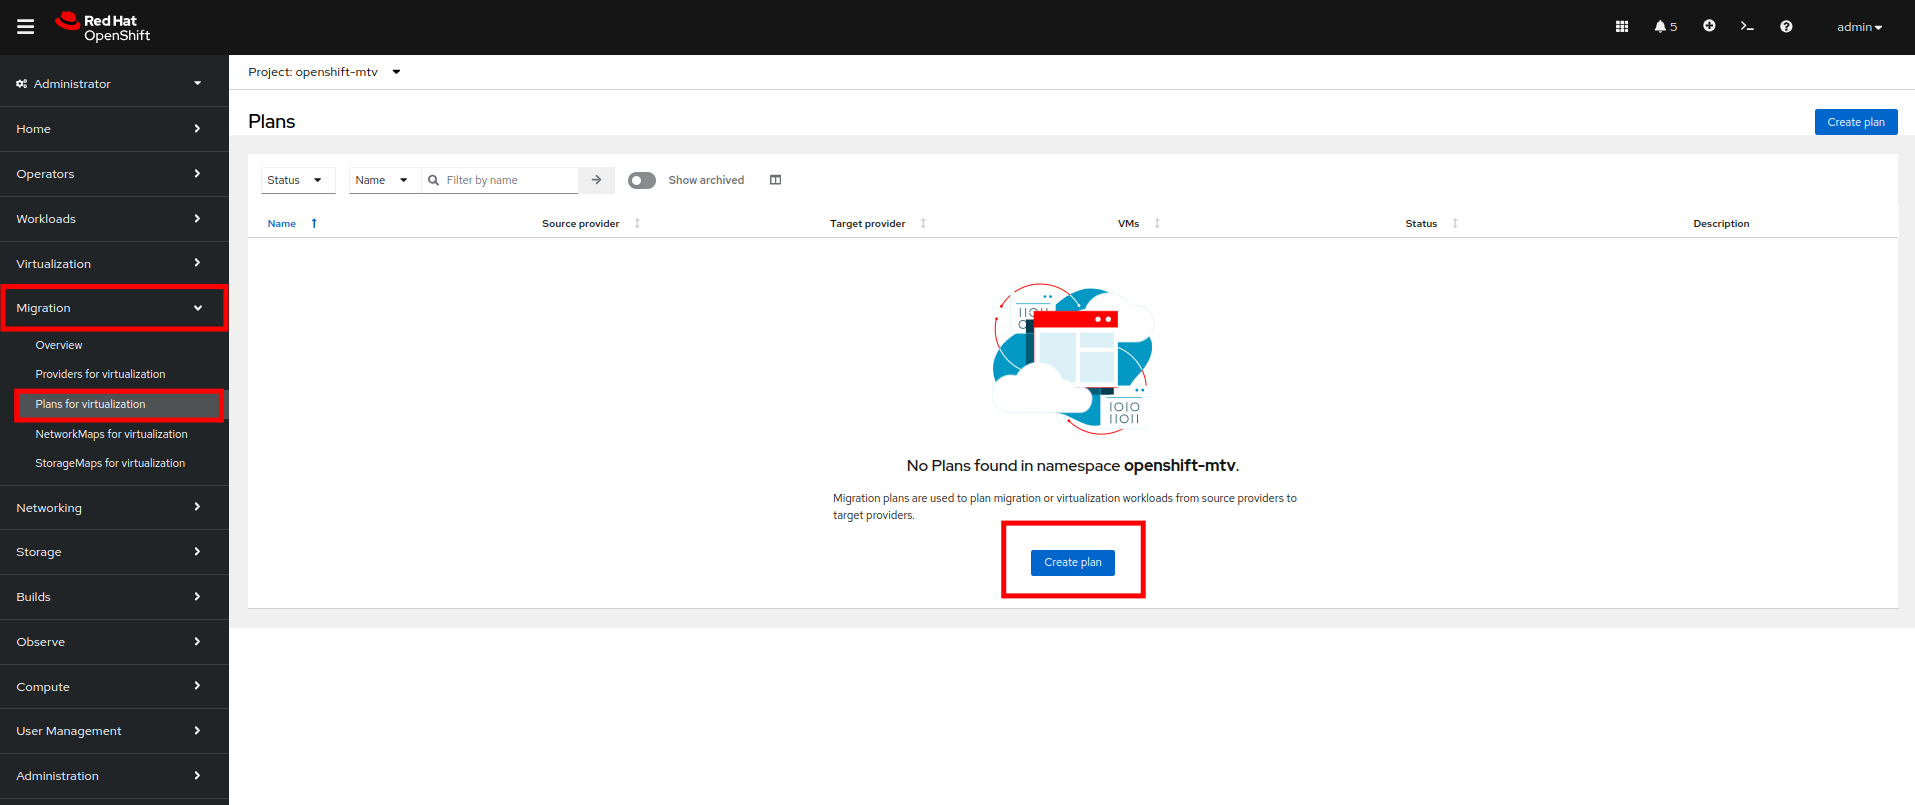
Figure 6 You will be asked to select the source provider that you intend to migrate from. Click on the VMware tile (Figure 7).
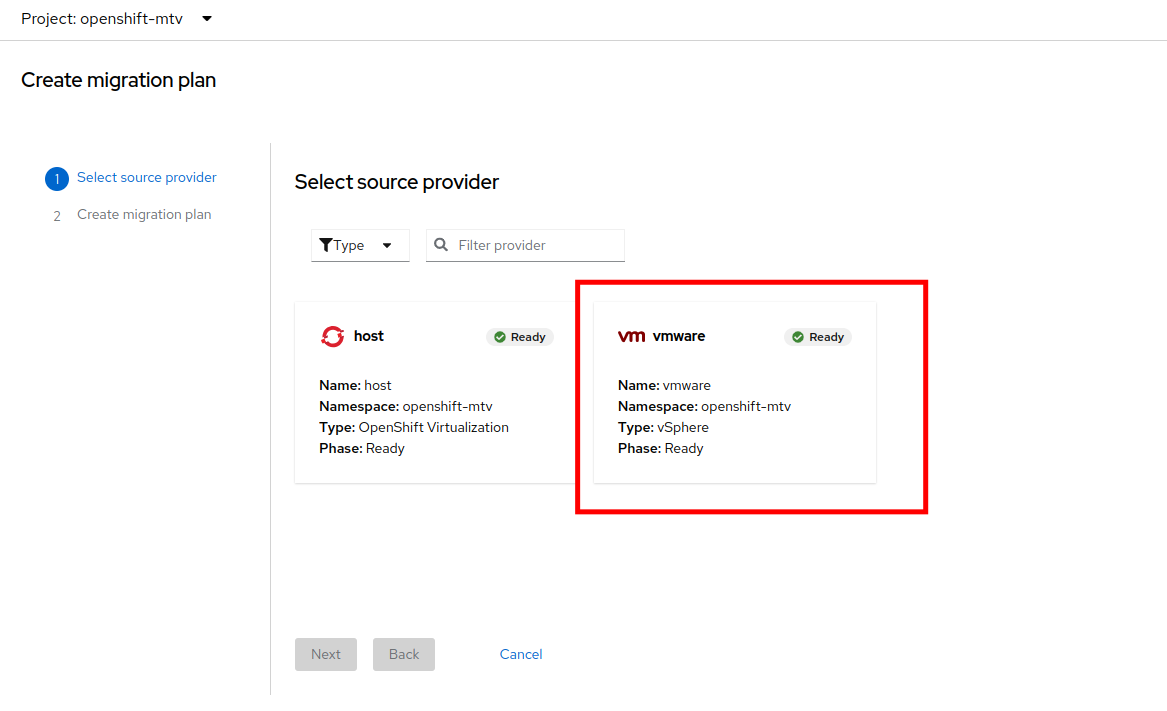
Figure 7 - On the next page select the three VMs you would like to move:
- database
- winweb01
- winweb02
Click Next (Figure 8).
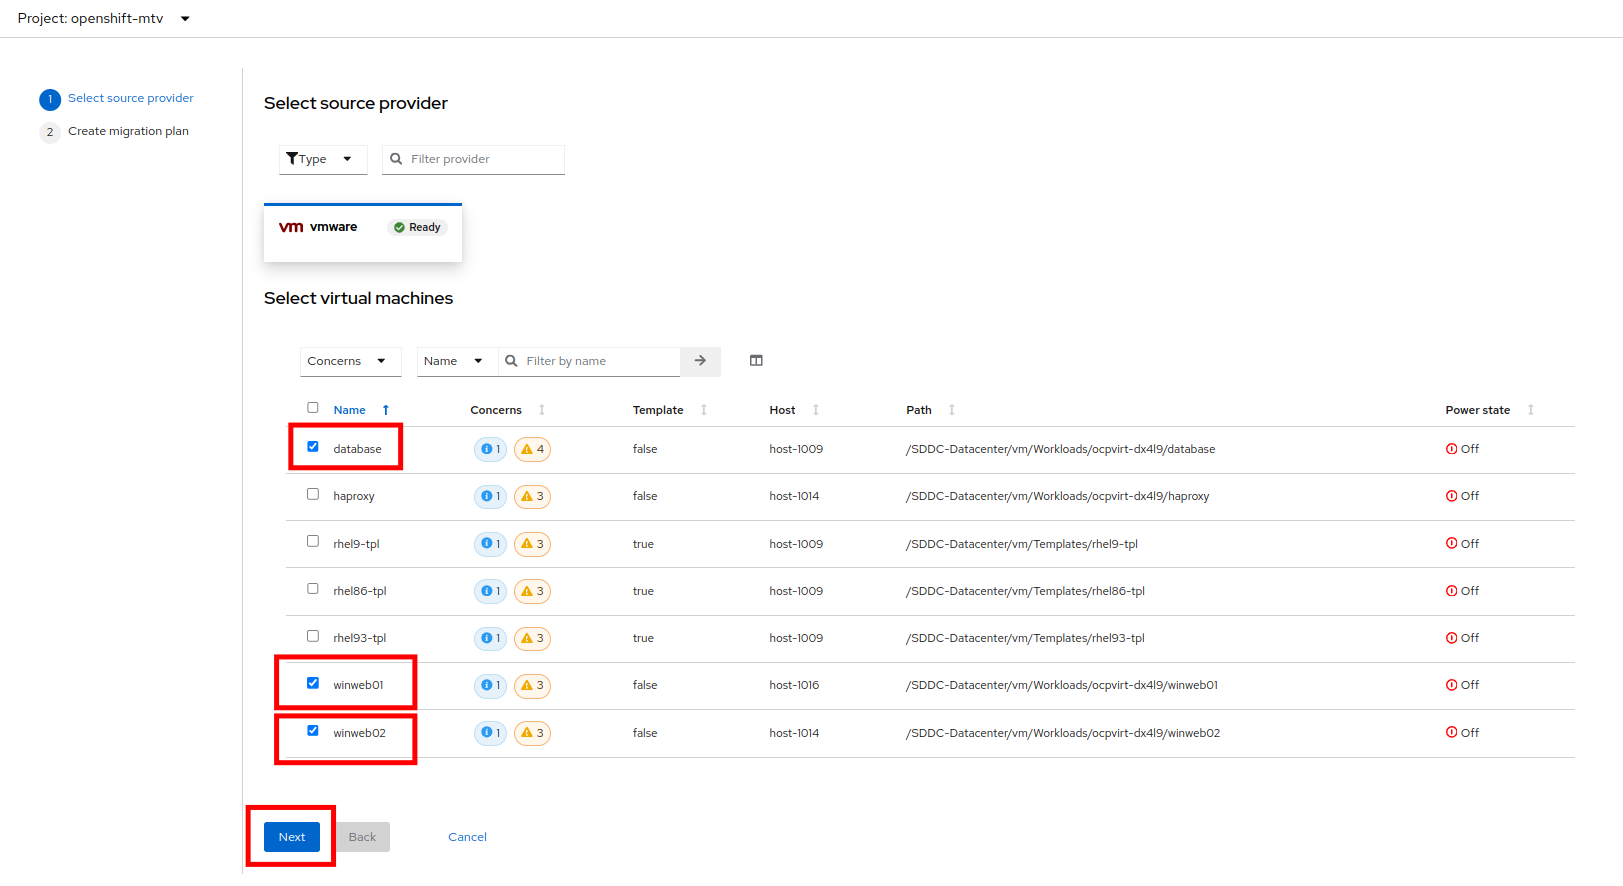
Figure 8 On the next screen you will be tasked with providing details for your migration plan. Several details will already be filled in for you, but you will have to make a few minor modifications to ensure that the VMs land in the correct namespace, and that the networks and storage options map correctly.
Please fill in your migration plan with the following values:
- Plan name: move-webapp-vmware
- Target namespace: vmexamples
- Network map: Pod Networking
Storage map: ocs-storagecluster-ceph-rbd-virtualization
Note: Both the Network and Storage map will automatically detect the Network and Datastore that the discovered virtual machines currently make use of on the source provider. You will just need to make sure that their respective values are set correctly on the OpenShift side.
Click Create migration plan (Figure 9).
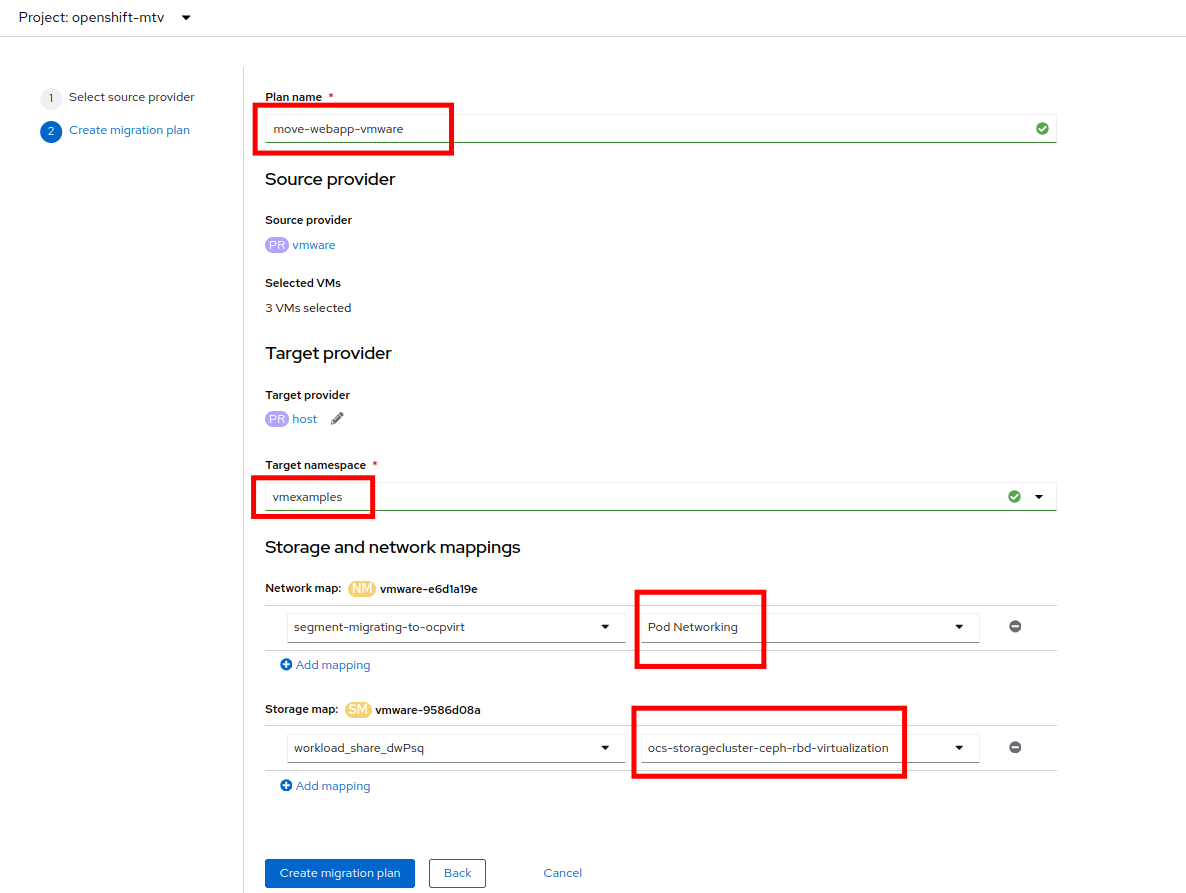
Figure 9 You will be taken to a new screen where you will see that the plan for migration is being made ready (Figure 10).
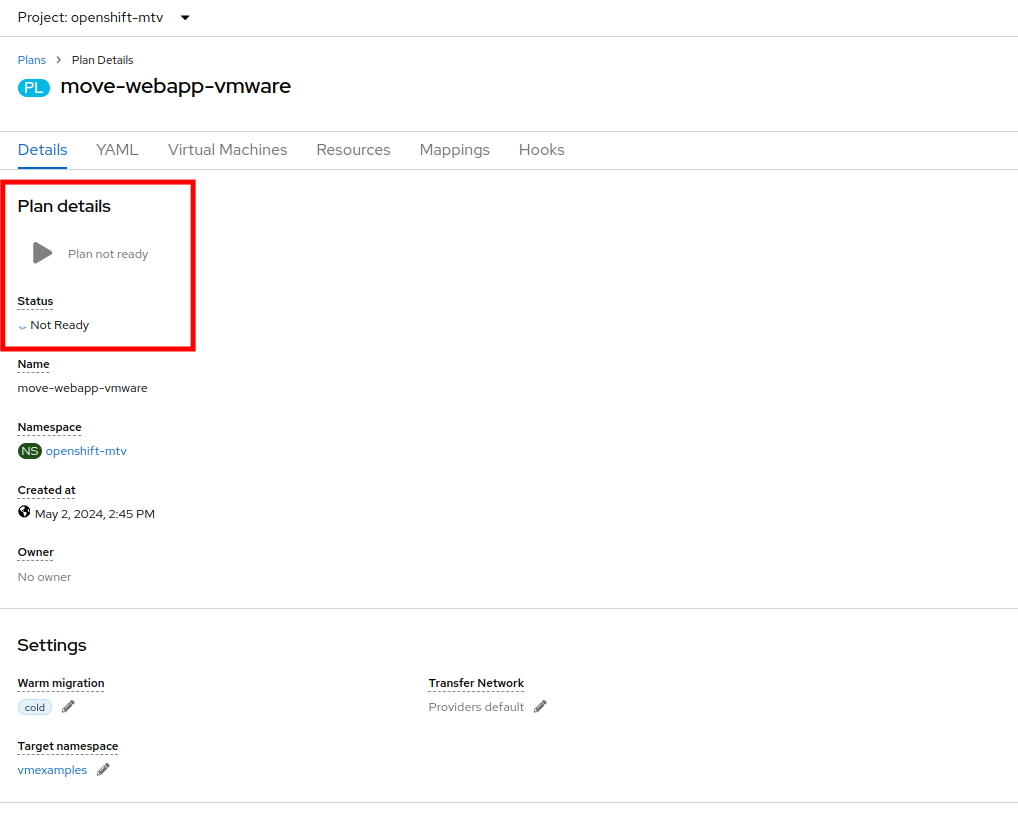
Figure 10 After a few moments the plan will become Ready, click on the green "Play" button in the center of the window to start the migration process (Figure 11).

Figure 11 You will be presented with a confirmation box to begin the migration, click on the Start button (Figure 12).
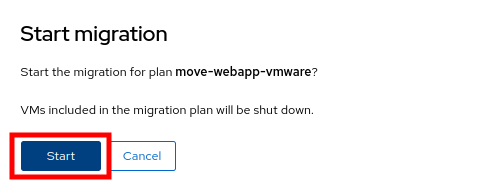
Figure 12 A progress bar will appear in the center of the screen along with the status of 0 of 3 VMs migrated (Figure 13).
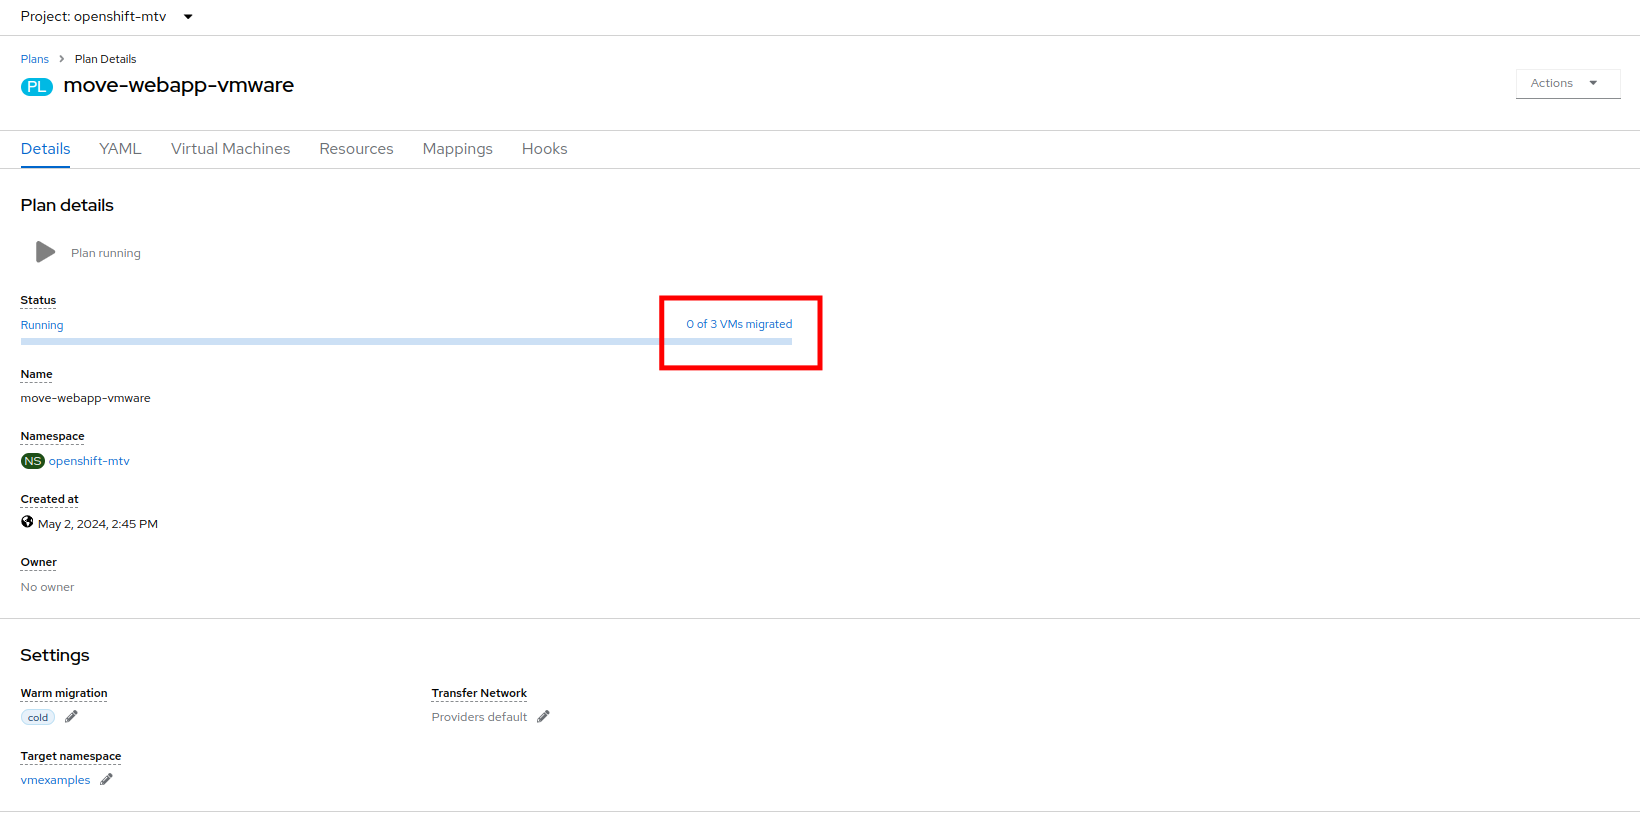
Figure 13 Click on the 0 of 3 VMs migrated link and you will be presented with a page with more details about the migration process (Figure 14).
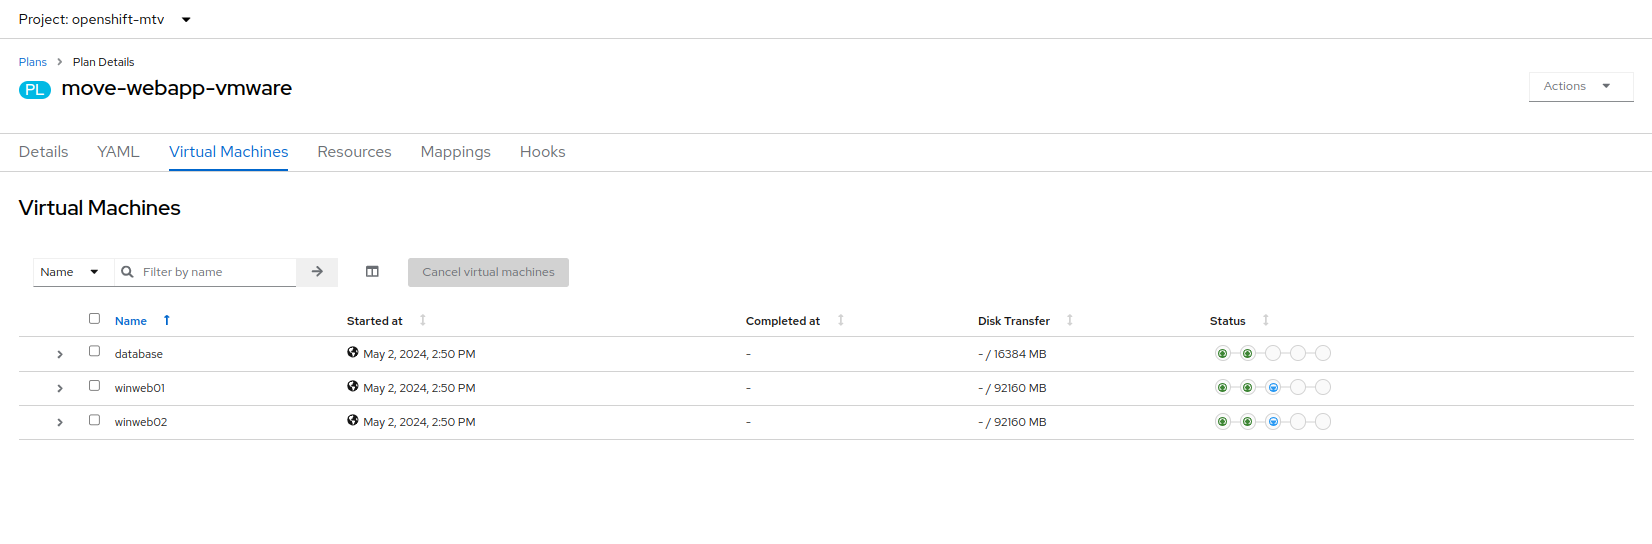
Figure 14 You can click the drop-down arrow next to the name of each VM being migrated to get additional details about the stages of the migration process (Figure 15).

Figure 15 Important: Having many participants performing the same task in parallel in a simulated lab environment can cause this task to perform much slower than in a real environment. For this lab instance we have limited the number of in-flight VMs to 1 at a time. Please be patient with this process as it completes. You may continue with other sections in the roadshow as the migrations complete.
After several minutes the migration has completed (Figure 16).
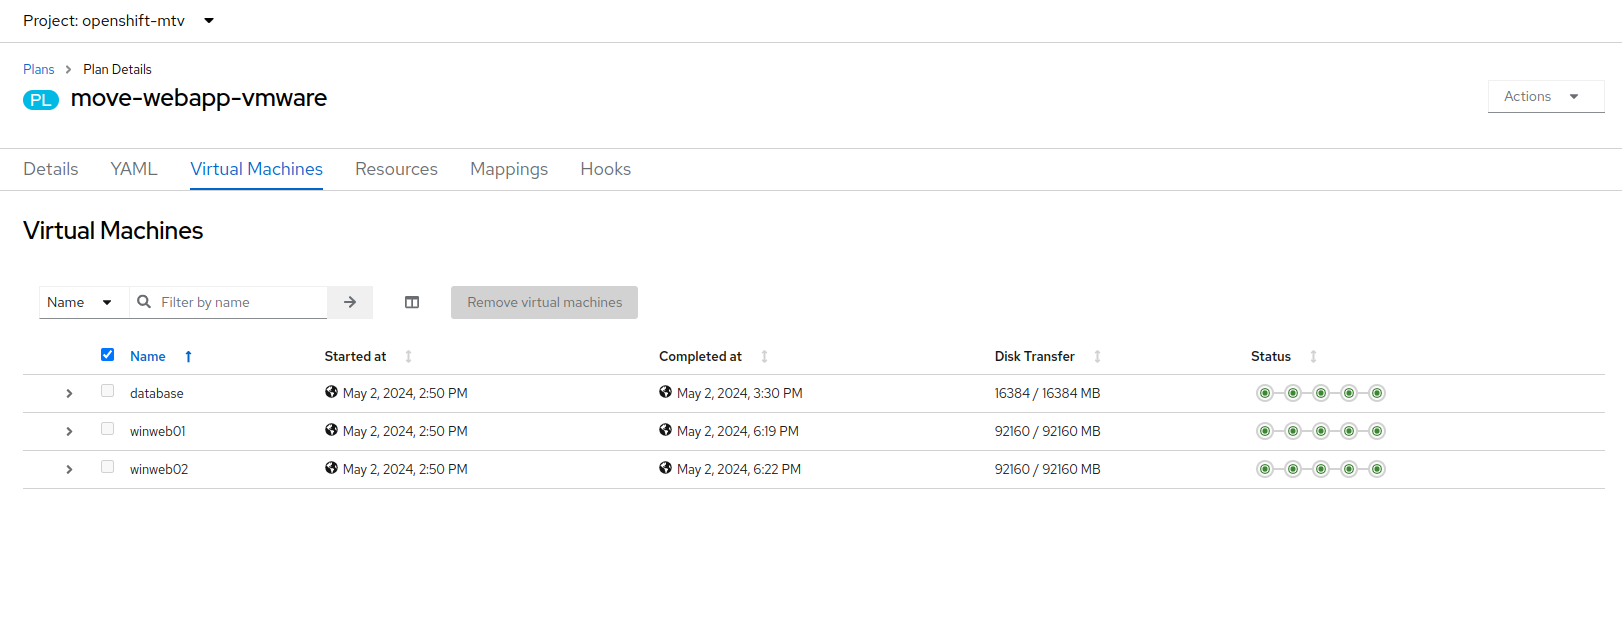
Figure 16 - The selected VMs have now been migrated and can be started on OpenShift Virtualization.
Summary
In this section, we explored the Migration Toolkit for Virtualization, and used it to assist with the migration of existing virtual machines from a VMware vSphere environment to OpenShift Virtualization. In addition to the Migration Toolkit for Virtualization, there are three other migration toolkits. The combination of these can be used to move many types of workloads into and within OpenShift clusters depending on your organization’s needs.
Migration Toolkit for Runtimes - Assist and accelerate Java application modernization and migration.
Migration Toolkit for Applications - Accelerate large-scale application modernization efforts to containers and Kubernetes.
Migration Toolkit for Containers - Migrate stateful application workloads between OpenShift clusters.
For more information about these other migration toolkits, please reach out to your Red Hat account team.
