
Integrating Okta with ROSA using OpenID Connect
This content is authored by Red Hat experts, but has not yet been tested on every supported configuration. This guide has been validated on OpenShift 4.22. Operator CRD names, API versions, and console paths may differ on other versions.
This guide demonstrates how to configure Okta as an OpenID Connect (OIDC) identity provider for Red Hat OpenShift Service on AWS (ROSA).
The configuration uses the built-in OpenShift OAuth server and an OpenID identity provider. After the integration is configured, users can authenticate to the OpenShift web console with their Okta credentials.
This guide configures Okta as an OpenID identity provider using the built-in OpenShift OAuth server. It does not cover the optional ROSA HCP External Authentication Provider feature (--external-auth-providers-enabled).
The Red Hat and Okta console interfaces may change over time. Screenshots and navigation paths in this guide may differ slightly from the current UI.
Architecture
The authentication flow looks like this:
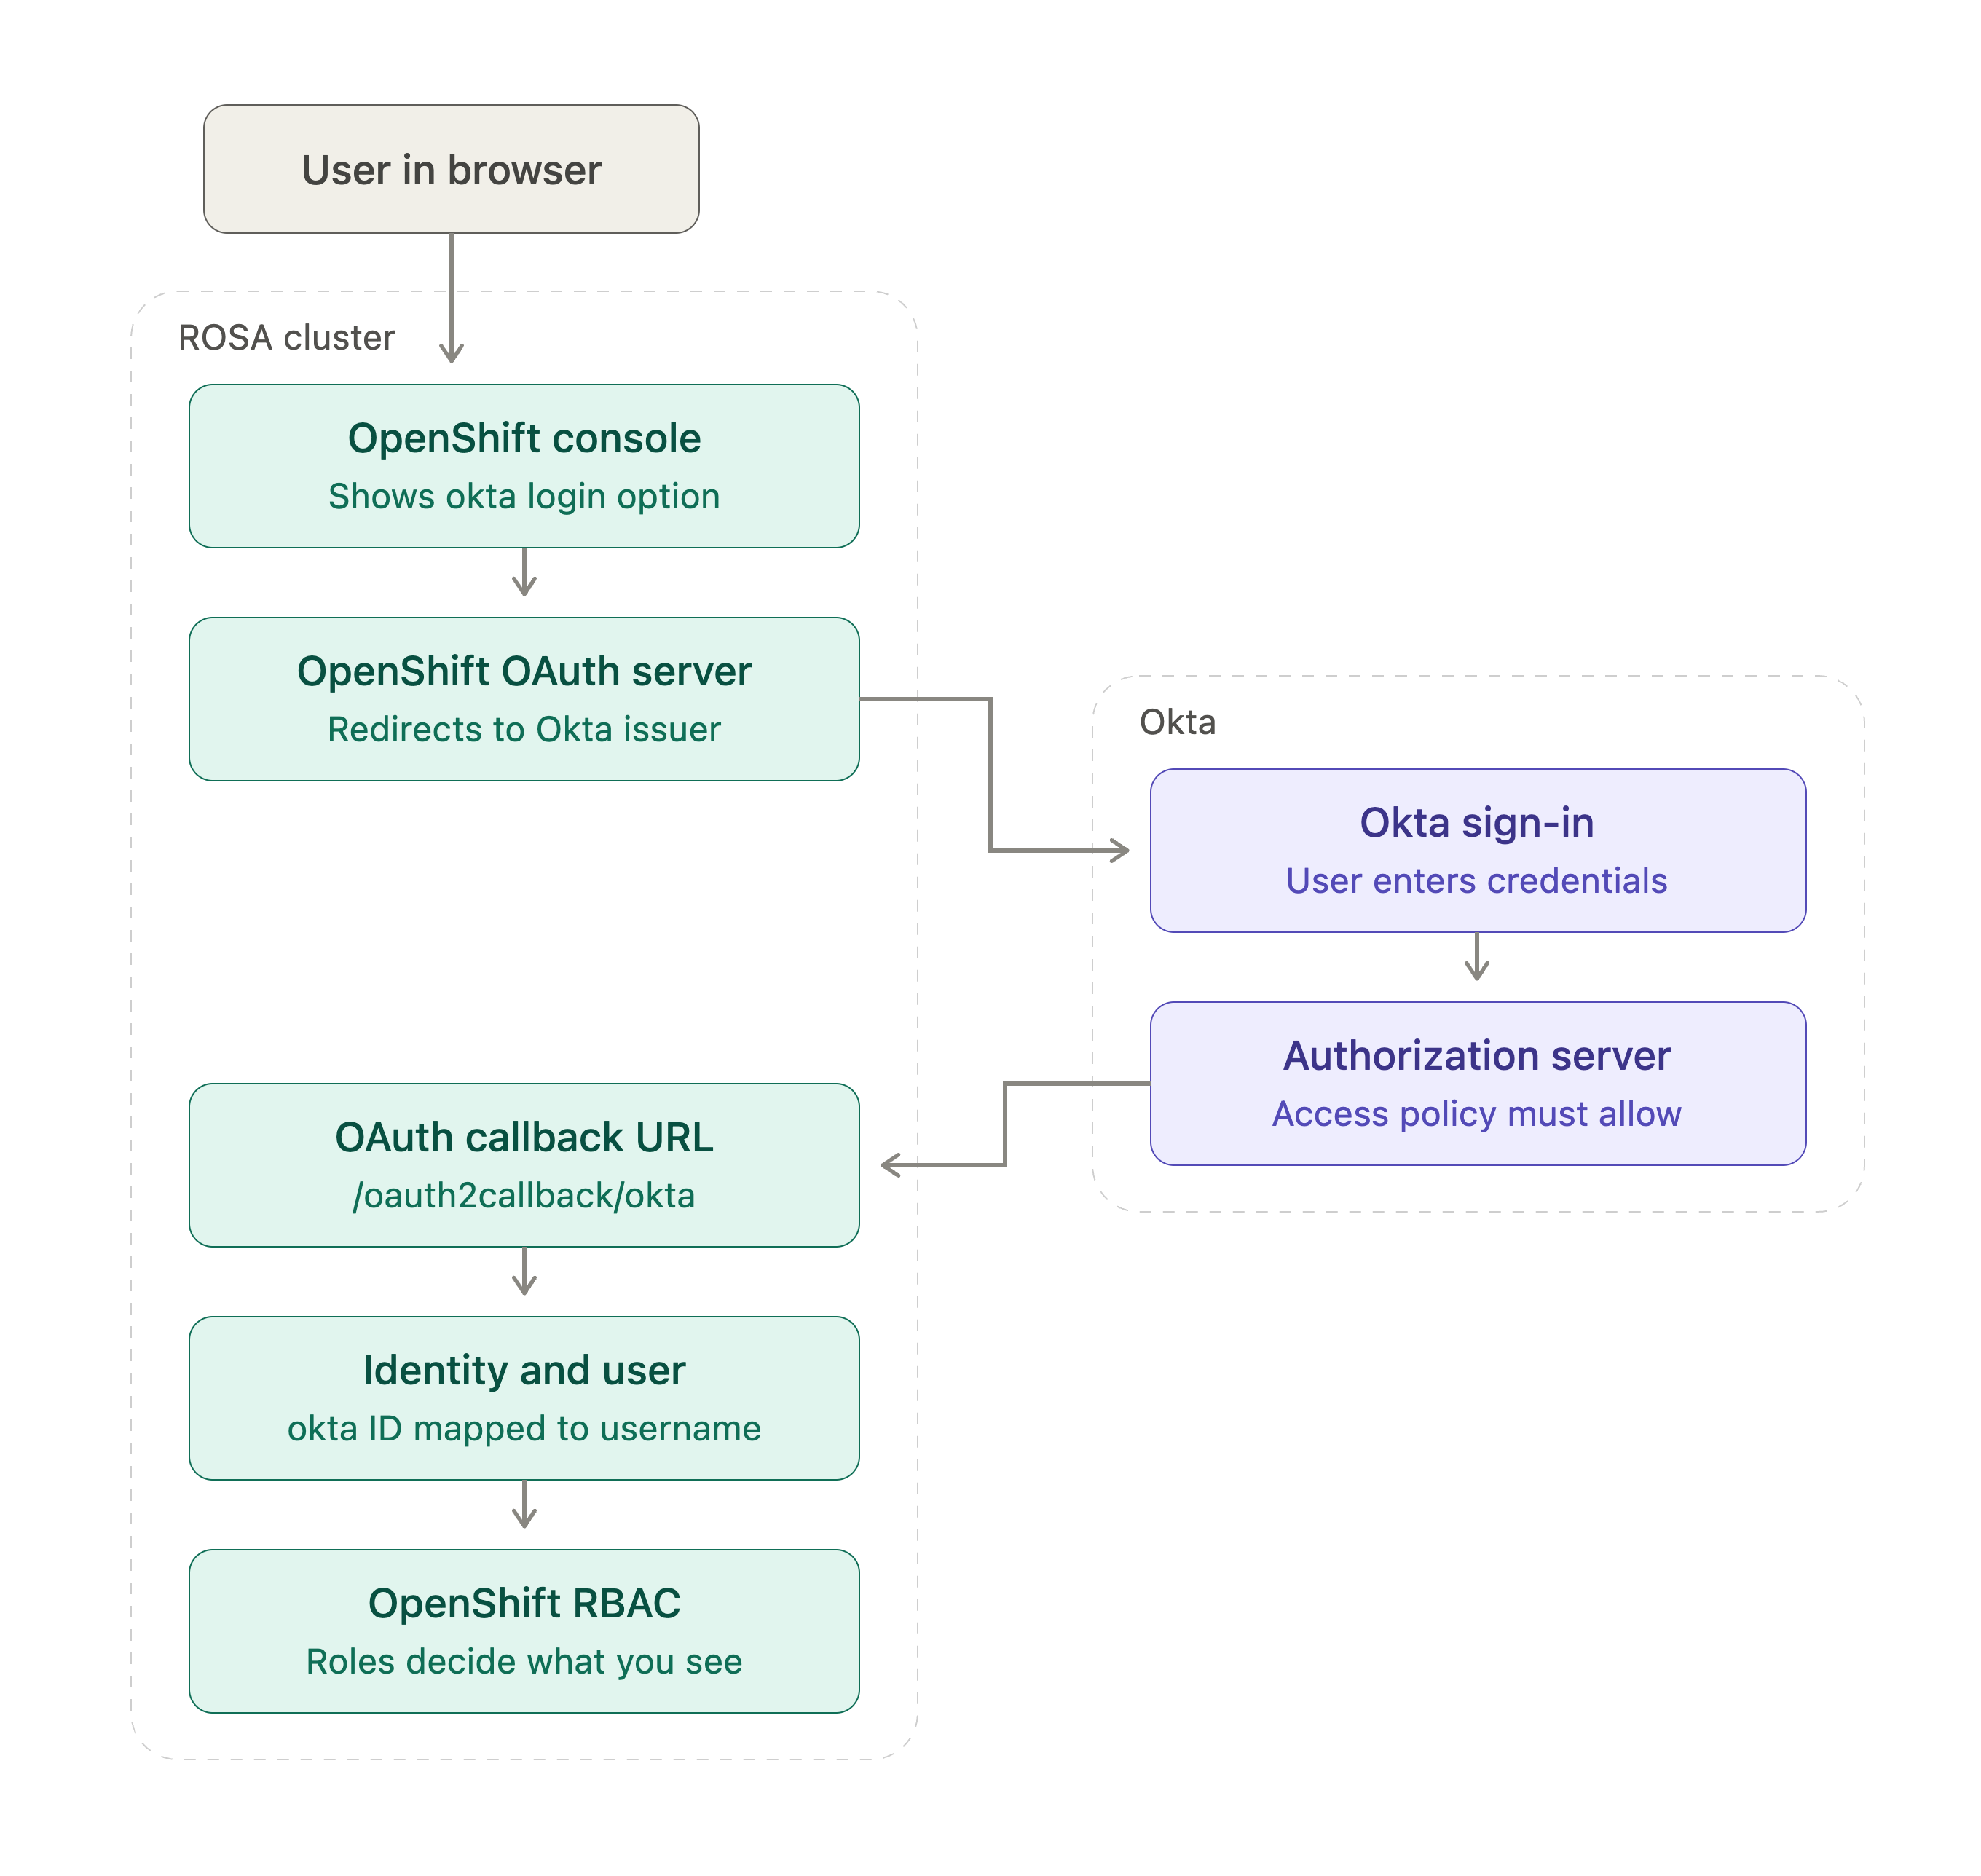
The Okta configuration itself is not specific to ROSA with Hosted Control Planes. The main cluster-specific value is the OpenShift OAuth callback URL.
Prerequisites
Before beginning, ensure that you have:
- A running ROSA cluster.
- An Okta organization.
- Permission to create or modify an OIDC application in Okta.
- Permission to configure identity providers on the ROSA cluster.
- The ROSA CLI , if using the CLI procedure.
- The
OpenShift CLI (
oc) . jqfor validating the OIDC discovery endpoint.
For testing, an Okta Integrator Free Plan can be used.
1. Create an OIDC application in Okta
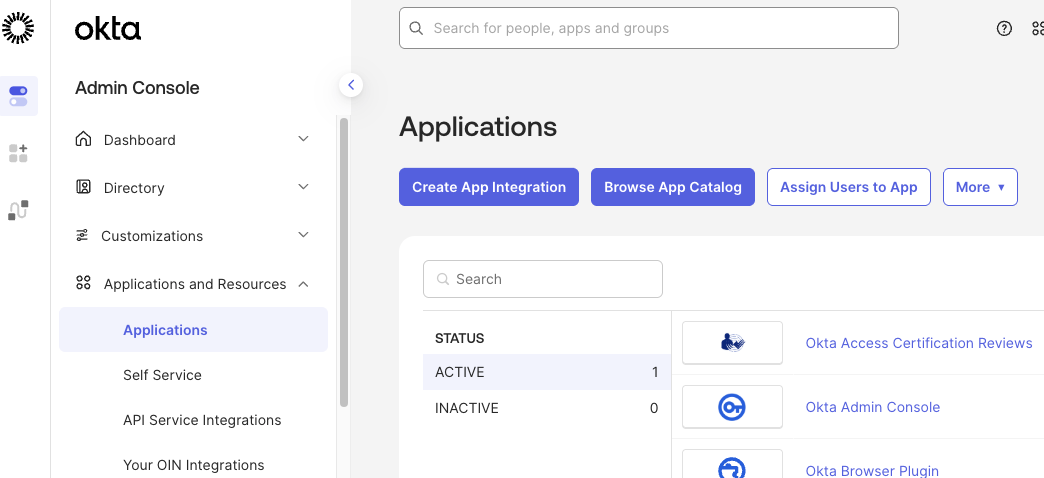
Log in to the Okta Admin Console and navigate to:
Applications -> Applications -> Create App Integration
Select:
- Sign-in method: OIDC - OpenID Connect
- Application type: Web Application
Click Next.
Configure the application:
- App integration name: for example,
ROSA HCP - Grant type: Authorization Code
- Controlled access: Configure according to your organization’s requirements
For a test environment, allowing all users in the Okta organization is sufficient.
The OpenShift OAuth callback URI is cluster-specific. If you do not yet know the callback URI, you can create the Okta application first and add the correct URI after configuring the ROSA identity provider.
Click Save.
2. Record the Okta client credentials
After the application is created, record the following values:
- Client ID
- Client secret
For CLI configuration, export the values as environment variables:
3. Determine the Okta issuer URL
The issuer URL depends on the Okta authorization server being used.
For example, when using the default custom authorization server:
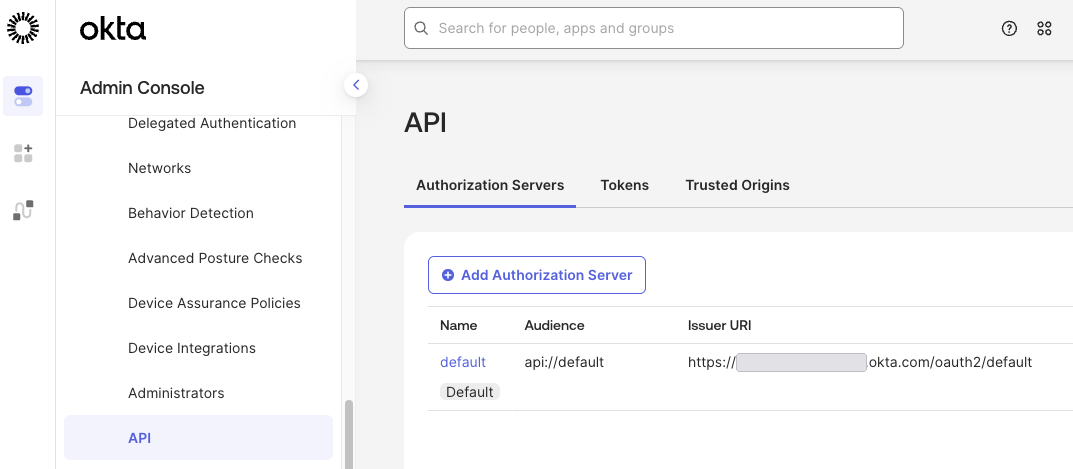
You can find the issuer in:
Security -> API -> Authorization Servers
Validate the OIDC discovery endpoint:
Example output:
Verify that the returned issuer exactly matches the issuer URL that will be configured in ROSA.
4. Configure the ROSA identity provider
Set the cluster name:
Create an OpenID identity provider named okta:
Example output:
Use the OAuth callback URI returned by ROSA exactly as displayed.
Do not construct the callback URL from the OpenShift console URL. The callback endpoint can differ from the normal *.apps route pattern, and Okta requires the redirect URI to match a registered URI.
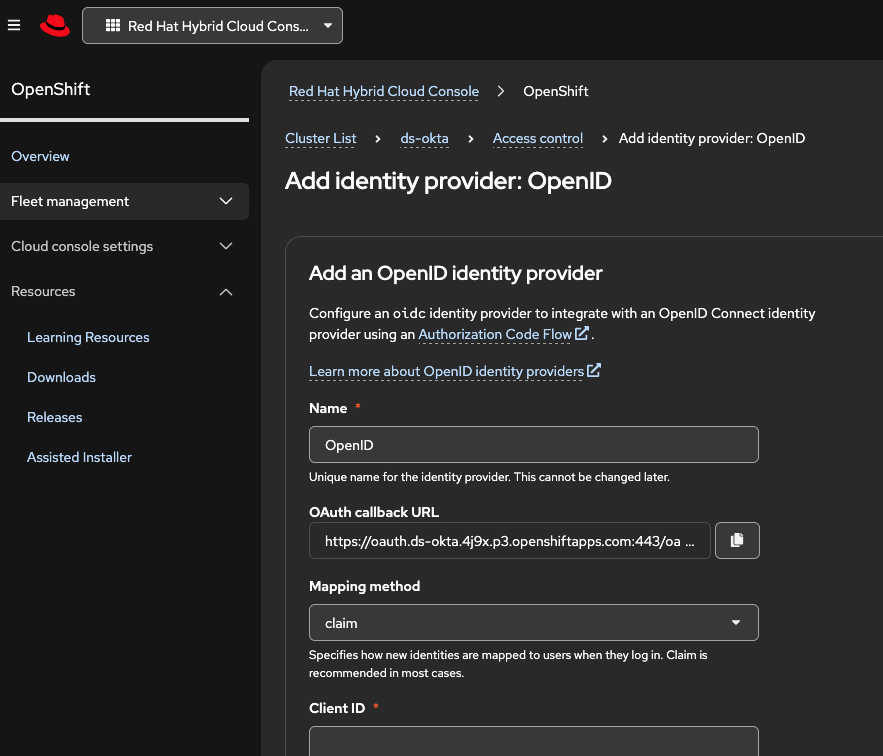
Alternatively, the identity provider can be configured using OpenShift Cluster Manager under:
Cluster -> Access control -> Identity providers -> Add identity provider -> OpenID
The OCM interface also displays the OAuth callback URL that must be configured in Okta.
5. Add the ROSA callback URL to Okta
Return to:
Applications -> Applications -> <ROSA application> -> General
Under Sign-in redirect URIs, add the callback URI displayed by ROSA or OCM.
For example:
Save the change.
An existing Okta OIDC application used by another OpenShift cluster can technically contain multiple redirect URIs.
However, using a separate Okta application for each environment can provide cleaner separation for client secrets, authorization policies, redirect URIs, lifecycle management, and troubleshooting.
6. Configure the Okta authorization server access policy
When using a custom authorization server, ensure that the Okta authorization server has an access policy permitting the ROSA application to use the Authorization Code flow.
Navigate to:
Security -> API -> Authorization Servers -> <authorization-server> pencil icon -> Access Policies
Create or select an access policy that applies to the ROSA OIDC application.
For a simple test configuration, create a rule with:
- Grant type: Authorization Code
- User: Any user assigned the app
- Scopes: Any scopes
- Inline hook: None
Click Create rule.
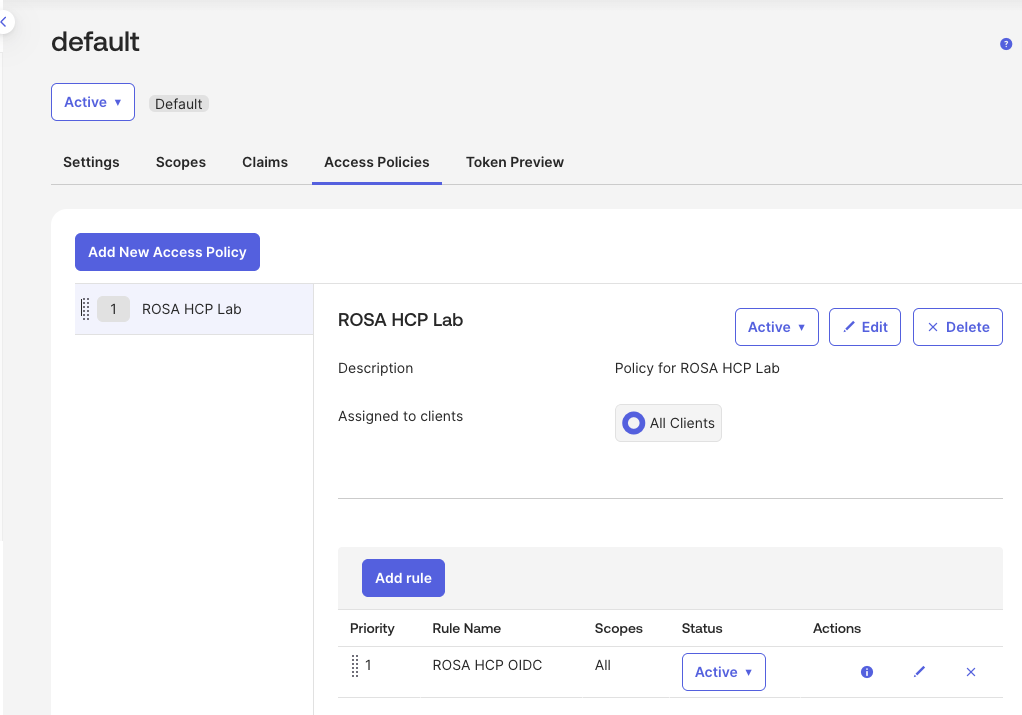
New Okta Integrator Free Plan organizations provide a default custom authorization server, but the server does not include a basic access policy by default.
Without an applicable policy and rule, authentication can fail with:
This is an Okta authorization-server policy failure rather than a ROSA authentication failure.
For production environments, configure the authorization policy according to your organization’s security requirements rather than using a broad test rule.
7. Verify the ROSA identity provider
Verify that the identity provider exists:
Allow several minutes for the cluster authentication configuration to reconcile.
Open the OpenShift web console.
The login page should present an okta identity provider.
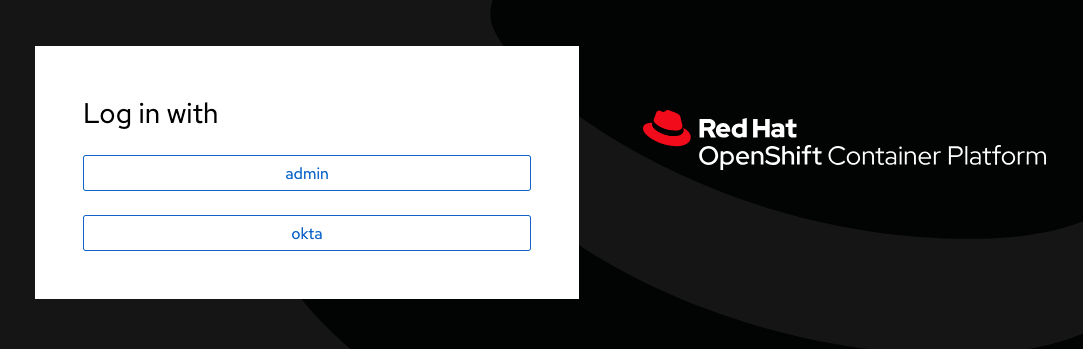
Select okta and authenticate using an assigned Okta user.
After authentication succeeds, the browser returns to the OpenShift OAuth callback and the user is logged in to the cluster.
8. Verify the OpenShift user and identity
Using an account with sufficient privileges, inspect the OpenShift users:
Then inspect identities:
Example:
The OpenShift username is populated from the configured preferred_username claim.
9. Configure authorization
Authentication and authorization are separate.
A user who successfully authenticates through Okta does not automatically receive administrative permissions inside OpenShift.
For a simple lab test, an administrator can grant cluster-admin to an individual user:
Granting cluster-admin directly to an individual user is shown only as a simple validation example.
Production environments should follow the organization’s RBAC model and generally assign appropriate roles to groups rather than granting every authenticated user cluster-wide administrative access.
For example:
OpenShift Groups, RoleBindings, and ClusterRoleBindings can also be managed declaratively through mechanisms such as Red Hat Advanced Cluster Management (ACM) governance policies or GitOps.
Receiving an Okta groups claim does not by itself create and maintain OpenShift Group objects.
If Okta is the source of truth for group membership, use an appropriate group synchronization mechanism and manage the OpenShift RoleBindings or ClusterRoleBindings separately.
Troubleshooting
The okta login option does not appear
Verify that the identity provider exists:
Allow several minutes for the authentication configuration to reconcile.
If you have cluster access, inspect the authentication ClusterOperator:
Okta reports a redirect URI error
Verify that the Sign-in redirect URI configured in Okta exactly matches the callback URI provided by ROSA.
Pay attention to:
- Hostname
- Port
- Identity provider name
/oauth2callback/<idp-name>path
Okta returns Policy evaluation failed for this request
Example:
Check:
Security -> API -> Authorization Servers -> Access Policies
Ensure that an access policy applies to the ROSA application and that its rules allow the Authorization Code grant and the requested scopes.
OIDC discovery fails
Test the issuer:
Failures can indicate:
- DNS problems
- Firewall filtering
- Proxy configuration
- TLS inspection or certificate trust problems
- An incorrect issuer URL
Okta login succeeds but the OpenShift console shows very little
Authentication has succeeded, but the user likely has insufficient OpenShift RBAC permissions.
Verify the user:
Then inspect the user’s access:
Configure the appropriate RoleBinding or ClusterRoleBinding according to the intended access level.
Private or restricted-egress ROSA clusters
For clusters with restrictive outbound networking, ensure that the environment can reach the Okta OIDC endpoints required by the configured authorization server.
At minimum, use the OIDC discovery document to identify the issuer’s relevant endpoints:
If HTTPS traffic is subject to TLS inspection, ensure the cluster trusts the CA used by the inspection infrastructure where required.
Shared VPC considerations
ROSA with Hosted Control Planes Shared VPC does not use a different OpenID authentication mechanism.
Shared VPC primarily changes ownership and management of AWS networking resources and IAM responsibilities between the VPC owner and cluster creator.
The Okta integration still consists of:
- Okta OIDC application
- OpenShift OpenID identity provider
- Cluster-specific OAuth callback URL
However, networking controls in the shared VPC must still permit the connectivity required for a successful authentication flow.
Cleanup
To remove the identity provider:
Confirm the identity provider is removed:
You can then remove the corresponding Okta application or its ROSA redirect URI if it is no longer required.
