
GCP Windows PAYG activation on OSD - OpenShift Virtualization
This content is authored by Red Hat experts, but has not yet been tested on every supported configuration. This guide has been validated on OpenShift 4.21. Operator CRD names, API versions, and console paths may differ on other versions.
Activate a Windows guest with Google PAYG on OSD CCS + C3 metal: Datacenter golden image, tag metal host, then KMS / slmgr.
Prerequisites
- An OpenShift Dedicated CCS cluster on Google Cloud with Workload Identity Federation (WIF). See the product docs for creating an OSD GCP cluster with WIF .
- OpenShift Virtualization installed on that cluster
- A C3 metal worker (
hyperdisk-balanced) and a Hyperdisk StorageClass - CLIs:
oc,virtctl, andgcloud
Step 0: Environment
Expected output:
Log into the OSD cluster as a user with cluster-admin (CCS) privileges before using oc. See
Accessing your cluster
and
managing admin roles
.
- Open the cluster in OpenShift Cluster Manager , then Open console.
- In the OpenShift web console, open your user menu → Copy login command → Display Token, then run the printed
oc logincommand locally (or paste your token and API URL):
Expected output:
Confirm you are on the intended cluster context before continuing.
Expected output:
Step 1: Tag the metal host (day-2)
Expected output:
Step 2: Private Google Access and KMS reachability
Expected output:
If False:
Expected output:
Route KMS via default internet gateway (not Cloud NAT)
OSD worker Cloud NAT can make TCP :1688 succeed while slmgr /ato returns 0xC004F074. Add a host route so 35.190.247.13/32 uses the default internet gateway (with PGA) so Google associates the request with the licensed metal instance:
Expected output:
Expected output: at least one NAT whose source ranges cover the worker subnet (or all subnetworks).
Expected output:
Step 3: Datacenter golden image
3.1 Download ISOs
-
Windows Server 2025 Eval
→ Datacenter (Desktop Experience) →
$WIN_ISO_PATH - VirtIO:
stable virtio-win.iso
→
$VIRTIO_ISO_PATH
Expected output:
3.2 Default StorageClass
Expected output:
3.3 Upload ISOs
Expected output:
3.4 Create installer VM
Expected output:
3.5 Install Windows
Console: Virtualization → windows-manual-install → Console
(or virtctl vnc --proxy-only windows-manual-install -n default → TigerVNC 127.0.0.1:<port from JSON>)
3.5.1 Boot from the Windows ISO (UEFI)
If the console shows the EDK2 / OpenShift Virtualization firmware menu (not Windows Setup yet):
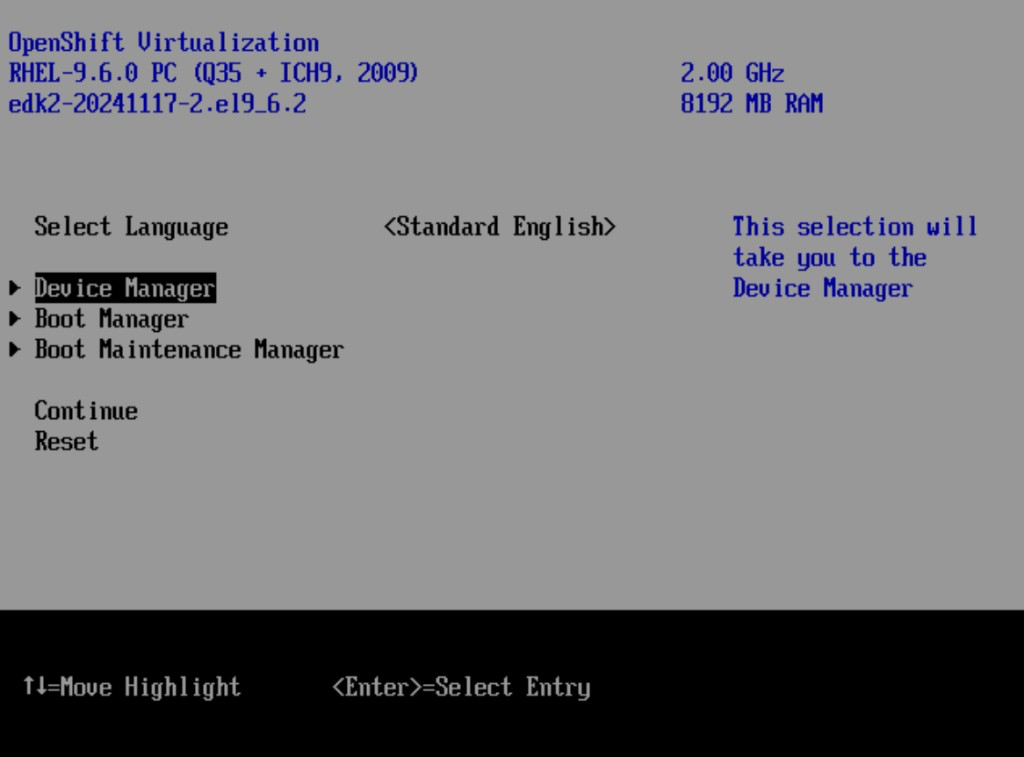
- Select Boot Manager → Enter
- Choose a UEFI QEMU DVD-ROM entry (there are usually two: Windows ISO and VirtIO ISO):
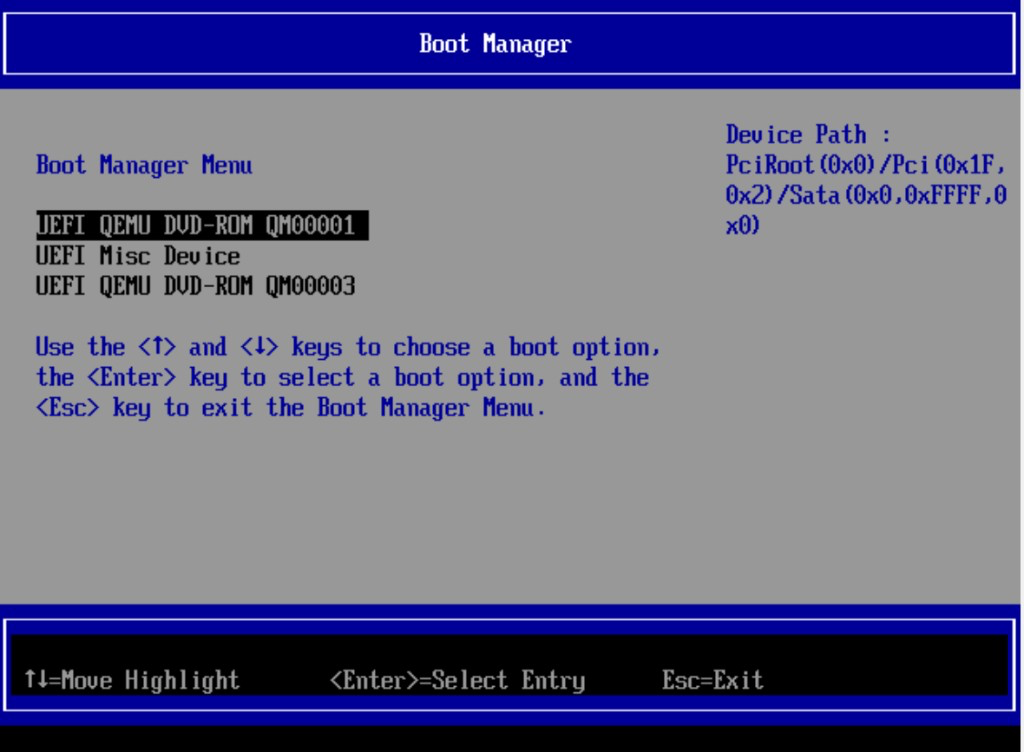
- Try
UEFI QEMU DVD-ROM QM00001first. If Windows Setup does not start, Esc and tryQM00003. - Skip UEFI Misc Device (that is the blank disk).
Expected: Windows Server Setup appears.
3.5.2 Select setup option
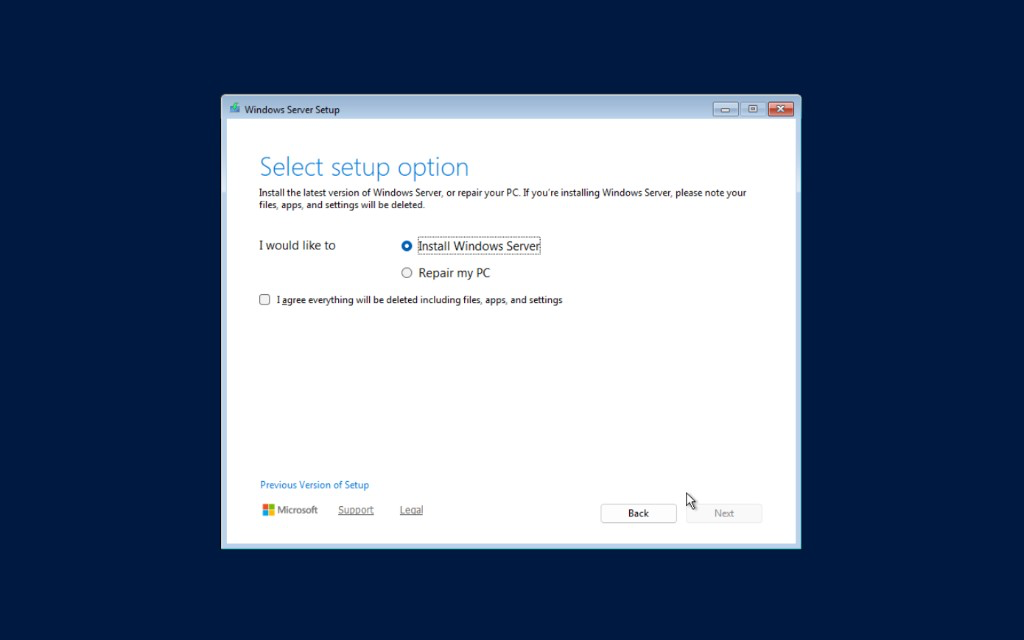
- Select Install Windows Server
- Check I agree everything will be deleted including files, apps, and settings
- Next (stays disabled until the checkbox is checked)
3.5.3 Select Datacenter Desktop Experience
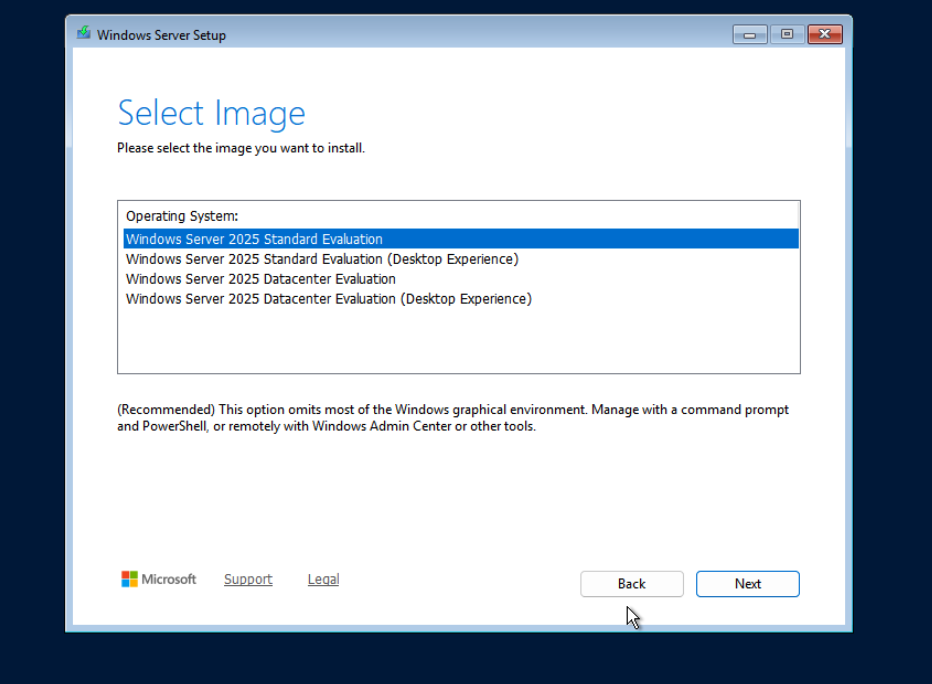
Select:
Windows Server 2025 Datacenter Evaluation (Desktop Experience)
Do not select Standard, and do not select Datacenter without “(Desktop Experience)” (Server Core).
3.5.4 Load VirtIO disk driver
When Setup reports no disks:
- Load driver → Browse
- Open CD Drive (
E:)virtio-win-…(not the Windows ISO onD:) - Scroll to
viostor→2k25→amd64(use2k22\amd64if2k25is missing) - Select the Red Hat VirtIO SCSI controller → Install
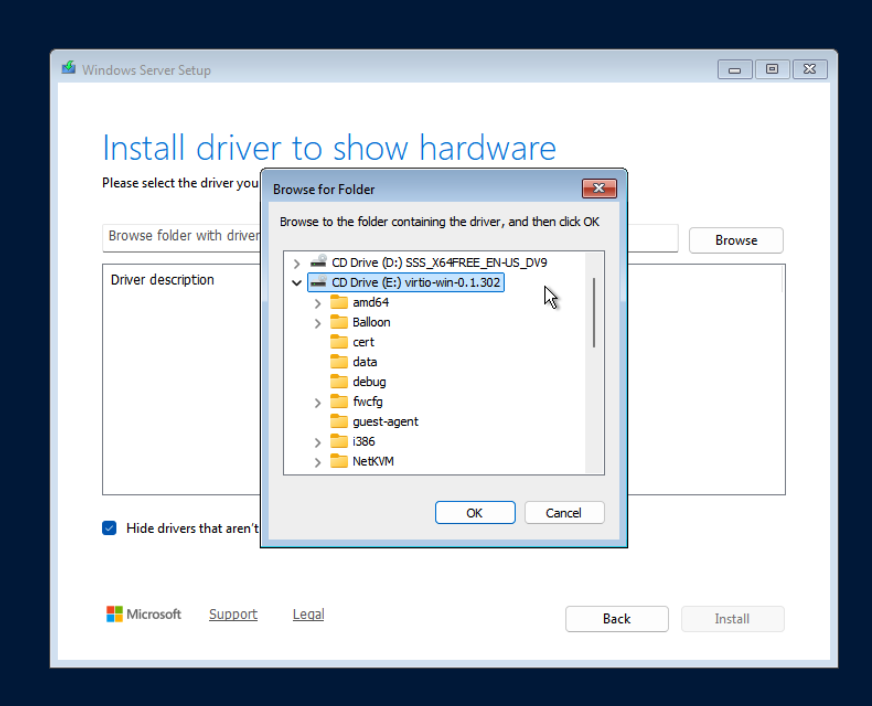
Expected: the blank disk appears; continue installation onto that disk.
3.5.5 Guest tools and Sysprep
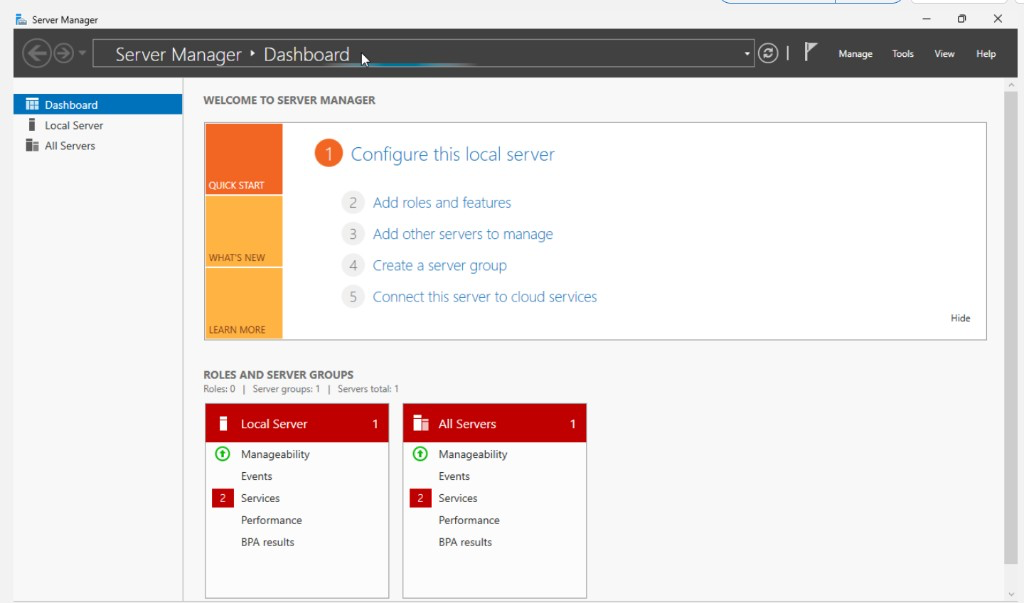
After first login you should see Server Manager (Desktop Experience):
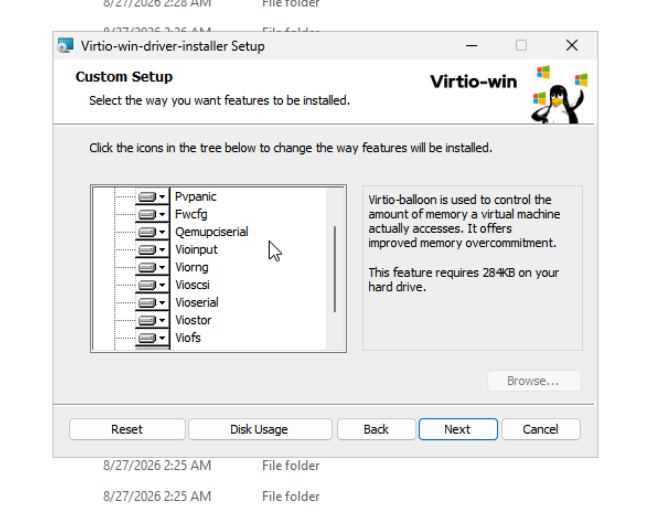
- From VirtIO ISO (
E:), runvirtio-win-gt-x64.msi. On Custom Setup, leave defaults (all features on local disk) → Next:
- Install QEMU guest agent from
E:\guest-agent\if not included by the MSI; reboot if prompted. - Sysprep + shutdown:
Expected output:
3.6 Publish golden DataSource
Expected output:
Optional cleanup:
Step 4: Create guest on tagged metal
Expected output:
(NODENAME must equal $NODE.)
Step 5: Activate Windows (guest)
Open console → Administrator PowerShell.
Expected output:
(or ServerDatacenterEval before convert)
Expected output (TcpTestSucceeded : True):
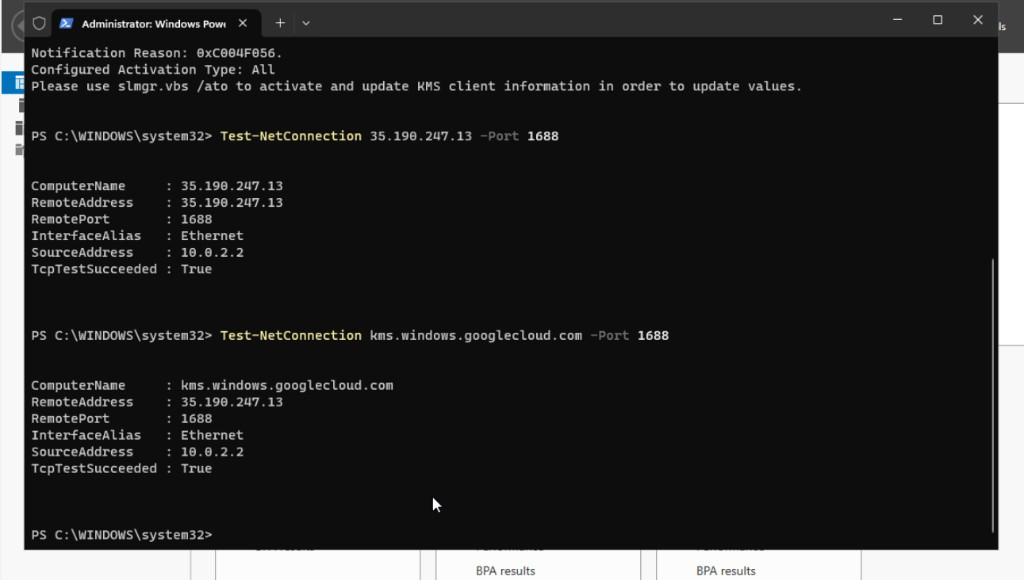
If edition is ServerDatacenterEval:
Expected output:
Then (Datacenter GVLK from Microsoft KMS client keys ):
Expected output: Product activated successfully; License Status: Licensed:
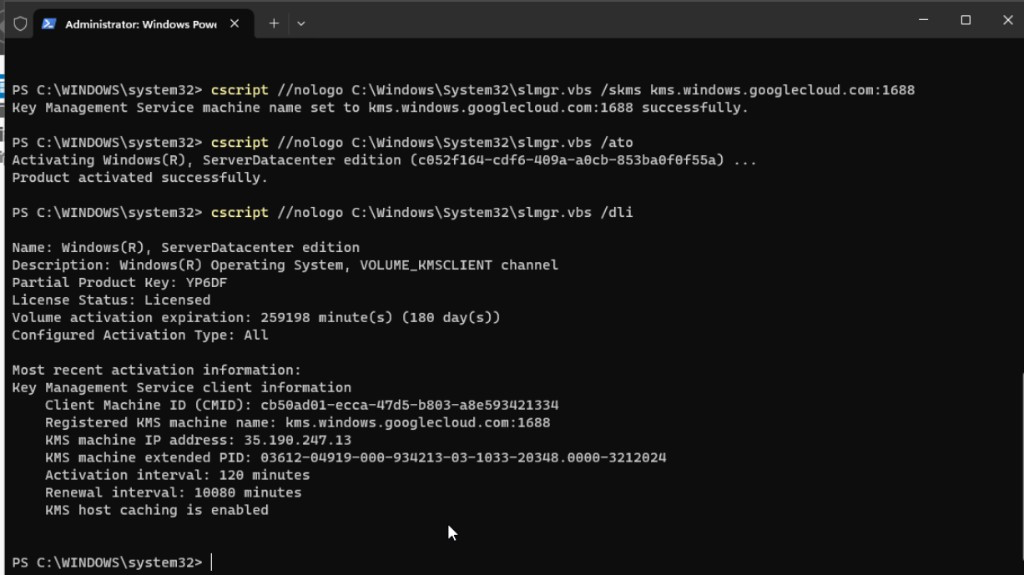
(180-day volume expiration is normal for KMS; the guest renews against Google KMS while the metal host stays tagged.)
Final check
| Step | Expected |
|---|---|
| 1 Host licenses | windows-server-2025-dc + RHCOS |
| 2 PGA | True |
| 2 KMS :1688 | Connected / TcpTestSucceeded : True |
| 3 Golden DataSource | Ready=True |
| 4 Guest VMI | Running on tagged $NODE, masquerade |
5 /dli |
License Status: Licensed |
Cleanup
Guest and golden-image resources
Stop and delete the Windows guest, then optional ISO / golden DataSource leftovers:
Optional: remove the KMS host route if you no longer need it:
Metal host PAYG off-ramp
The Windows PAYG license stays on the boot disk until that disk is destroyed. You typically cannot strip windows-server-2025-dc with gcloud compute disks update --remove-licenses, and OSD customers cannot oc delete machine (SRE admission webhook). Plan the host off-ramp deliberately:
| Path | Notes |
|---|---|
Start the instance again (gcloud compute instances start) |
Keeps the tagged disk; keep paying |
gcloud compute instances delete if disks[].autoDelete=true |
Destroys the boot disk; Machine controller should create a new untagged worker. Confirm the new disk has only the RH marketplace license. Orphaned tagged disks still bill. |
Do not leave the instance stopped with no plan: either start it (keep the tag and keep paying) or delete/replace it (stop PAYG billing).
