Creating ROSA Components with GitOps
This content is authored by Red Hat experts, but has not yet been tested on every supported configuration.
Many organizations want to use GitOps methodologies as a main part of their operational practices. Often times, this includes infrastructure as well. The advantage to this practice is that anything controlled in this manner can exist as infrastructure-as-code, by way of Kubernetes YAML definitions, in a centralized repository backed by Git. Additionally, all processes and procedures become a part of the Git workflow with a standardized Continuous Deployment pipeline controlling the outcome. ROSA is not immune to these practices, however, there was not a native way to control ROSA clusters with Kubernetes YAML definitions. This struck up a community project called OCM Operator as a way to accomplish this.
This walkthrough takes a standard approach by first showing a user how to use the native OCM Operator CRDs and later guides a user that wants to use GitOps practices to control ROSA components such as Clusters, Machine Pools and Identity Providers.
Prerequisites
Set Environment
This step sets needed environment variables that are necessary to continue the walkthrough:
AWS_ACCOUNT_ID: the AWS account ID where the ROSA cluster will be provisioned.ROSA_CLUSTER_NAME: the ROSA cluster name that the OCM operator will be installed upon.ROSA_USER_ROLE: the user role that is associated with the cluster. This is a mandatory input to the provisioning process.OCM_OPERATOR_NAMESPACE: the namespace where the ocm-operator will be installed.OCM_OPERATOR_VERSION: the version of ocm-operator that will be installed.
export AWS_ACCOUNT_ID=111111111111
export ROSA_CLUSTER_NAME=dscott
export ROSA_USER_ROLE="arn:aws:iam::${AWS_ACCOUNT_ID}:role/ManagedOpenShift-User-dscott_mobb-Role"
export OCM_OPERATOR_NAMESPACE=ocm-operator
export OCM_OPERATOR_VERSION=v0.1.0
Install the OCM Operator
Retrieve and Store the OCM Token
- Create a namespace where you wish to install the operator:
oc new-project $OCM_OPERATOR_NAMESPACE
- Create a secret containing the OCM_TOKEN. This token can be obtained form
https://console.redhat.com/openshift/token
and is used by the operator to authenticate
against the OCM API. This token must exist in the same namespace that the operator
is running and be named
ocm-token. It also expects the key to be calledOCM_TOKENas the operator is expecting this value as an environment variable. Be sure to substitute ${MY_OCM_TOKEN} with your token in the below command!
oc create secret generic ocm-token \
  --namespace=$OCM_OPERATOR_NAMESPACE \
  --from-literal=OCM_TOKEN=${MY_OCM_TOKEN}
Create the IAM Policies and Roles
The operator will need to elevate privileges in order to perform things like
creating the operator-roles for the clusters. Because of this, the operator
must have a specific role created to allow it these permissions. In each instance,
it is a best practice to create a new set of policies and roles for each instance
of the OCM Operator. Policies and roles are prefixed with the ROSA_CLUSTER_NAME
environment variable that is specified below.
NOTE: please understand what you are doing if you deviate from the known good policies. If errors or more stringent security lockdowns are found, please submit a PR so that we can get this fixed.
- Download, review and make the script executable, and finally run the script to create the required policies and roles. This creates a a policy for the operator, and a role which allows the operator to assume a role against the OIDC identity of the ROSA cluster. If the policies and roles already exist (prefixed by your cluster name), then the creation of them is skipped:
# download
curl -s https://raw.githubusercontent.com/rh-mobb/ocm-operator/main/test/scripts/generate-iam.sh > ./ocm-operator-policies.sh

# review
cat ./ocm-operator-policies.sh

# make executable and run
chmod +x ./ocm-operator-policies.sh && ./ocm-operator-policies.sh
As an alternative to the above, if you prefer Terraform, you can create the roles using Terraform using this example:
cat <<EOF > main.tf
variable "oidc_provider_url" {
  type = string
}

variable "cluster_name" {
  type = string
}

module "ocm_operator_iam" {
  source = "git::https://github.com/rh-mobb/ocm-operator//test/terraform?ref=main"

  oidc_provider_url       = var.oidc_provider_url
  ocm_operator_iam_prefix = var.cluster_name
}

output "ocm_operator_iam" {
  value = module.ocm_operator_iam
}

EOF
terraform init
terraform plan -out ocm.plan -var="oidc_provider_url=$(rosa describe cluster -c $ROSA_CLUSTER_NAME -o json | jq -r '.aws.sts.oidc_endpoint_url')" -var=cluster_name=$ROSA_CLUSTER_NAME
terraform apply "ocm.plan"
- Create the secret containing the assume role credentials:
cat <<EOF > /tmp/credentials
[default]
role_arn = arn:aws:iam::$AWS_ACCOUNT_ID:role/$ROSA_CLUSTER_NAME-OCMOperator
web_identity_token_file = /var/run/secrets/openshift/serviceaccount/token
EOF

oc create secret generic aws-credentials \
    --namespace=$OCM_OPERATOR_NAMESPACE \
    --from-file=credentials=/tmp/credentials
Install the Operator
This step installs the OCM operator. The OCM operator will use the OCM token from the previous step to authenticate against OCM, as well as your AWS credentials file to be able to assume the previous role you created in order to authenticate against the AWS API:
cat <<EOF | oc apply -f -
apiVersion: operators.coreos.com/v1
kind: OperatorGroup
metadata:
  name: ocm-operator
  namespace: $OCM_OPERATOR_NAMESPACE
spec:
  targetNamespaces:
    - $OCM_OPERATOR_NAMESPACE
---
apiVersion: operators.coreos.com/v1alpha1
kind: Subscription
metadata:
  name: ocm-operator
  namespace: $OCM_OPERATOR_NAMESPACE
spec:
  channel: alpha
  installPlanApproval: Automatic
  name: ocm-operator
  source: community-operators
  sourceNamespace: openshift-marketplace
  startingCSV: ocm-operator.$OCM_OPERATOR_VERSION
EOF
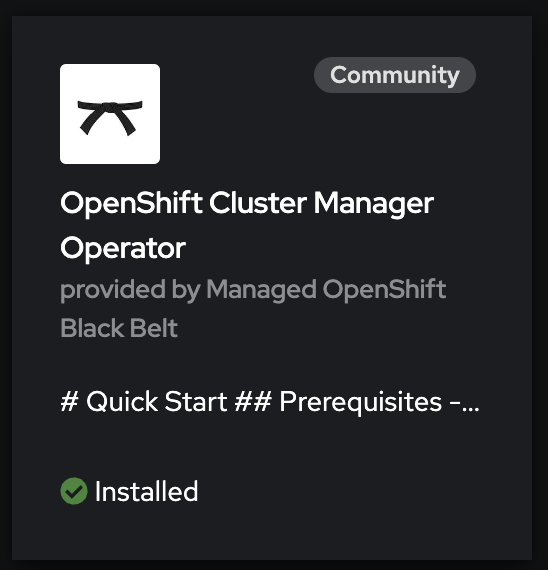
You have successfully installed the OCM operator, which now exists in OperatorHub!
Provision a ROSA Cluster via Custom Resource Definition
- Documentation:
oc explain rosacluster.spec - Examples: https://github.com/rh-mobb/ocm-operator/tree/main/config/samples/cluster
This shows you how to install a ROSA Cluster directly via CRD. This is important to understand the workflow and inputs to provisioning a cluster via GitOps. You may safely proceed to the GitOps provisioning step if you already understand this or would like to move directly to GitOps for provisioning objects.
cat << EOF | oc apply -f -
apiVersion: ocm.mobb.redhat.com/v1alpha1
kind: ROSACluster
metadata:
  name: rosa-crd
  namespace: $OCM_OPERATOR_NAMESPACE
spec:
  accountID: "${AWS_ACCOUNT_ID}"
  tags:
    owner: dscott
  iam:
    userRole: $ROSA_USER_ROLE
  defaultMachinePool:
    minimumNodesPerZone: 2
    instanceType: m5.xlarge
EOF
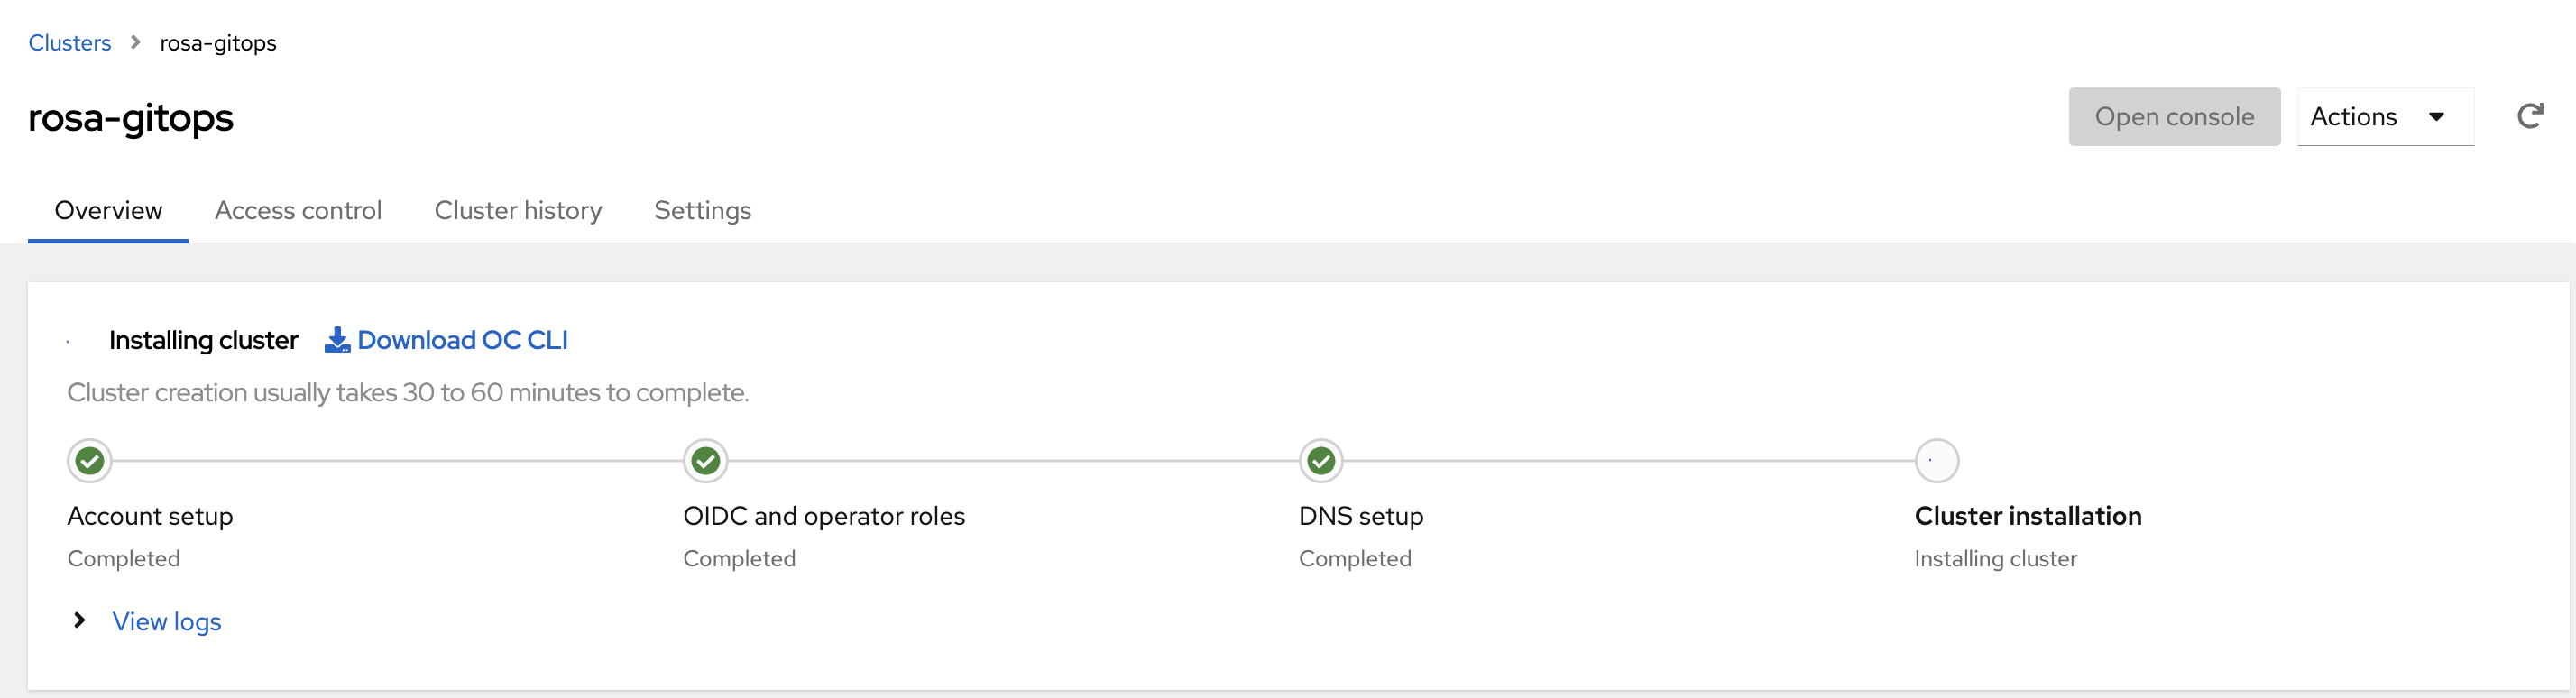
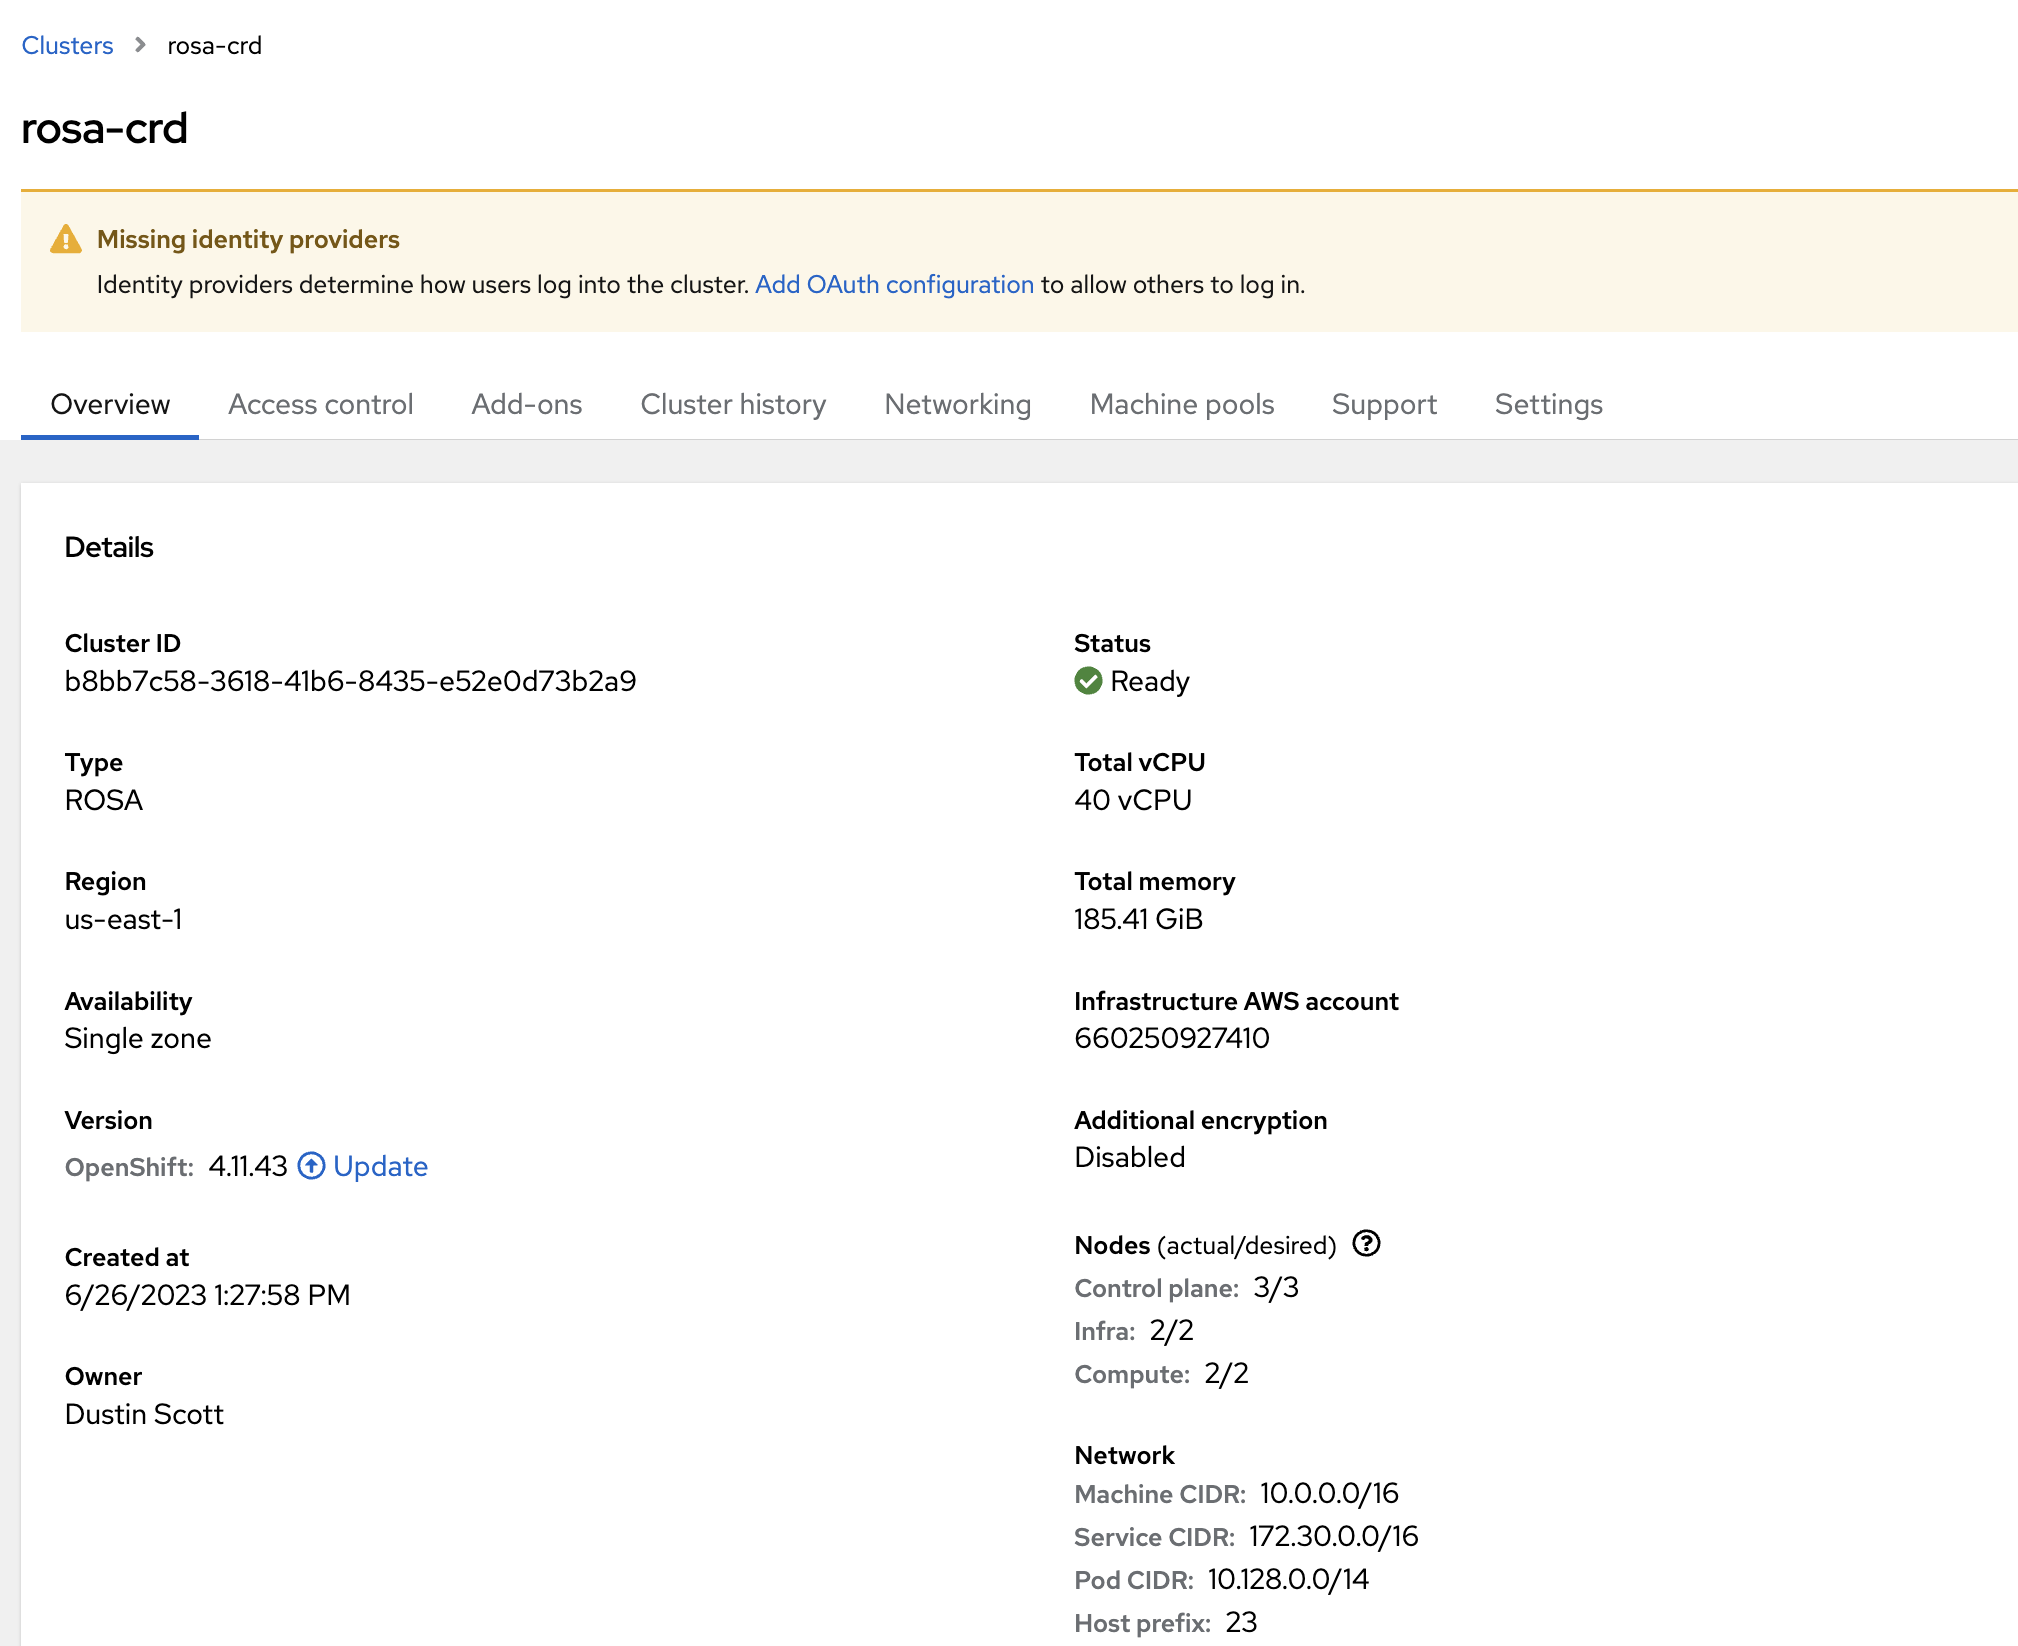
You can view the status of the cluster installation in OCM .
Provision a Machine Pool via Custom Resource Definition
- Documentation:
oc explain machinepool.spec - Examples: https://github.com/rh-mobb/ocm-operator/tree/main/config/samples/machinepool
This shows you how to install a ROSA Cluster Machine Pool directly via CRD. This is important to understand the workflow and inputs to provisioning a cluster via GitOps. You may safely proceed to the GitOps provisioning step if you already understand this or would like to move directly to GitOps for provisioning objects.
IMPORTANT This relies upon a fully operational ROSA cluster. If you are following along and just provisioned a ROSA cluster via CRD then you must wait for the cluster to be ready before proceeding.
cat << EOF | oc apply -f -
apiVersion: ocm.mobb.redhat.com/v1alpha1
kind: MachinePool
metadata:
  name: rosa-crd-mp
  namespace: $OCM_OPERATOR_NAMESPACE
spec:
  wait: false
  clusterName: "rosa-crd"
  minimumNodesPerZone: 1
  maximumNodesPerZone: 1
  instanceType: m5.xlarge
EOF
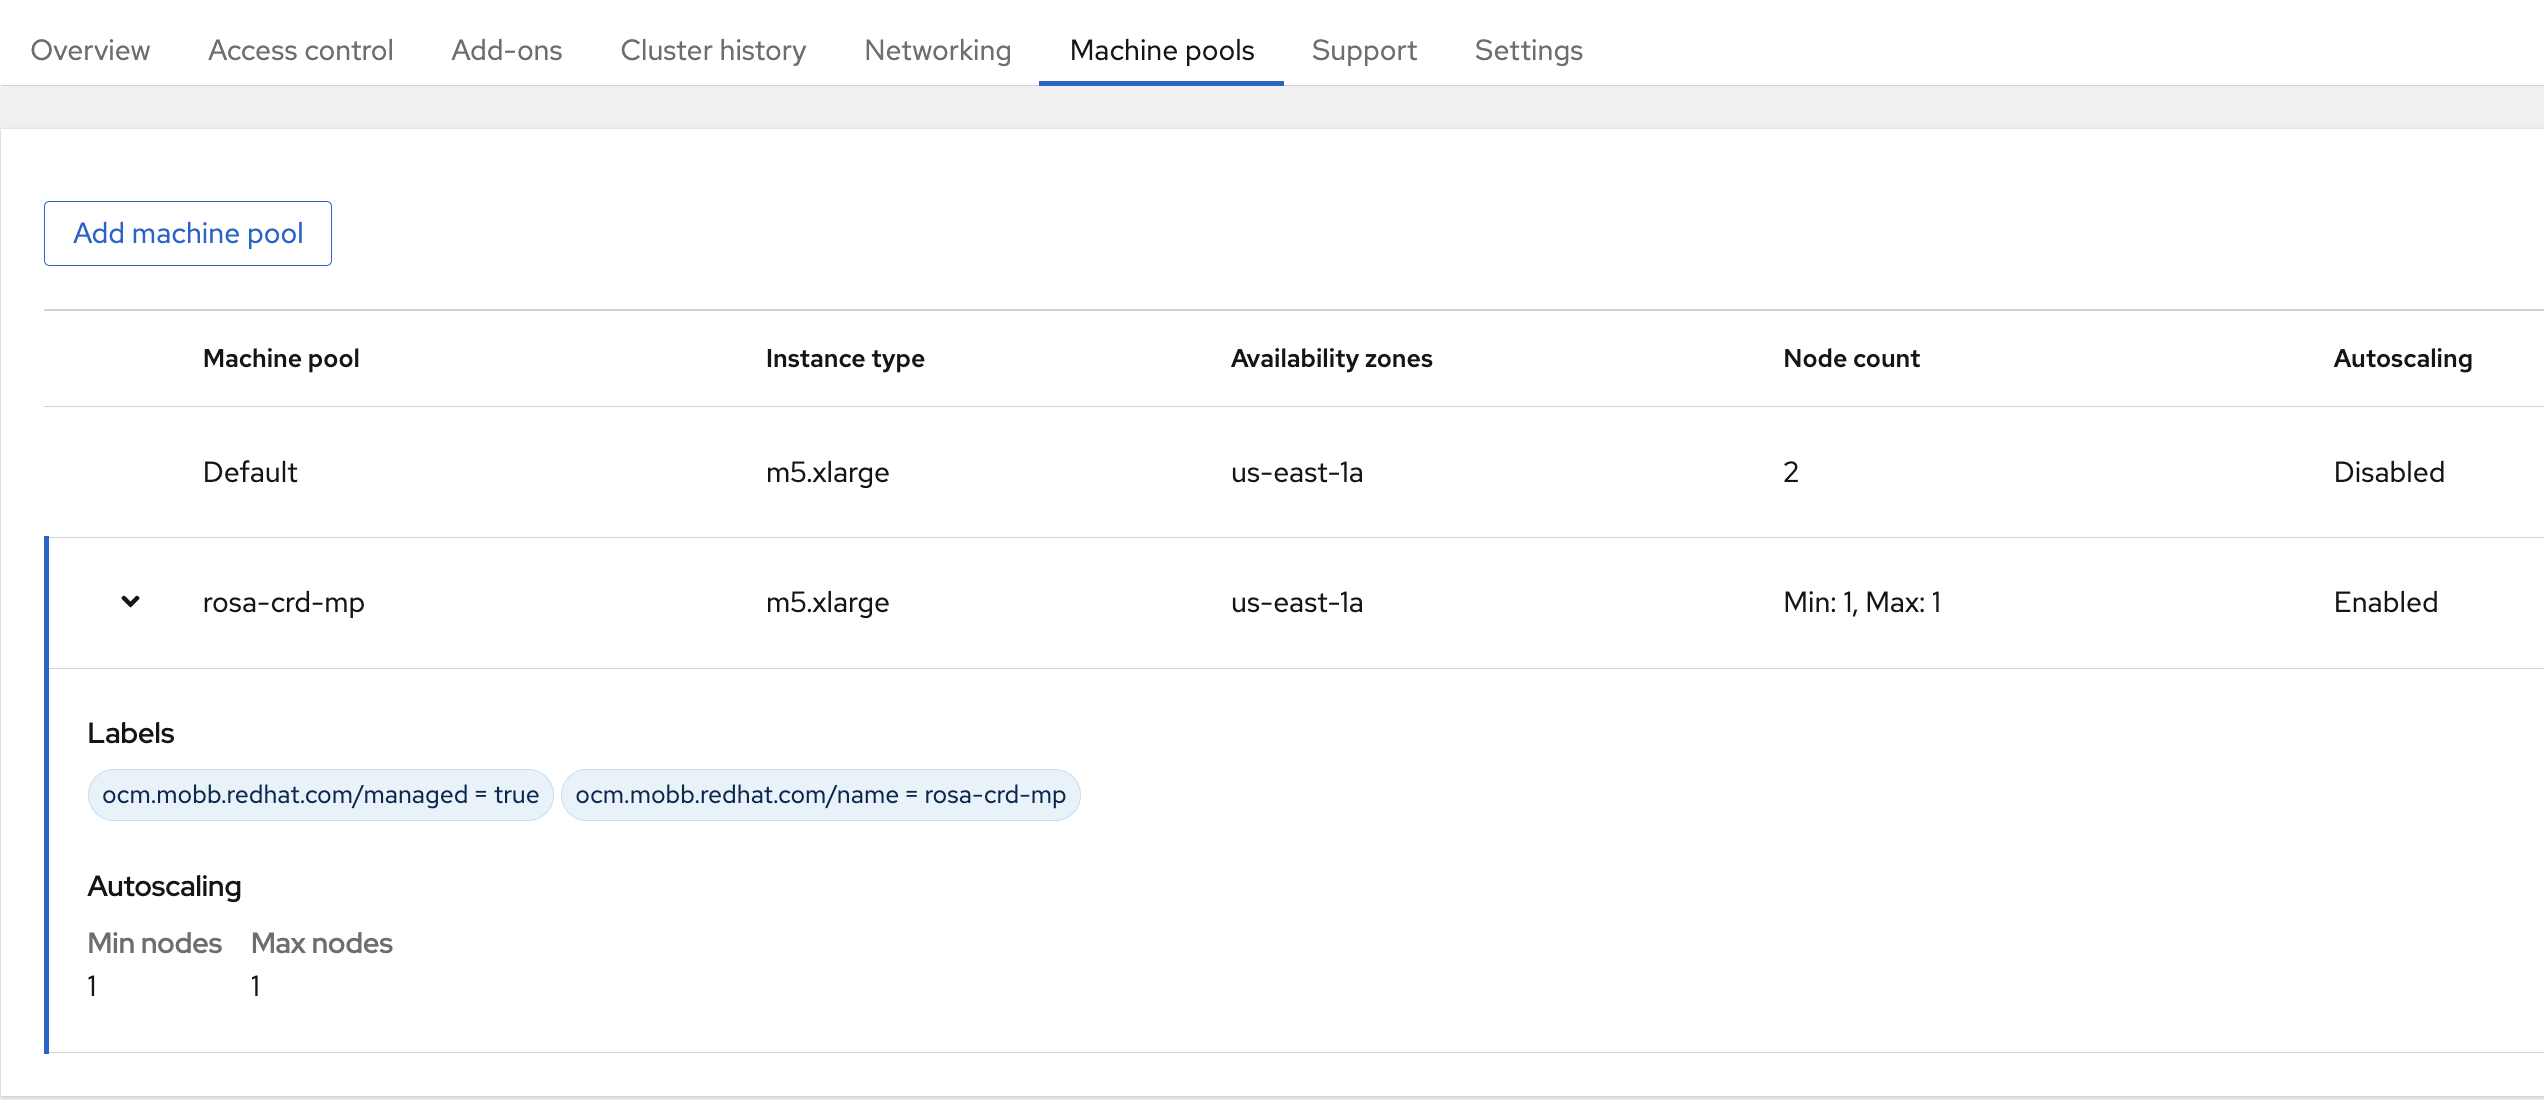
You can view the status of the Machine Pool by navigating to the Machine Pools tab of
your cluster in
OCM
.
Provision an Identity Provider via Custom Resource Definition
- Documentation:
- LDAP:
oc explain ldapidentityprovider.spec - GitLab:
oc explain gitlabidentityprovider.spec
- LDAP:
- Examples: https://github.com/rh-mobb/ocm-operator/tree/main/config/samples/identityprovider
This shows you how to install a ROSA Cluster Identity Provider directly via CRD. This is important to understand the workflow and inputs to provisioning a cluster via GitOps. You may safely proceed to the GitOps provisioning step if you already understand this or would like to move directly to GitOps for provisioning objects.
It is important to note that, at this time, only the following Identity Providers are supported:
- LDAP
- GitLab
Other identity providers have been requested and will be developed as needed. Please open an issue if your needed identity provider is missing. The example below shows an LDAP Identity provider but the mechanics are the same using a GitLab Identity Provider.
IMPORTANT This relies upon a fully operational ROSA cluster. If you are following along and just provisioned a ROSA cluster via CRD then you must wait for the cluster to be ready before proceeding.
First, create the secret which contains your LDAP credentials:
oc create secret generic ldap-crd \
  --namespace=$OCM_OPERATOR_NAMESPACE \
  --from-literal=bindPassword=${MY_BIND_PASSWORD}
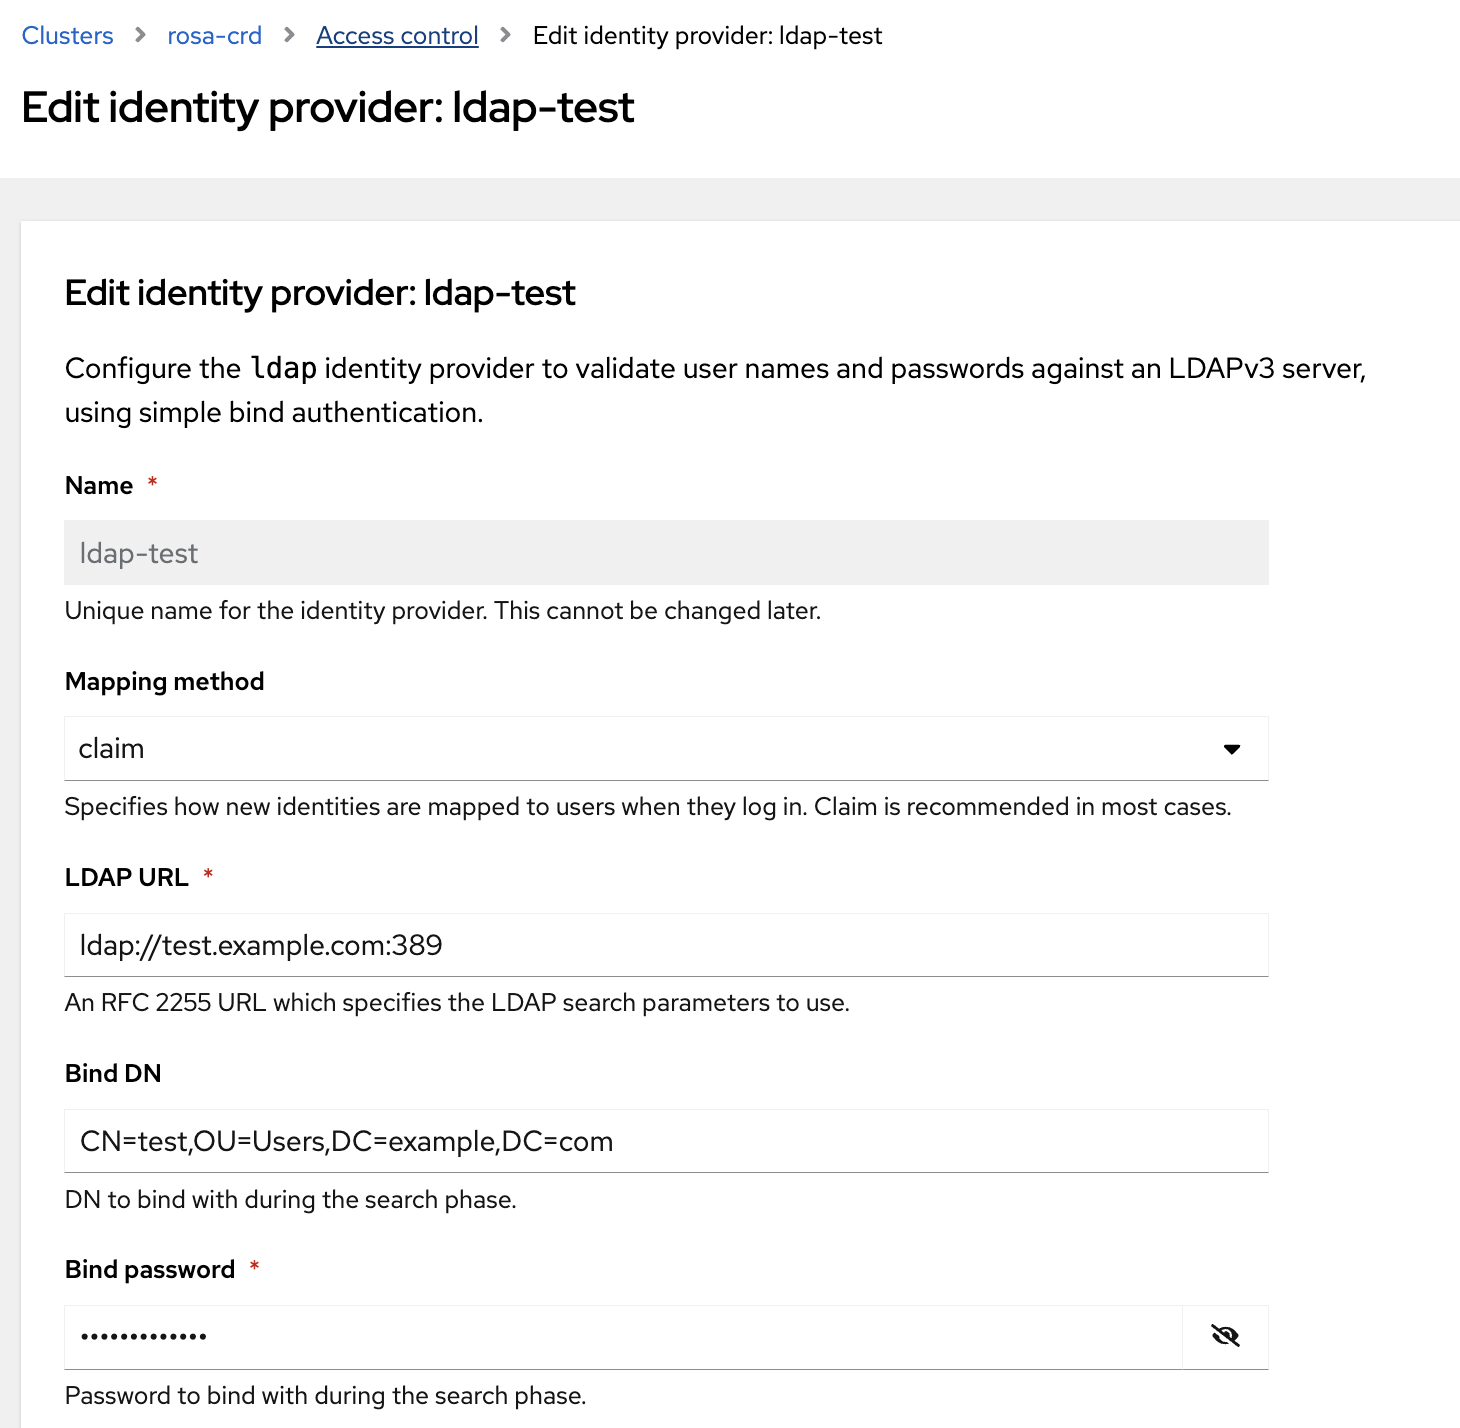
Next, create the LDAPIdentityProvider resource:
cat << EOF | oc apply -f -
apiVersion: ocm.mobb.redhat.com/v1alpha1
kind: LDAPIdentityProvider
metadata:
  name: ldap-crd
  namespace: $OCM_OPERATOR_NAMESPACE
spec:
  clusterName: rosa-crd
  displayName: ldap-test
  mappingMethod: claim
  url: ldap://test.example.com:389
  bindDN: CN=test,OU=Users,DC=example,DC=com
  bindPassword:
    name: ldap-crd
  attributes: {}
EOF
You can view the your configured LDAP Identity Provider by navigating to the Access Control tab of
your cluster in
OCM
and selecting Edit under your Identity Provider.
Provision Objects via GitOps
Install and Configure the OpenShift GitOps Operator
Install the OpenShift GitOps operator:
cat <<EOF | oc apply -f -
apiVersion: operators.coreos.com/v1alpha1
kind: Subscription
metadata:
  name: openshift-gitops-operator
  namespace: openshift-operators
spec:
  channel: latest
  installPlanApproval: Automatic
  name: openshift-gitops-operator
  source: redhat-operators
  sourceNamespace: openshift-marketplace
  startingCSV: openshift-gitops-operator.v1.9.0
EOF
Allow the GitOps operator to manage the OCM_OPERATOR_NAMESPACE namespace resources:
oc label ns $OCM_OPERATOR_NAMESPACE argocd.argoproj.io/managed-by=openshift-gitops
Deploy the Application
First, create the secret which contains your LDAP credentials, which will be used to provision the Identity Provider via GitOps. We do this first via a GitOps workflow to prevent storing secure information in a GitOps repository:
NOTE There are other ways to handle this such as the External Secrets Operator or other projects like Sealed Secrets , however for simplicity for this walkthrough, we are going to pre-create the secret for this workflow.
oc create secret generic ldap-gitops \
  --namespace=$OCM_OPERATOR_NAMESPACE \
  --from-literal=bindPassword=${MY_BIND_PASSWORD}
Next, view the upstream manifests in the
demo repo
.
These are the manifests that will be controlled via the GitOps definition.
Finally, submit the Application resource which will tell the GitOps operator
how to deploy the application. In this case, we are deploying a set of manifests
that are used to control various OCM objects via our OCM operator.
cat << EOF | oc apply -f -
apiVersion: argoproj.io/v1alpha1
kind: Application
metadata:
  name: rosa-gitops
  namespace: openshift-gitops
spec:
  project: default
  source:
    repoURL: https://github.com/rh-mobb/demos.git
    targetRevision: HEAD
    path: gitops/ocm_operator
  destination:
    server: https://kubernetes.default.svc
    namespace: $OCM_OPERATOR_NAMESPACE
  syncPolicy:
    automated:
      selfHeal: true
      prune: true
EOF
NOTE The cluster will appear in OCM. Be sure to understand that it will take a full cluster provision for the other objects such as the Identity Provider and the Machine Pools to be configured.
List View:

Cluster View: