Cloud Experts Documentation

Deploying OpenShift Virtualization on ROSA (CLI)

This content is authored by Red Hat experts, but has not yet been tested on every supported configuration.

OpenShift Virtualization is a feature of OpenShift that allows you to run virtual machines alongside your containers. This is useful for running legacy applications that can’t be containerized, or for running applications that require special hardware or software that isn’t available in a container.

In this tutorial, I’ll show you how to deploy OpenShift Virtualization on Red Hat OpenShift on AWS (ROSA). I’ll show you how to create a ROSA cluster, deploy the OpenShift Virtualization operator, and create a virtual machine.

It’s important to keep in mind that this tutorial is designed to show you the quickest way to get started with OpenShift Virtualization on ROSA. It’s not designed to be a production-ready deployment. If you’re planning to deploy OpenShift Virtualization in a production environment, you should follow the official documentation and best practices.

If you don’t want to deploy the resources yourself, you can watch the video below to see how it’s done.

Pre-requisites

  1. You will need a A ROSA Cluster (see Deploying ROSA HCP with Terraform if you need help creating one).

  2. Set the cluster name as an environment variable (in the example we re-use the variable from the Terraform guide).

    export CLUSTER="${TF_VAR_cluster_name}"
    export METAL_AZ=$(terraform output -json private_subnet_azs | jq -r '.[0]')
    
  3. Create a bare metal machine pool

    Note bare metal machines are not cheap, so be warned!

     rosa create machine-pool -c $CLUSTER \
       --replicas 1 --availability-zone $METAL_AZ \
       --instance-type m5zn.metal --name virt
    

Deploy the OpenShift Virtualization Operator

  1. Deploy the OpenShift Virtualization Operator

    cat << EOF | oc apply -f -
    apiVersion: v1
    kind: Namespace
    metadata:
      name: openshift-cnv
    ---
    apiVersion: operators.coreos.com/v1
    kind: OperatorGroup
    metadata:
      name: kubevirt-hyperconverged-group
      namespace: openshift-cnv
    spec:
      targetNamespaces:
        - openshift-cnv
    ---
    apiVersion: operators.coreos.com/v1alpha1
    kind: Subscription
    metadata:
      name: hco-operatorhub
      namespace: openshift-cnv
    spec:
      source: redhat-operators
      sourceNamespace: openshift-marketplace
      name: kubevirt-hyperconverged
      startingCSV: kubevirt-hyperconverged-operator.v4.15.1
      channel: "stable"
    EOF
    
  2. If you want to see the progress of the operator you can log into the OpenShift Console (hint run oc whoami --show-console to get the URL)

    list of installed operators
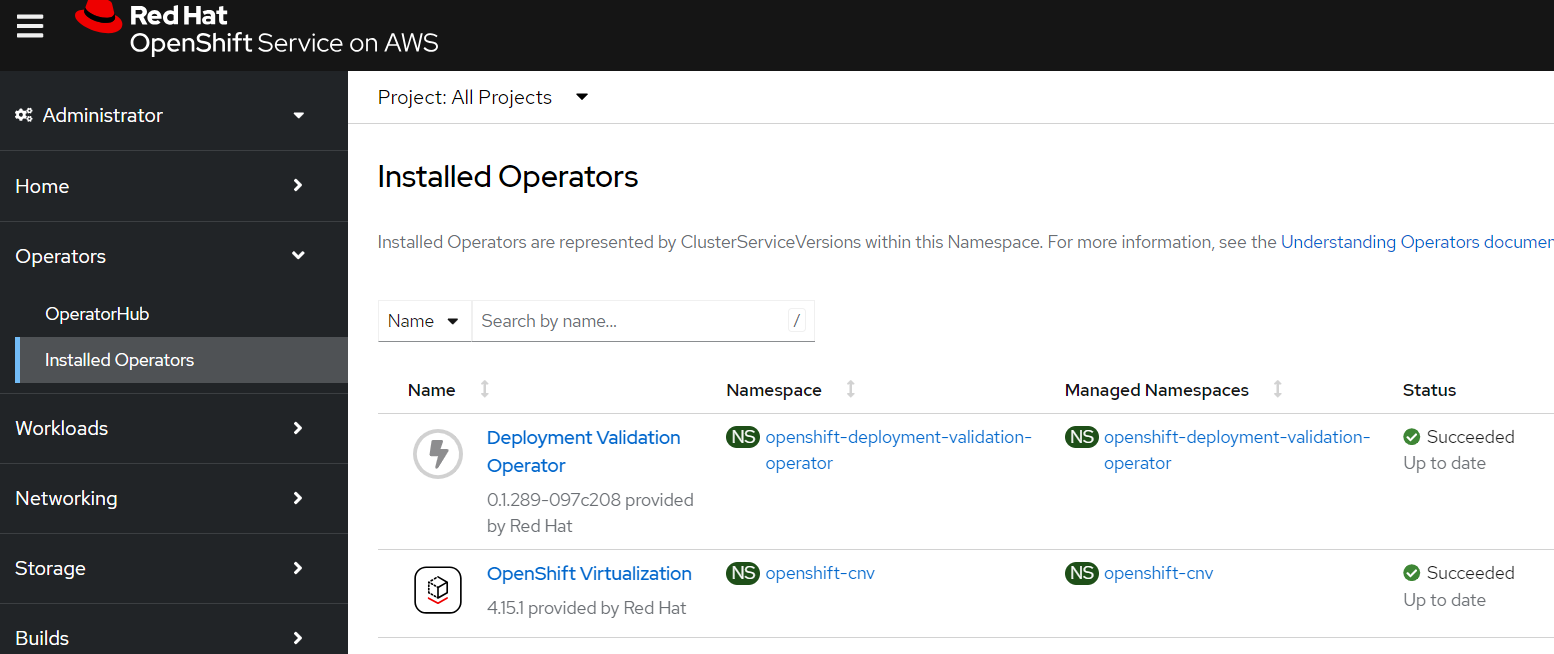
  3. Create an OpenShift Virtualization operand

    Note: this is all defaults, so will not support a lot of the more advanced features you might want such as live migration.

    cat << EOF | oc apply -f -
    apiVersion: hco.kubevirt.io/v1beta1
    kind: HyperConverged
    metadata:
      name: kubevirt-hyperconverged
      namespace: openshift-cnv
      annotations:
        deployOVS: "false"
      labels:
        app: kubevirt-hyperconverged
    spec:
      applicationAwareConfig:
        allowApplicationAwareClusterResourceQuota: false
        vmiCalcConfigName: DedicatedVirtualResources
      certConfig:
        ca:
          duration: 48h0m0s
          renewBefore: 24h0m0s
        server:
          duration: 24h0m0s
          renewBefore: 12h0m0s
      evictionStrategy: LiveMigrate
      featureGates:
        alignCPUs: false
        autoResourceLimits: false
        deployKubeSecondaryDNS: false
        deployTektonTaskResources: false
        deployVmConsoleProxy: false
        disableMDevConfiguration: false
        enableApplicationAwareQuota: false
        enableCommonBootImageImport: true
        enableManagedTenantQuota: false
        nonRoot: true
        persistentReservation: false
        withHostPassthroughCPU: false
      infra: {}
      liveMigrationConfig:
        allowAutoConverge: false
        allowPostCopy: false
        completionTimeoutPerGiB: 800
        parallelMigrationsPerCluster: 5
        parallelOutboundMigrationsPerNode: 2
        progressTimeout: 150
      resourceRequirements:
        vmiCPUAllocationRatio: 10
      uninstallStrategy: BlockUninstallIfWorkloadsExist
      virtualMachineOptions:
        disableFreePageReporting: false
        disableSerialConsoleLog: true
      workloadUpdateStrategy:
        batchEvictionInterval: 1m0s
        batchEvictionSize: 10
        workloadUpdateMethods:
        - LiveMigrate
      workloads: {}
    EOF
    
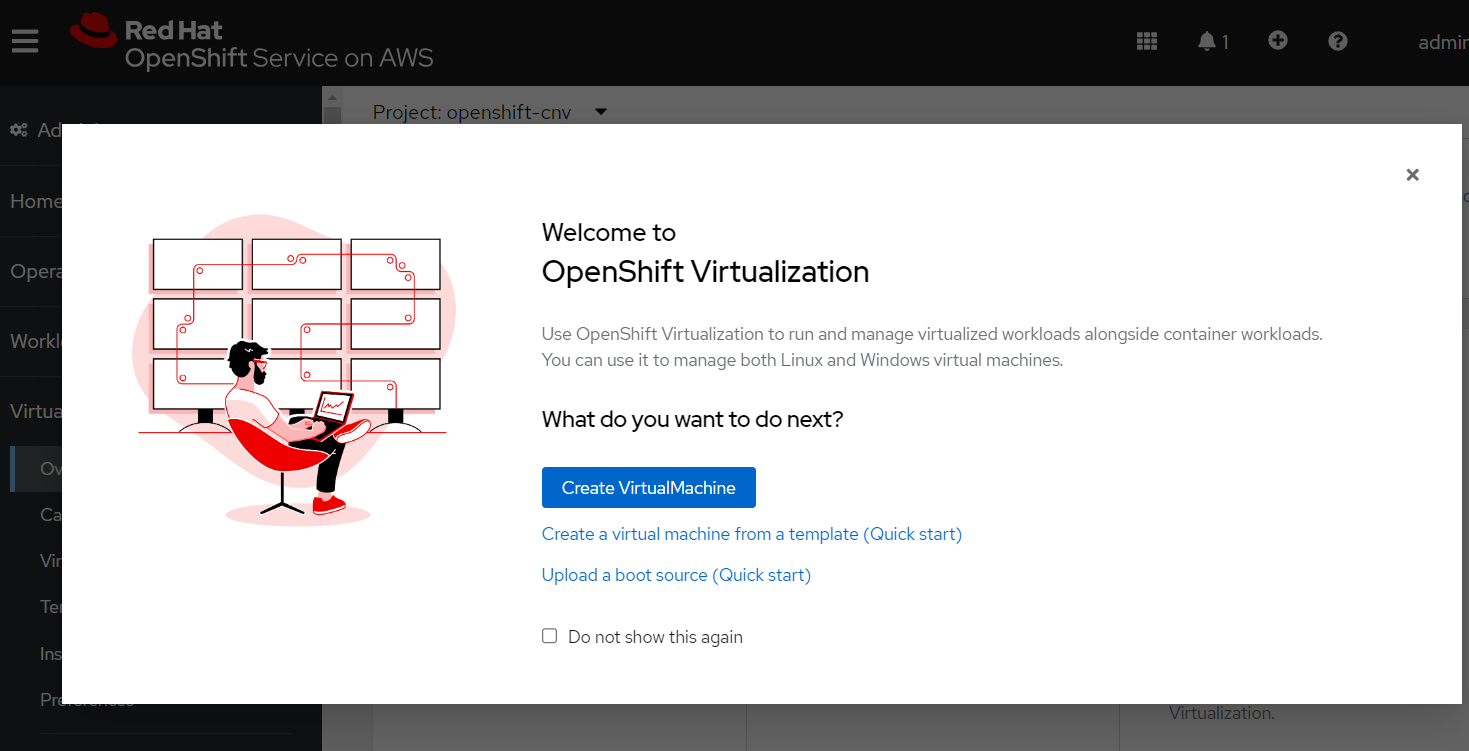
  4. New “Virtualization” Section in the OpenShift Console

    Once the operator is installed you should see a new “Virtualization” section in the OpenShift Console (you may be prompted to refresh the page)

    Virtualization Section
  5. Close the popup window and click the “Download virtctl” button to download the virtctl binary.

Create a Virtual Machine

  1. Create a project and a secret containing your public SSH key

    oc new-project my-vms
    oc create secret generic authorized-keys --from-file=ssh-publickey=$HOME/.ssh/id_rsa.pub
    
  2. Create a VM

    cat << EOF | oc apply -f -
    apiVersion: kubevirt.io/v1
    kind: VirtualMachine
    metadata:
      name: example-vm
    spec:
      dataVolumeTemplates:
      - apiVersion: cdi.kubevirt.io/v1beta1
        kind: DataVolume
        metadata:
          name: example-vm-disk
        spec:
          sourceRef:
            kind: DataSource
            name: rhel9
            namespace: openshift-virtualization-os-images
          storage:
            resources:
              requests:
                storage: 30Gi
      running: false
      template:
        metadata:
          labels:
            kubevirt.io/domain: example-vm
        spec:
          domain:
            cpu:
              cores: 1
              sockets: 2
              threads: 1
            devices:
              disks:
              - disk:
                  bus: virtio
                name: rootdisk
              - disk:
                  bus: virtio
                name: cloudinitdisk
              interfaces:
              - masquerade: {}
                name: default
              rng: {}
            features:
              smm:
                enabled: true
            firmware:
              bootloader:
                efi: {}
            resources:
              requests:
                memory: 8Gi
          evictionStrategy: LiveMigrate
          networks:
          - name: default
            pod: {}
          volumes:
            - name: rootdisk
              dataVolume:
                name: example-vm-disk
            - cloudInitConfigDrive:
                userData: |-
                  #cloud-config
                  user: cloud-user
                  password: not-a-secure-password
                  chpasswd: { expire: False }
              name: cloudinitdisk
          accessCredentials:
            - sshPublicKey:
                propagationMethod:
                  configDrive: {}
                source:
                  secret:
                    secretName: authorized-keys
    EOF
    
  3. Start the VM

    virtctl start example-vm
    
  4. Watch for the VM to be ready

    watch oc get vm example-vm
    

    Every 2.0s: oc get vm NAME AGE STATUS READY example-vm 3m16s Running False

  5. SSH into the VM

    virtctl ssh cloud-user@example-vm -i ~/.ssh/id_rsa
    
    Register this system with Red Hat Insights: insights-client --register
    Create an account or view all your systems at https://red.ht/insights-dashboard
    Last login: Fri May 17 16:35:39 2024 from 10.130.0.41
    [cloud-user@example-vm ~]$
    
  6. Congratulations! You now have a virtual machine running on OpenShift Virtualization on ROSA!

Cleanup

  1. Delete the VM

    oc delete vm example-vm
    
  2. Delete the ROSA Cluster

    terraform destroy
    

Interested in contributing to these docs?

Collaboration drives progress. Help improve our documentation The Red Hat Way.

Red Hat logo LinkedIn YouTube Facebook Twitter

Products

Tools

Try, buy & sell

Communicate

About Red Hat

We’re the world’s leading provider of enterprise open source solutions—including Linux, cloud, container, and Kubernetes. We deliver hardened solutions that make it easier for enterprises to work across platforms and environments, from the core datacenter to the network edge.

Subscribe to our newsletter, Red Hat Shares

Sign up now
© 2023 Red Hat, Inc.