Azure DevOps with Managed OpenShift
This content is authored by Red Hat experts, but has not yet been tested on every supported configuration.
Author: Kevin Collins
Last edited: 03/14/2023
Adopted from Hosting an Azure Pipelines Build Agent in OpenShift and Kevin Chung Azure Pipelines OpenShift example
Azure DevOps is a very popular DevOps tool that has a host of features including the ability for developers to create CI/CD pipelines.
In this document, I will show you how to connect your Managed OpenShift Cluster to Azure DevOps end-to-end including running the pipeline build process in the cluster, setting up the OpenShift internal image registry to store the images, and then finally deploy a sample application. To demonstrate the flexibility of Azure DevOps, I will be deploying to a ROSA cluster, however the same procudures will apply to if you choose to deploy to any other OCP Cluster.
Prerequisites
- A Public Cloud subscription (Azure Subscription)
- Azure Dev Ops instance
- An OpenShift Cluster (to create an Azure Red Hat OpenShift (ROSA) cluster, click here )
Clone example application and configuration files
Configure Azure Devops
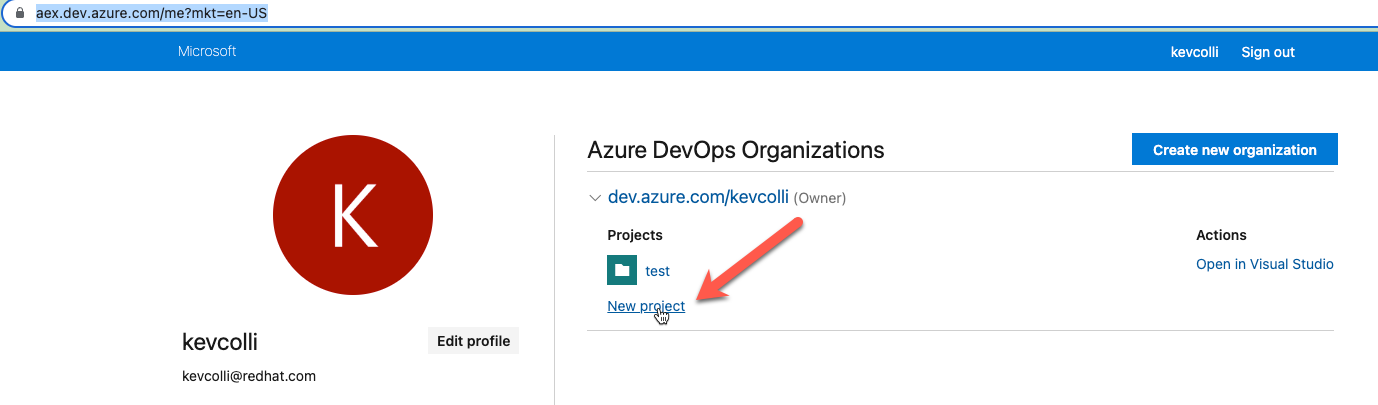
While logged into your
Azure DevOps Organization
, create a new project. The examples in this document will assume the project is named azure-pipelines-openshift
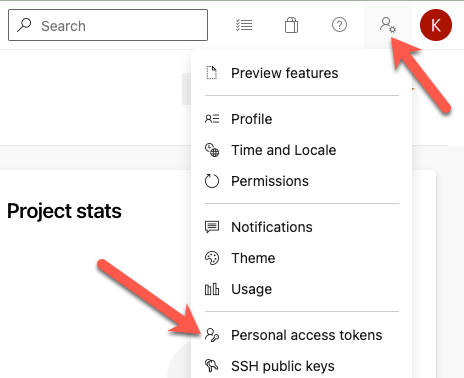
Obtain a personal access token. While in Azure DevOPs, select Personal Access Token under User Settings.
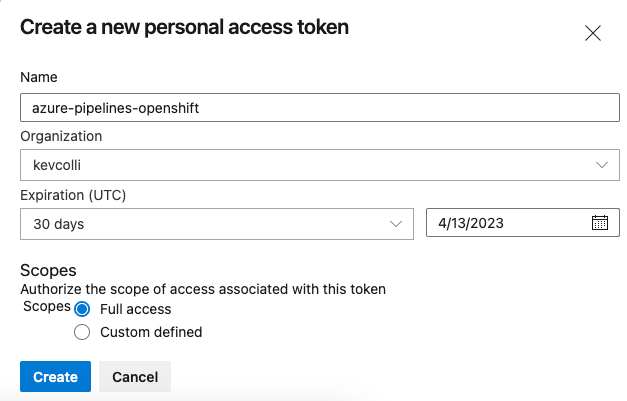
On the next screen, create a New Token. In this example, we will create a token with Full Access. Once you click create your token will be displayed. Make sure to store it somewhere safe as you won’t be able to see it again.
Set Azure DevOps environment variables for your Azure DevOps instance
Host an Azure Pipelines Build Agent in OpenShift
note: this is an abreviated version of this blog by Kevin Chung and Mark Dunnett.
In this step, we will configure OpenShift to build our container image leveraging Universal Base Images ( UBI )
Configure the Azure DevOps build agent with OpenShift
Start by creating a new project
Create the following artifacts that include a wrapper script for the build agent and an example BuildConfig that will build a .NET application using the Red Hat Universal Based Image for .NET
Update the azure build agent image
As a cluster admin, create a service account for the build agent
Make sure to be in the root directory of the Azure Pipelines OpenShift git repository you cloned in the previous step.
Create a secret with your Azure DevOps credentials
Deploy the azure build agent
Make sure the build agent is running:
expected output:
Create an Azure DevOps Pipeline
The pipeline we will create has three steps.
- build the image on the OpenShift cluster
- push the image to the internal registry of the OpenShift cluster
- deploy the application to the cluster
Before we can do steps 2 and 3, we need to create a service account in OpenShift to both authenticate with OpenShift to push an image and also the internal image registry.
Create a new project for our application
Create a service account and grant it cluster-admin privileges
Create a secret token for the service account
Retrieve the secret name that we just created that was a token associated with it.
expected output:
note: your output will have a different name
Describe the secret to retrieve the token:
expected output:
Copy the value of the token.
Retrieve the host of your cluster image regstry.
Expected Output:
Get the cluster api endpoint
expected output:
note the api server url for usage later
Configure Azure DevOps service connections for the registry and OpenShift
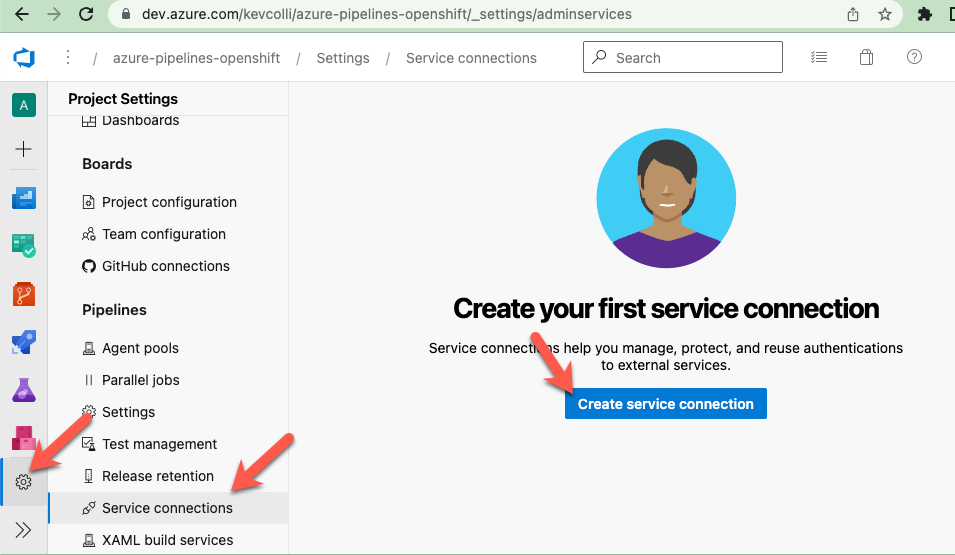
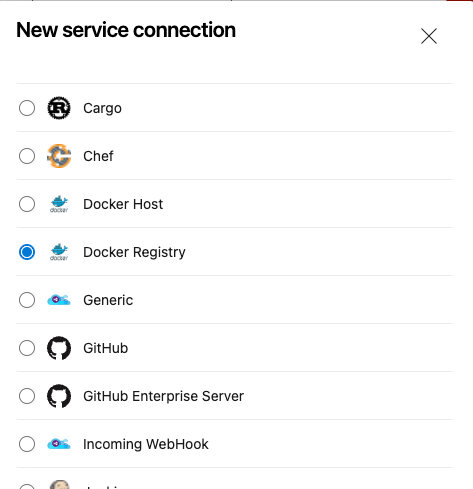
From Azure DevOps, click on Project settings ( the gear icon ), then Service Connections, and finally Create service connection.
Select Docker registry
Enter the settings we retrieved in the previous step:
- Select Others for Docker Registry
- Docker Registry - make sure to add https:// in front of the hostname you retrieved
- Docker ID - the service account you created
- Docker Password - the service account token
- Service connection name - enter openshift-registry
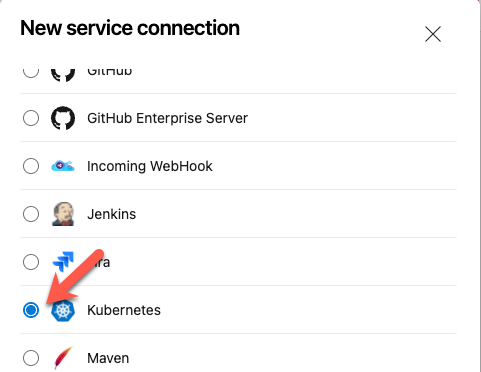
Next, let’s create a another serivce connection for our cluster.
Click New service connection:

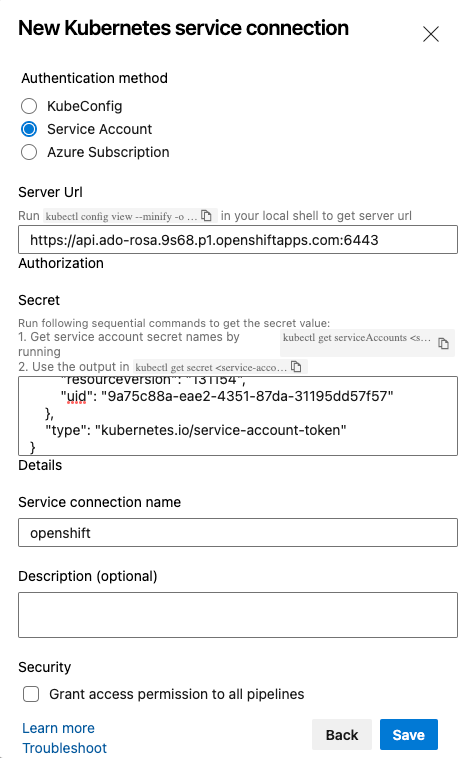
Select Kubernetes
-
Server Url - the api server you retrieved in the previous step
-
Secret - using the name of the secret that we retieved earlier that has token in the name run:
Copy the entire json results and paste it in the Secret field
-
Service connection name - select openshift
Create an Azure DevOps Pipeline
We will be deploying an application from a GitHub repo. Fork the following Git Repo: https://github.com/rh-mobb/azure-pipelines-openshift
In Azure DevOPs, click on Pipelines and then Create Pipeline

On the next screen, select GitHub
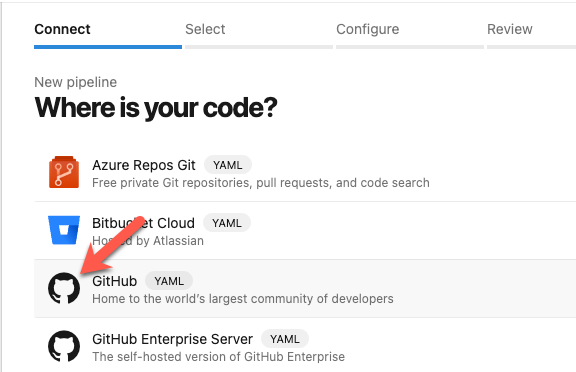
On the next screen, select your github repo that you forked to.
Review the azure-pipelines.yml file and then click run.
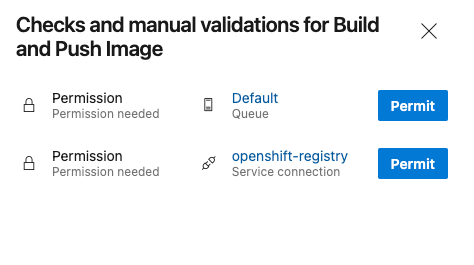
If this is the first time running, you might see a message like the following:

Clickad on the Build and Push Image tile, and then view permissions, and grat permissions to both the Default queue and the openshift-registry service connection.
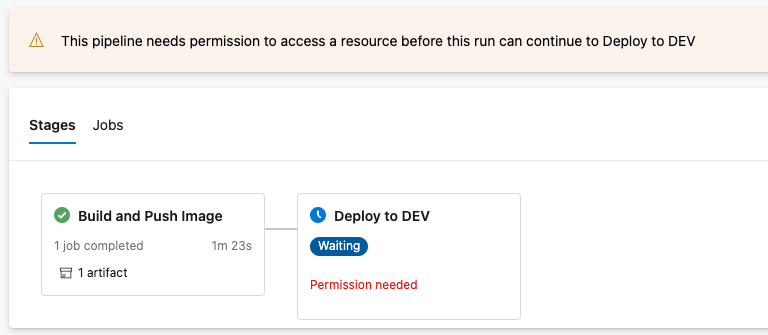
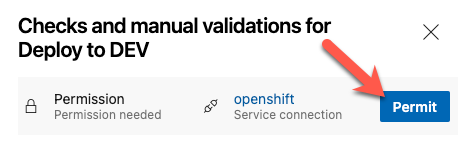
Like we saw with permissions on the build and push, we also need to give permissions to deploy.
On the next screen, click on Permit to give access to the OpenShift connection.
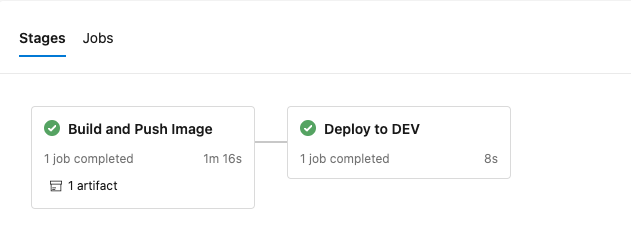
After a few minutes, you should see both the Build and Push Image and Deploy to DEV stages complete.
To verify the application was successfully deployed in openshift run:
expected output: